You can insert symbols straight from the device project tree with the following functions:
Insert occurrence of device to drawing
Do the following:
-
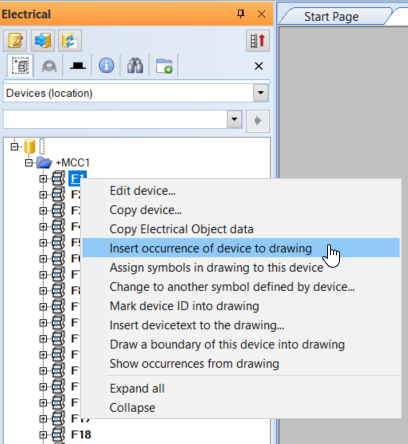
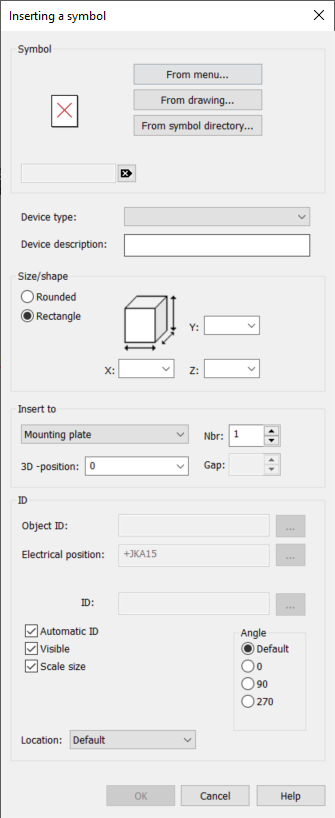
In the project tree, right-click the device you want to insert in the drawing, and select Insert occurrence of device to drawing.
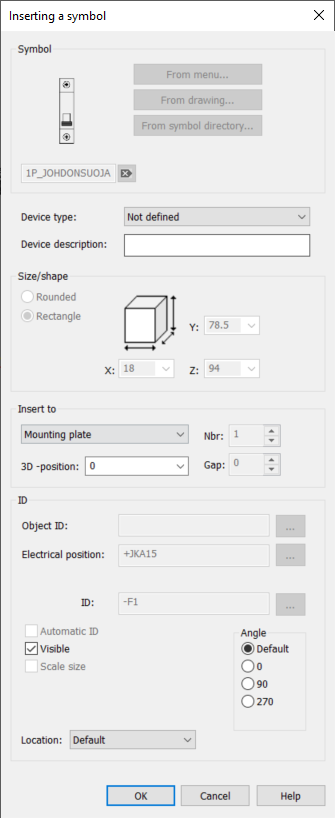
The Inserting a symbol dialog opens.
-
If necessary, select the device type.
-
If necessary, enter a description for the device.
-
Select the insertion place of the device in the distribution board: back, door/cover or mounting plate.
-
If you want to change the installation height, enter the elevation in millimeters in the 3D -position field.
-
Enter the data for the ID:
-
If you want to show the ID, select Visible.
-
If you want to scale the ID according to the symbol size, select Scale size. You can only select this, if you selected a scalable symbol – if the symbol is not scalable, the ID will be drawn according to the symbol size.
-
Select the angle of the ID.
-
Select the location of the ID. The Default option places the ID inside the device symbol.
-
-
Click OK.
-
Indicate the location of the symbol ithe drawing.
-
Indicate the angle of the symbol. The program inserts the device in the drawing.
Insert device
Do the following:
-
In the project tree, right-click the location , and select Insert device. The Inserting a symbol dialog opens.
-
Select an icon for the symbol from your own symbol menu, from the drawing or from the symbol directory.
-
If necessary, select the device type.
-
If necessary, enter a description for the device.
-
Enter the dimensions of the symbol.
-
Select the insertion place of the device in the distribution board: back, door/cover or mounting plate.
-
If you want to change the installation height, enter the elevation in millimeters in the 3D -position field.
-
If you want to insert multiple symbols, enter the number of the symbols in the Nbr field.
-
If you selected to insert multiple symbols, enter the distances between the symbols in the Gap field.
-
Enter the data for the ID:
-
If you want to enter your own ID, clear the selection in Automatic ID and enter the desired ID in the ID field.
If in step 8 you selected to insert multiple symbols, in addition to clearing Automatic ID do the following:
-
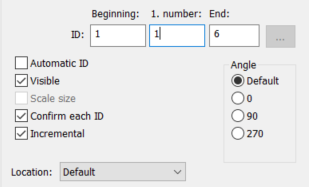
If you want to use incremental numbering in the ID, select Incremental.
-
Enter the beginning and the end of the ID in the ID fields. If you selected Incremental, also enter the number to start from in the 1. number field.
-
If you want to confirm each of the IDs, select Confirm each ID. When you insert the symbols, a confirmation dialog will open for each symbol and you can either edit or accept the ID.
-
-
If you want to show the ID, select Visible.
-
If you want to scale the ID according to the symbol size, select Scale size. You can only select this, if you selected a scalable symbol – if the symbol is not scalable, the ID will be drawn according to the symbol size.
-
Select the angle of the ID.
-
Select the location of the ID. The Default option places the ID inside the device symbol.
-
-
Click OK.
-
Indicate the location of the symbol on the drawing.
-
Indicate the angle of the symbol.
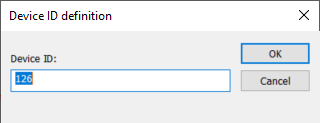
If you entered your own IDs with confirmation, the Device ID definition dialog opens for each symbol. If necessary, edit the ID and click OK.
The program places the device(s) in the drawing.
Insert devices side by side or stacked
You can also place all devices in the same location in the drawing side by side or stacked.
Do the following:
-
In the project tree, select a location whose devices you want to insert in the drawing.
-
Right-click the device, and select Insert devices of the location > Side by side or Stacked.

-
Indicate the location of the devices. The program draws all the devices in the location in order either side by side (horizontally) or stacked (vertically). The IDs are scaled only for scalable symbols.