|
|
Layout tab > Cableways group > Edit |
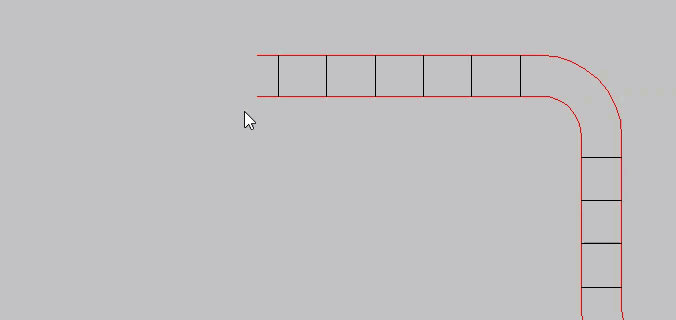
With this function, you can edit cableways, including vertical ones. Editing is also activated when you select a cableway or vertical cableway part in the drawing. The correct editing function opens based on your selections
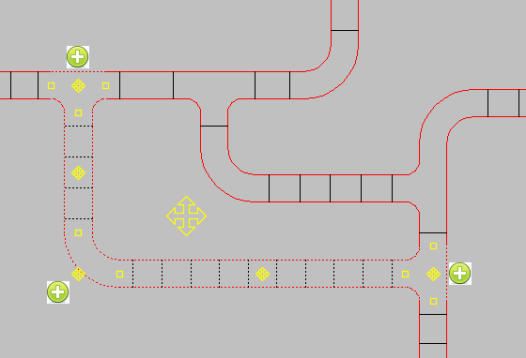
Start by selecting the cableways you want to edit. You can also make selections as follows:
- Select the entire cableway network with Ctrl + Shift + A. Using this key combination after selecting one section of a cableway network, all cableways connected to the selected cableway section become selected.
- Select the shortest route between two points by selecting where you want to start and then pressing and holding down Ctrl and Shift while selecting the end point. If there are several routes between the cableway sections, the shortest one is selected.
- Expand your current selection by pressing and holding down Ctrl and Shift and then using the arrow keys to point which way you want to expand:
The current settings and values of the selected cableways are displayed and can be edited in the Edit cableway dialog that opens to the left by default. For more information on the settings, see Draw cableways. For more information on vertical cableways, see Draw vertical cableways.
If the selected elements have several different values, such as elevations, editing the values is disabled. The respective field then states Multiple values.

In addition to editing the information, you can move, stretch, continue and combine cableways and copy them vertically.
Move and stretch
When selecting cableways, arrowheads for moving and square grips can be seen in different parts of the cableway. If you select several cableways at a time, the bigger arrowhead allows you to move all the selected parts simultaneously.
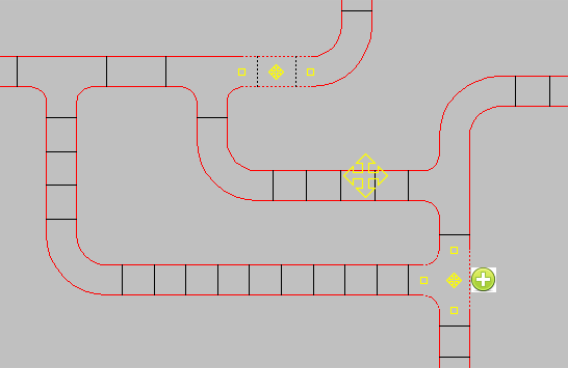
To move a cableway, click the arrowhead and drag the cableway parts to the desired location, then accept the move by clicking. If other cableways are connected to the moved cableway sections, they are automatically stretched so that the cableways remain united.
When you want to actually stretch a cableway, use one of the square grips. Click the grip, drag the cableway end to the desired length, and accept the change by clicking. Stretching can be done at the end of the cableway or at the junction in the middle of the cableway, in which case the stretching applies to both sections connected to the point.
You can change the stretching direction with the Tab key. There are three modes in stretching; stretching vertically (only 3D view/geometry), stretching horizontally with original direction and stretching horizontally with free direction.
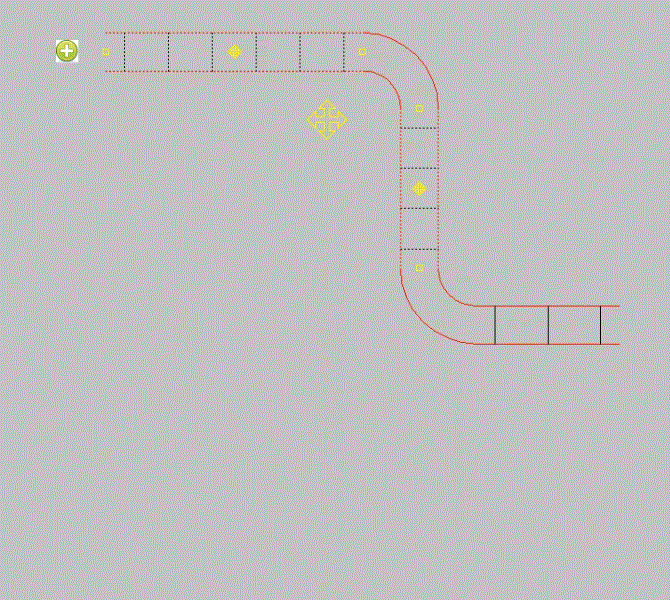
Extend
To extend a cableway, use
the ![]() button. The function creates a new
part that starts from the end point of the previous cableway part.
The drafting style is taken from the cableway to be extended.
button. The function creates a new
part that starts from the end point of the previous cableway part.
The drafting style is taken from the cableway to be extended.
Connect
If a cableway ends to another cableway or is drawn over a cableway, the cableways can be automatically connected with a Tee or crosspiece. Connecting is affected by the following:
- The Automatic connection setting in cableway's Advanced settings – If this setting is not enabled, connecting will not be automatic. Connecting can be turned on or off temporarily by pressing and holding down the Alt Gr key. If automatic connecting is enabled, the Alt Gr key will disable it temporarily and vice versa.
- If the cableways have the same elevation and you end drawing to another cableway, the cableways are connected with a Tee, or if you draw over another cableway, they are connected with a crosspiece.
- Cableways with different elevations – If the cableways have different elevations, the cableways are connected with a Y piece if the draw is completed to another cableway. If the draw is made over a cableway, no connecting will occur, and the cableways cross each other at different elevations.

Two existing cableways can be connected to each other with some limitations. There are certain criteria for connected cableways:
- The cableways must have the same type.
- The cableways must have a common virtual crossing point.
- Elevation and rotation of cableways must be the same
- The cableway ends must be straight, corners of crossings can not be connected.
You can also use the following right-click menu options to connect a cableway to another:
- Connect at the same angle by stretching – Connects the selected cableway to another cableway using the original angle by stretching the cableway.
- Connect at the same angle with new segment – Connects the selected cableway to another cableway using the original angle by adding a new cableway segment.
- Connect nearest nodes by stretching – Connects the selected cableway to the nearest node of another cableway by stretching the cableway.
- Connect nearest nodes with new segment – Connects the selected cableway to the nearest node of another cableway by adding a new cableway segment.
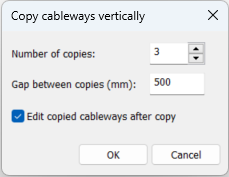
Copy vertically
You can copy a cableway with specified gaps between them.
Do the following:
-
Select the desired cableway, right-click and select Copy cableways vertically. The Copy cableways vertically dialog opens.
-
Define how many copies you want to make.
-
Define the gap between the copies.
-
If you want to leave the copies selected for editing, select Edit copied cableways after copy.
-
Click OK. The function makes a copy of the selected cableways and adds the given gap to the original elevation. Copying will continue until the selected number of copies is reached.