Insert a symbol
The instructions below contain the basic instructions for inserting a symbol, and you can use them later when you insert symbols in any drawing.
Tip: You can find the desired symbols quickly by entering the full symbol name in the symbol selection window search field.
Do the following:
-
Open the symbol selection window by selecting Symbols > Symbol selection window on screen. The symbol selection window stays on the screen until you choose to close it.
-
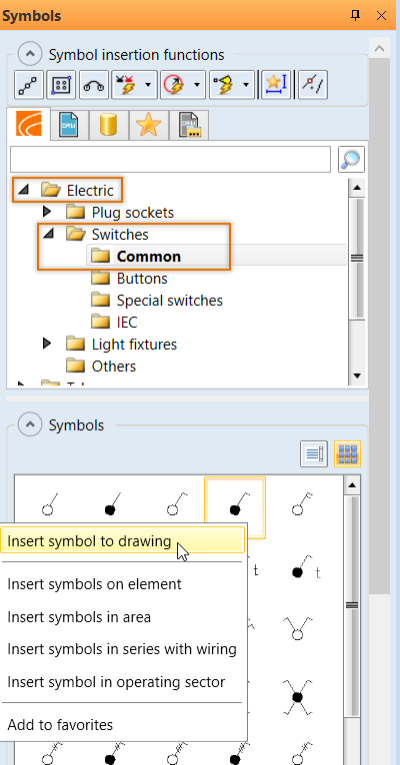
From the Electric drop-down menu, select Switches > Common.
-
Insert the Switch, 1-pole, flush symbol by double-clicking it or by right-clicking it and selecting Insert symbol to drawing:
-
Insert the symbol:
-
If necessary, rotate the symbol with F8.
-
Indicate the location of the symbol.
-
Accept the angle by right-clicking.
-
Indicate the location of the next symbol.
-
Accept the angle by right-clicking.
-
-
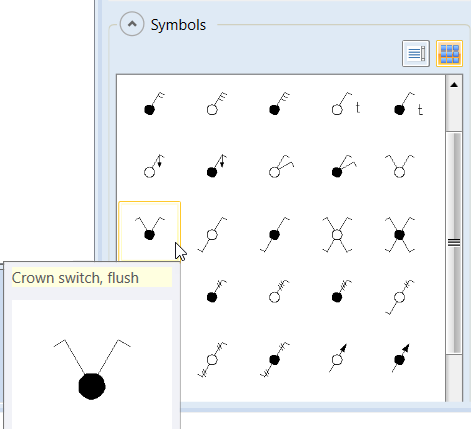
In the symbol selection window, select Electric > Switches > Common and insert the Crown switch, flush symbol:
Tip: You can change the symbol in the cross-hair simply by selecting another symbol. If necessary, you can stop insertion with Esc or by double-tapping the mouse wheel.
 Previous Previous |
Next

|