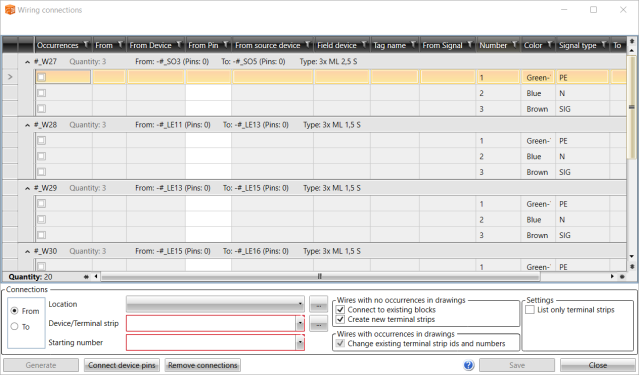
You can define wiring connections directly from the database for cable wires and internal wires.
The Wiring connections dialog opens after you have defined a new wire, if you selected the Connect created wires option. You can also open the dialog on the Cables tab by right-clicking the desired cable and selecting Cable wiring connections. You can select several cables by holding down Shift or Ctrl.
Do the following:
-
Select the wire to connect.

You can connect only wires that are not in the drawing. Connected wires are shown in green.
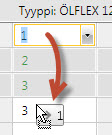
You can drag and drop to swap pins:

-
At the bottom of the dialog, define the From information (location, device/terminal strip, starting number) and click Generate.
-
Define the To information as above, and click Generate.
-
Define the other settings:
-
Connect to existing blocks – Connect only pins that exist. If not selected, new pins will be created.
-
Create new terminal strips – If terminal strip does not exist, it will be created.
-
List only terminal strips – Device list shows only devices of type terminal strip. This helps you to find the correct device from the list and from the tree.
-
-
When all the connections are ready, click Save. Changes to database are made only up on save. If you want to cancel any connections you have made, close the dialog by clicking Close.
With Connect device pins, the application will try to connect pins automatically according to the wire signal type, if device is defined to From and To information. If multiple wires are connected to a single pin, the row is displayed in red.
With Remove connections, you can remove wire connection information from the database. Wires that are in the drawing cannot be removed (marked with green).