Copy from a clipboard project
With a temporary clipboard project, you can easily copy items (such as drawing files, sheets, devices, circuits, and locations) in your project or from one project to another. You can define rules for copying objects and generating new IDs.
Do the following:
-
Copy the first sheet of the E-0-Schematics-01-501.drw drawing:
-
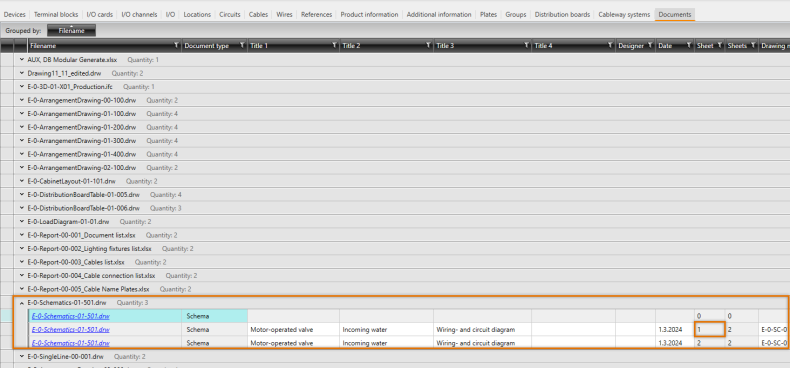
In the database tool, select the Documents tab.
-
Drag-and-drop the Filename column header to the grouping row.
-
Find and select the 1st sheet row of E-0-Schematics-01-501.drw.
-
Right-click the row, and select Copy to clipboard project. The Copy to clipboard project dialog opens. The Export tab shows all the selected documents and their information. If necessary, you can change the export settings on the Settings tab.
-
Click Copy to copy the information to the clipboard project. The dialog closes when copying is ready.
-
-
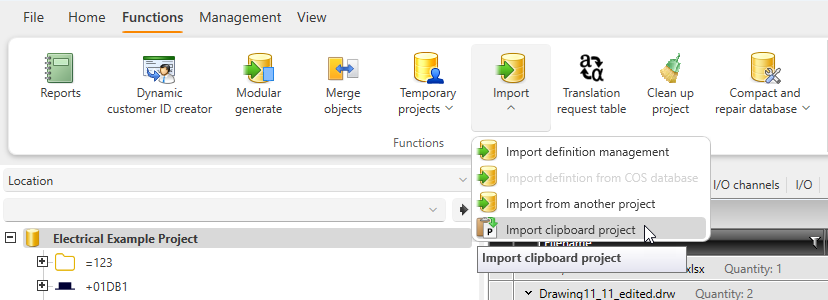
Select Functions tab > Import menu > Import clipboard project.
-
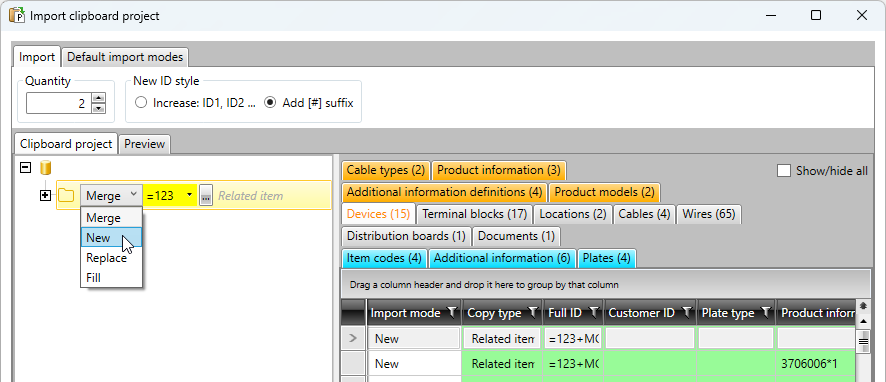
Define 2 as the quantity.
-
As the new ID style, select Add [#] suffix.
-
Select the import mode:
-
New – New objects are created from the clipboard objects. Identical IDs are handled according to the New ID style option.
-
Merge – Objects with identical IDs are merged. For example, MCC1 stays as MCC1.
For more information on the other modes (rarely used in this case), see
-
-
Click Continue.
-
Preview the changes, and then click Import. New documents E-0-Schematics-01-502 and E-0-Schematics-01-503 are added to the project.
-
Merge the documents:
-
If the E-0-Schematics-01-501.drw file is open on the drawing side, close it.
-
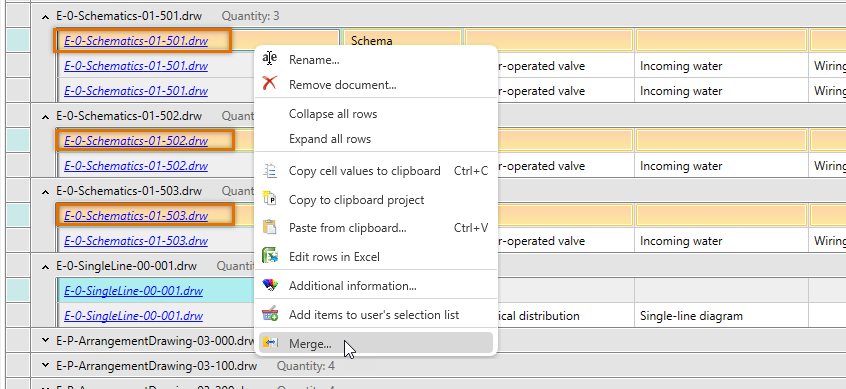
Select the E-0-Schematics-01-502.drw file (blue row, first copy).
-
Press Ctrl, and select the E-0-Schematics-01-503.drw file (blue row, second copy).
-
With Ctrl still down, select the E-0-Schematics-01-501.drw file (blue row, original).
-
Right-click, and select Merge.
- In the Merge objects dialog, click Merge.
- When the application asks about deleting the 0 layer, click Yes. The files are now merged, and you can close the dialog with Close.
- Open the E-0-Schematics-01-501.drw file.
-
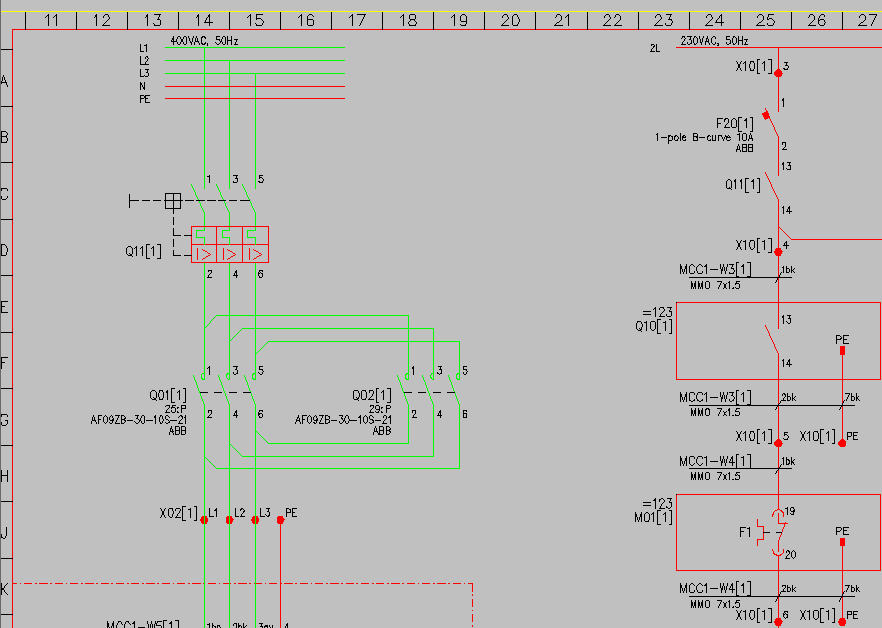
The Import clipboard project dialog opens. The dialog shows the objects you are about to import to your project.
Here is an example of sheet 4 (IDs have [1] at the end because this is the first copy):
 Previous Previous |
Next

|