You can select which columns (= data) are displayed on each tab in the DB Tool. Furthermore, you can also control the order and width of the columns.
Do the following:
-
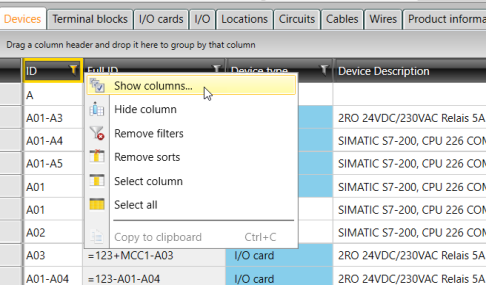
Right-click on the column header row, and select Show columns.

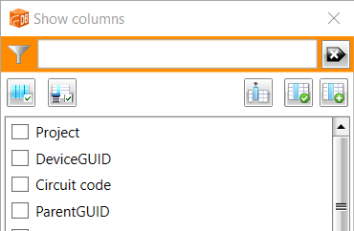
The Show columns dialog opens.

You can edit the column list as follows:
-
With the
 button, you can only show columns with additional information, such as position texts,
technical data, etc.
 -
With the
 button, you can only show selected columns.
 -
With the
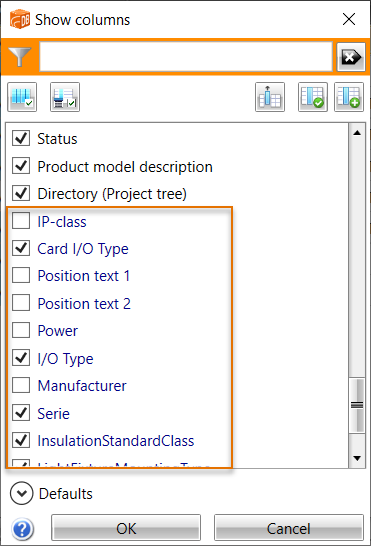
 button, you can add additional information columns to the grid. The additional information columns are shown at the bottom of the list in blue.
-
- Select the columns you want shown in the grid.
- You can select all columns or clear selection from all columns with the
 button.
 - You can select the columns with values with the
 button.
- You can select all columns or clear selection from all columns with the
- If you want to change the order of the columns, do it by dragging and dropping. You can also drag and drop the column headers in the grid.
- Click OK to save the changes.
If necessary, you can easily access the default settings with the options in the Defaults section:
|
|
Reset grid settings to defaults – Restore programs default settings for columns. |
|
|
Reset user grid settings – Set column settings to values that user has saved previously. |
|
|
Save user grid settings – Save current column settings as user's default settings. |
