Define the main user and create databases
Define the main user and create databases in Microsoft SQL Server Management Studio.
You will need to create three databases:
-
EDBManagement is the management database.
-
EDBProject is a project database that contains all the CADMATIC Electrical project data in the SQL Server instance.
-
EDBUserCommon contains the shared design content, such as cable types, product information, and plate defnitions.
Do the following:
-
Add a new user (who you will define as the main user later):
-
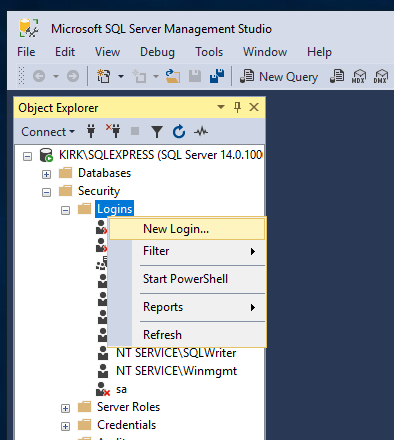
Open Security > Logins. This folder contains all SQL Server users and user groups.
-
Right-click Logins, and select New Login.
The Login - New dialog opens.
-
For Login name, enter the username in the format [domain name]\[Windows username].
-
Click OK. The program creates the new user into the user folder.
-
-
Create the databases:
-
Right-click Databases, and select New Database. The New Database dialog opens.
-
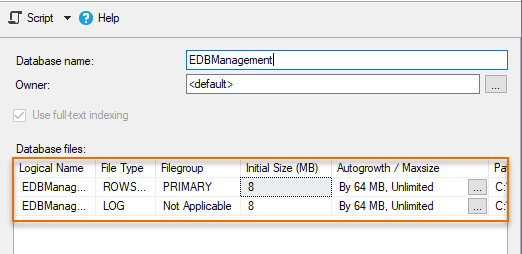
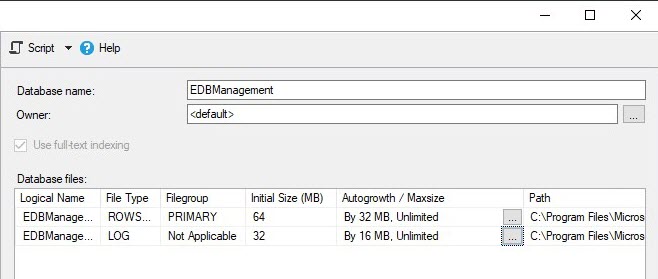
In the Database Name field, enter EDBManagement. The program creates two files: a ROWS file that contains the actual database data, and a LOG file that contains the SQL commands that are sent to the database.
-
Define the default sizes:
-
For the ROWS file, for Initial Size, enter 64 as the value.
-
For the LOG file, enter 32 as the default size.
-
-
Define the growth rates:
-
For the ROWS file, below Autogrowth / Maxsize, click the
 button. The Change Autogrowth for [file name] opens.
 -
For In Megabytes, enter 32 as the value.
-
Click OK.
-
Enter 16 as the growth rate for the LOG file as described.
-
-
Check the default file location in the Path column. You do not need to change the location at this point, but note that the program does not create backups of the files, so you have to do that yourself.
-
Click OK.
-
Create two more databases named EDBProject and EDBUserCommon as described, with the following definitions:
Database
Type
Default size
Growth rate
EDBProject
ROWS
512
256 LOG
128 64 EDBUserCommon
ROWS
128 64 LOG
64 32
-
-
Define the main user for the databases:
-
Open Security > Logins.
-
Right-click the user name you added in step 1, and select Properties. The Login Properties - [User name] dialog opens.
-
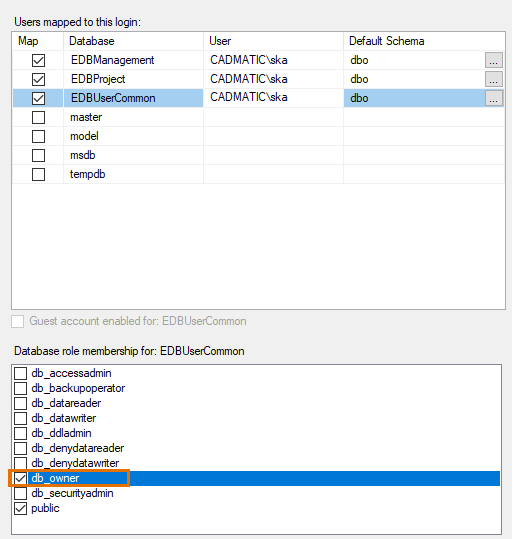
Select User Mapping.
-
On the Map column, select the databases you just created.
-
For Default Schema, enter dbo as the value for each database.
-
One by one, on the list in the bottom of the dialog, select db_owner for each database.
-
Click OK. The program adds the user as the main user for the databases. If you want to check that everything is in order, select Databases > [Database] > Security > Users. The user is visible in the user list.
-
Next, configure the firewall.