Add and insert logos
|
|
Electrical tab > Frames and labels group > Management |
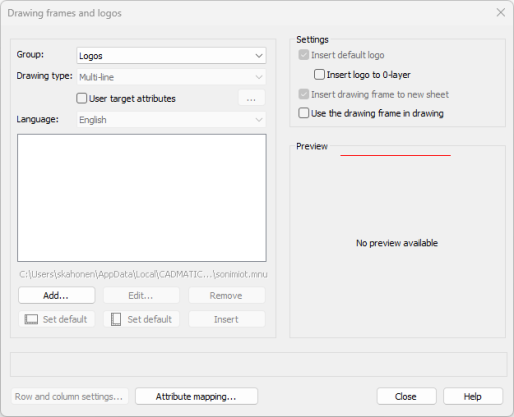
You can have several logos, but you can only define one logo as the default. The program inserts the default logo automatically on drawing labels and frames if you select Insert default logo. You can use the same logo for labels and frames, as it will be scaled to fit the logo position as necessary.
Add and insert a logo as follows:
-
In the Drawing frames and logos dialog, in the Group drop-down menu, select Logos. The list shows you the logos that are available, if any.

-
Add a new logo:
-
Click Add. The New logo dialog opens.
-
Select the logo symbol (the .drw file) in the directory by clicking the
 button. You can also select the logo from the drawing by clicking Select from drawing.
 -
In the Description field, enter a name for the logo. You can later edit the description by selecting the logo and clicking Edit.
-
Click OK.
-
-
Set the default vertical or horizontal logo by selecting the logo on the list and clicking the correct Set default button. The function scales the logo to the correct size.
-
Insert the logo in the drawing by clicking Insert. If the drawing already has a logo and you want to replace it, click Yes.
-
Close the dialog by clicking Close.
If necessary, remove the logo by selecting the logo on the list and clicking Remove.