Performing collision checks
Collision checks test whether objects collide with other objects, contact other objects, or violate clearance limits. On the Model tab, from the context menu by selecting Check for Collisions you can run a collision check with default settings to see whether the objects in one node of the object tree collide with any other objects. By using the Check for Collisions tool from the main toolbar, you can do more complex object selections and also customize the collision check settings.
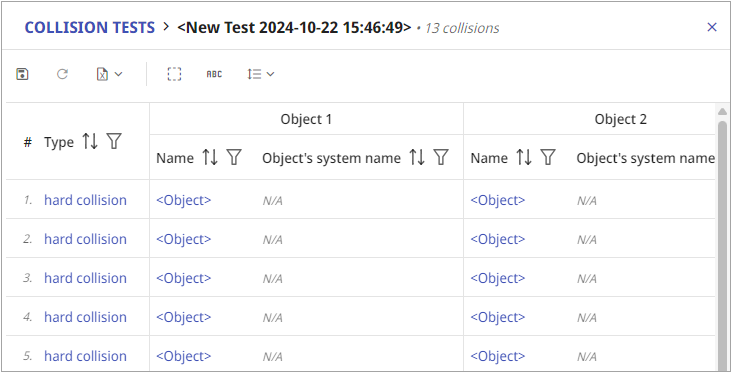
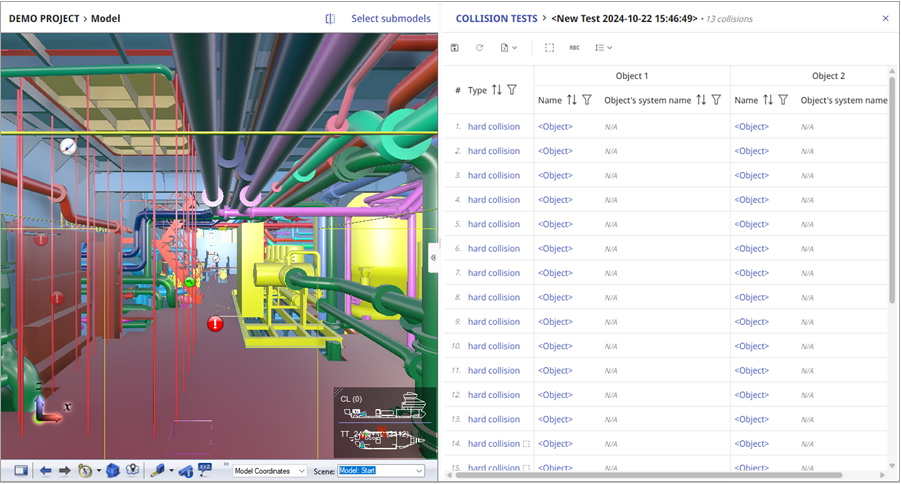
When the checks are completed, the Collision tests pane with a table containing the collisions is automatically displayed, and you can browse the table to see where violations occur. If there are no collisions, the pane opens displaying text No collisions.
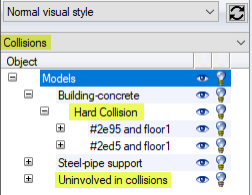
To view the results in the object tree, select Show sidebar button  in the main toolbar.
Performing collision checks with default settings
You can run a collision check with default settings to test whether one set of objects collides with any other objects.
Do the following:
-
On the Model tab, select the object hierarchy that you want to use to select which objects to include in the collision check.
-
In the hierarchical object tree, right-click the node that contains the objects to be checked, and select the check method to use from the Check for Collisions context menu:
- Only Collisions (Faster) – Performs a quick check for collisions and contacts between objects, and reports both types as collisions. The check ignores cases where objects are less than 1 mm apart but there is no physical hit. This is faster than the complete check but not all contacts might be noticed.
- With Contacts and Clearance Violations – Performs a complete check for collisions, contacts, and clearance violations between objects. This is more accurate than the fast method but can take significantly more time, especially when there is a large number of objects to be checked.
-
 . See Viewing saved collision test results.
Note: In some cases the collision test results cannot be saved and rerun in the Collision tests pane, if the selections in model tree are such that cannot be rerun using the Check for Collisions dialog.
To examine a collision, select either the type of collision, or the object in the table and the collision opens in Examine mode.
Using the check for collisions tool
In the Check for Collisions tool you can select any combination of objects to be checked against other objects, and you can specify various settings for the check to be performed.
Do the following:
-
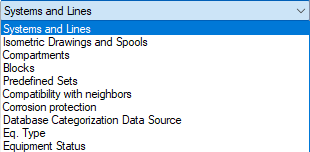
On the Model tab, select the object hierarchy that you want to use to select which objects to include in the collision check.
For example, if the model contains blocks and you set the hierarchy menu to Blocks, you will be able to check for collisions between block boundaries.
-
In the main toolbar, click the Check for Collisions button
 . The Check for Collisions dialog opens.
 -
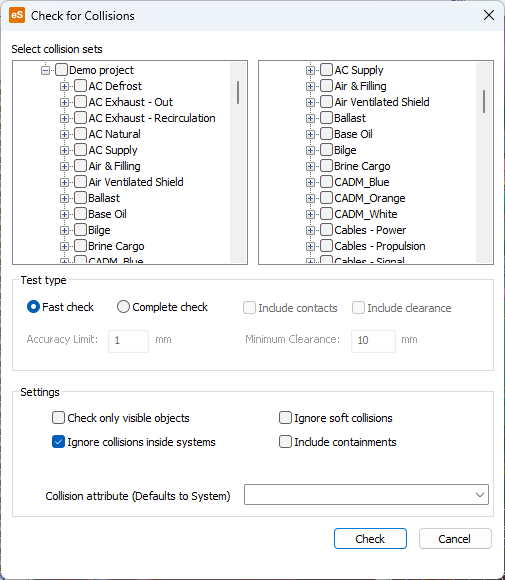
In Select collision sets, select which sets of objects to compare to which.
For example, if the hierarchical tree is arranged by blocks, you can select one block from the left pane and then its neighboring blocks from the right pane, to check whether that one block collides with the others.
-
In the Test type section, first select what type of tests to run:
Fast check – Performs a simpler collision check which is faster to execute. All hits between objects are listed as collisions. Accuracy limit is not used.
Complete check – Performs a more thorough check for collisions between objects. Hits are listed by type. If Include contacts is enabled, also contacts are included. If Include clearance is enabled, also clearance violations are included. A collision is reported when object overlap is greater than the specified Accuracy limit value; a contact is reported when object overlap is smaller than Accuracy limit but objects are less than Accuracy limit apart; a clearance violation is reported when objects are more than Accuracy limit but less than Minimum clearance apart.
-
Still in the Test type section, specify the tolerance values to consider between objects:
Accuracy Limit – Specifies the tolerance value to use in collision checks (1-100 mm). A collision is reported if objects collide at least by the amount specified in this field.
Minimum Clearance – Specifies the tolerance value to use in clearance violation checks (1–10000 mm). A clearance violation is reported if objects are closer to each other than value specified in this field.
-
In the Settings section, specify the following settings:
Check only visible objects – If selected, hidden objects are not checked for collisions.
Ignore collisions inside systems – If selected, collisions are not checked between objects that belong to the same system.
Ignore soft collisions – If selected, collisions are not checked between objects and insulation or 3D spaces.
Include containments – If selected, in addition to Passages and Service Spaces also the following 3D space objects are included in the check: Blocks, Super Blocks, Sub Blocks, Compartments, Fire Zones, Flooded Volumes, and Outfit Areas.
Collision attribute – Specifies an attribute, whose value, if present, will be saved for each colliding object in each collision. Can be useful for models that do not have reliable object GUIDs for storing a piece of extra information, e.g., the system the object belongs to.
-
Click Check to run the check.
-
While the check runs you can click Cancel if you need to cancel the checking; no violations will be reported in this case.
-
. See Viewing saved collision test results.
To examine a collision, select either the type of collision, or the object in the table and the collision opens in Examine mode.
To view the results in the object tree, select Show sidebar button
in the main toolbar. To examine a collision from the model tree, select the violation, and then Examine from the context menu.