Project management view
In the Project Management view of CADMATIC eShare a system administrator can add and delete projects.
-
To open the Project Management view, select Projects in the menu.

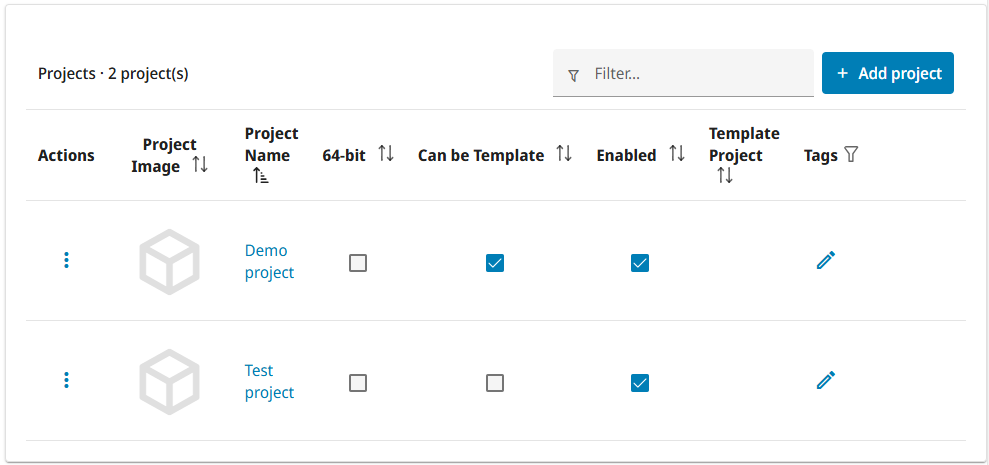
The title row of the Projects list indicates how many projects there are in total. Click Add project to add a new project, as described Adding a new project.
In project-specific rows of the project list you can do the following:
-
Click
 in Actions column and select:
-
Edit to edit project details. See Editing project details.
-
Delete to delete the project. See Deleting a project.
-
-
Project Name – Click the project name to open the project administration view. See Project administration.
-
64-bit – Select to specify that the project is so large that it must be opened in eShare App instead of a web browser.
-
Can be Template – Select to specify that the project can be used as a template for new projects.
-
Enabled – When a project is enabled, licensed users and applications are able to access the project and exchange data with it. For example:
- Authenticated eShare project administrators and users can see and access the project in eShare, eShare App, or eShare for HoloLens.
- CADMATIC Plant Modeller can publish 3D models and documents to the project.
- CADMATIC P&ID can retrieve object information from the project.
- CADMATIC eGo can download the project and synchronize project data with eShare.
Clearing the Enabled check box disables the project immediately. You can disable projects that you do not want any user or application to be able to access.
You might also want to disable old, non-active projects, because this can improve the start-up time of the server. When a project is disabled, the server does not load the related adapters and data sources, index the documents, or synchronize the point cloud files.
Note: CADMATIC eGo users who downloaded the project before it was disabled can continue using their offline copy, but they will not be able to synchronize the data with eShare.
-
Template Project – Shows the name of the template project if the project was created from a template.
-
Tags – Click
 to select an existing project tag or add a new project tag. Click to
  to confirm changes.
You can also filter the project list based on tags. There are two selections in the filtering menu:
-
Includes – Selection for tags, which the projects must have. It will include all the projects that have all of the selected tags. For example, selecting tags one and two means that projects which have both of these tags will be shown, so for example one, two or one, two, three will be visible, but one, three will not.
-
Excludes – Selection for tags, which the project cannot have. It will exclude all the projects that have any of the selected tags. For example, selecting tags one and two means that it will not show projects that have either of these tags. So for example projects with tags one, three or two, or one, two, will not be visible.
The filters can then be either cleared or applied from the footer of the filter menu. These filters are saved locally.
-