Check Out/In blocks
Home > General > Save Construction > Check Out/In
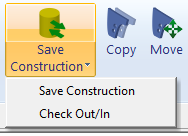
Get the latest data from the COS server, check out available data, save your local changes to the COS server, and check in data you have worked on. These operations are only available in COS projects.
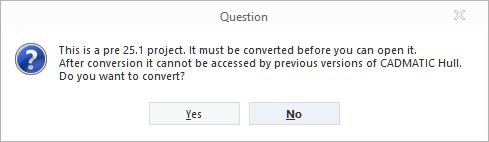
Important: When checking out a block created in an earlier CADMATIC Hull version than 2025H1, the block is converted to be compatible with version 2025H1 and onwards, unless it has already been converted before. This could have happened when the block was imported to or checked in, or the project was opened in version 2025H1 or newer. After the conversion the block cannot be opened with an earlier version.
All users must exit the block before it can be checked out to a site.

Note: The buttons are enabled or disabled according to your selections; operations allowed for at least one of the selected data are enabled. When multiple data sets are selected, each operation is applied only to the items for which it is allowed. For example, if you select a block that is checked out to another site and a block that is not checked out and then click Check Out, only the second block is checked out.
Data table
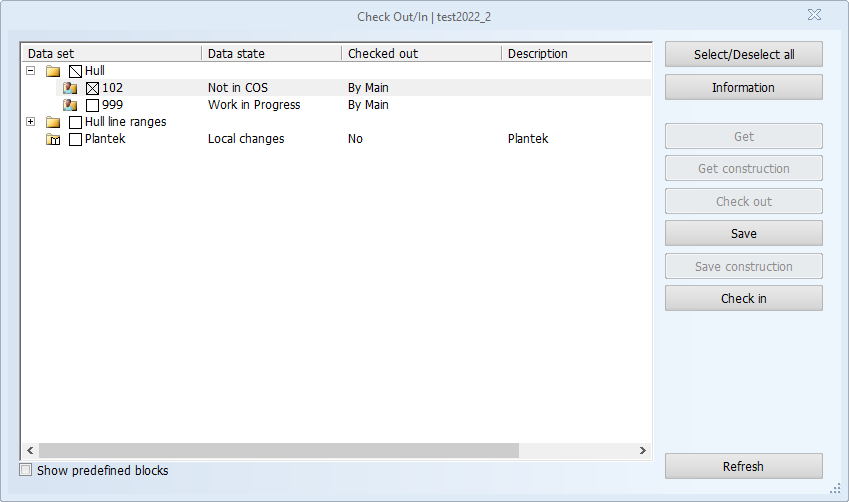
The Check Out/In dialog shows available blocks contained in block groups, hull line range subsets, and Plantek symbols.
Columns
The following columns describe the state, ownership, and synchronization of each data set in COS.
Data Set – Shows available block groups, blocks, hull line range subsets and the Plantek application. When the dialog is opened from System Management, it also shows Hull norms, Hull shape and Hull Project General.
Note: Clicking an item highlights it. However, data is considered selected only when there is a check mark in the respective check box. You can select individual items and clear individual selections by clicking the respective check boxes, double-clicking the desired item, or clicking the desired item and pressing the Space key.
Data State – Shows the state of data apart from Plantek as follows:
- Not in COS – The object has been created on the COS server, but data has never been saved.
- Absent – Data is present only on the COS server and not locally.
- Absent and Not in COS – Data has not been saved to the COS server, and it is also absent locally at the current site. No operations can be performed at the site until the owner site saves the data, after which a get can be done.
- Up-to-date – There is no new data on the COS server. There could still be local changes, requiring to be saved.
- Out-of-date – There is new data on the COS server.
- Recently updated – There are local changes that are not checked into COS yet.
- Work in Progress – The object is checked out to the current site, and the site owns the object. Thus, the COS state is no longer relevant because other sites cannot work on the data. However, if the object is not in COS or it is absent, the respective state will be shown instead of Work in Progress.
- Unknown – An unexpected error prevents determining the state.
For Plantek, the data states are as follows:
- Local changes – There are local changes in the planteksymbols directory that need to be saved to the COS server.
- Remote changes – There are changes at other sites that need to be downloaded from the COS server.
- Local and remote changes – In addition to local changes that need to be saved to the COS server, there are also changes at other sites that need to be downloaded from the server.
- Up-to-date – There are no local changes nor changes on the COS server.
Checked Out/In – Shows whether the object is checked out or not, either Checked out or Checked in.
Check Out/In Progress – Shows the progress of the current action.
-
Saving – Percentage of data saved.
-
Getting – Percentage of data loaded.
-
Checking in – Percentage of data checked in.
-
Save complete
-
Get complete
-
Check in complete
-
In case the action cannot be finished, a failure status is shown, for example, Check in failed. More information on the reason of the failure can be found from the information panel.
Checked Out By – Shows which site has checked out the object.
Description – Shows a description for the data object.
Last Modified – The last time the user has modified the corresponding object (date given in format YYYY-MM-DD, time given in HH:MM:SS).
Last Action Result – Shows the result of the last action the user performed with the corresponding object, either Success or Failure
Welds for Outfitting – Shows if the weld creation has been enabled, either Enabled or Disabled.
Hull Construction Parts for Outfitting – Shows if the Hull Construction part creation has been enabled, either Enabled or Disabled.
Set Columns button
The Set Columns button is used for selecting and organizing the information columns in the Check Out/In dialog. The selected column configuration remains the same the next time Hull is started.
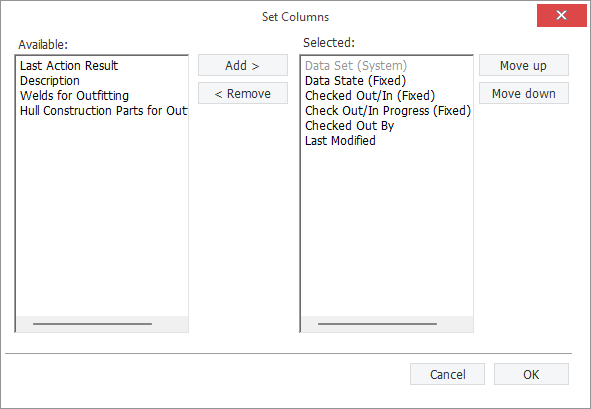
There are some permanently selected information columns: Data Set, Data State, Checked Out/In, and Check Out/In Progress. The definition after them means the following:
-
System – This is a system setting which cannot be changed by the user, and thus is grayed out. It is permanently placed as the first column.
-
Fixed – This column is always included, but its place in the list can be changed.
Filtering information
The filtering features help you locate and manage relevant data in projects that contain a large number of blocks, block groups, or other data sets.
Filtering and selection tools allow you to quickly narrow down visible items, select multiple data sets efficiently, and focus operations only on the data you intend to work with.
Search filtering
Use the Search function to search the data set names for an item containing the value given.
Select/Deselect all
Select all data or clear the selection for all data in the tree structure. You can select individual items and clear individual selections by clicking the respective check boxes, double-clicking the desired item, or clicking the item and pressing the Space key.
Tip: Highlighting an item does not select it. Data is considered selected only when the corresponding check box is selected.
Show predefined blocks
Show or hide predefined blocks. This option is selected by default when the dialog is opened from System Management.
COS operations
The COS operations section contains commands for synchronizing local data with the COS server, managing data ownership between sites, and saving or retrieving changes. The availability of operations depends on the selected data, its current state, and whether it is checked out to the current site.
The buttons are enabled or disabled according to your selections; operations allowed for at least one of the selected data are enabled. When multiple data sets are selected, each operation is applied only to the items for which it is allowed. For example, if you select a block that is checked out to another site and a block that is not checked out and then click Check Out, only the second block is checked out.
After starting any operation, all operation buttons are disabled. They remain disabled until the operation has finished for the selected data. Clicking the Refresh button (or pressing F5) re-evaluates the current selections and enables only the operations that are now allowed for the selected items.
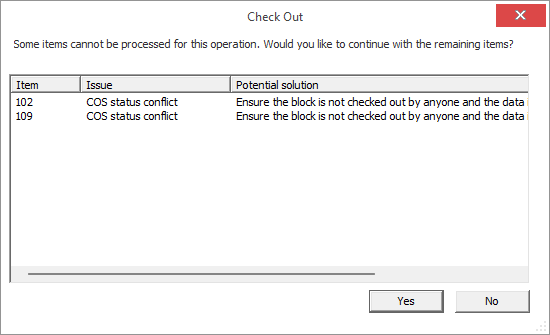
If the operation cannot be performed, there is a warning message listing the blocks for which the current operation is not performed. The dialog shows also a possible solution for the issue.
Update data
Get – Update your local data with the latest changes from the COS server. You have to exit from the block before getting the data.
Note: During a Get operation the following subfolders of the block folder are cleared before getting data from COS: 2d, 3d, 3dshow, shell, cgf and sheets.
This means that files that were locally added in any of these folders will be deleted when getting data from COS. Locally added files anywhere else in the block folder will not be touched.
Get construction – Update your local construction data, welds and the Work Breakdown Structure with the latest changes from the COS server, without getting all the block data. This operation is enabled only when you have selected a block. You have to exit from the block before getting the data.
Tip: Getting the construction data is faster than getting all block data.
Note: If the object is open by multiple users at the same time, there will be a warning message prompting the users to exit the block before performing the Get operation.
Save your data to COS
Save – Save your local changes to the COS server. This operation is enabled whenever the data is checked out to your site. You have to exit from the block before saving. After saving, other sites can see your changes but the objects are locked until you check them in.
If you have selected a block and any CGF files are missing or outdated, they will be recalculated. In this case, the Model creation dialog opens showing you the progress of the operation. If you cancel the operation, saving will be aborted.
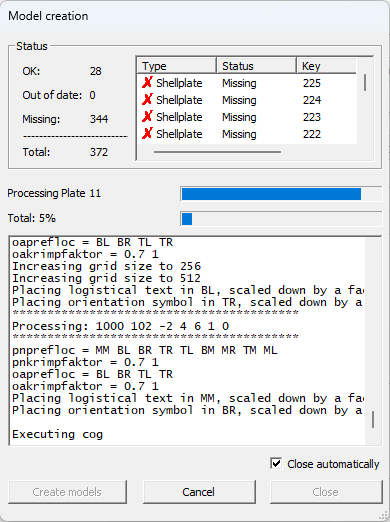
Save construction – Save your local construction changes, welds and the Work Breakdown Structure to the COS server, without saving all block data. This operation is available only when you have selected a block checked out to your site. You have to exit from the block before saving. After saving, other sites can see your changes but the objects are locked until you check them in.
Important: The data will be available in Plant Modeller after saving. However, to have the Work Breakdown Structure and custom attributes available, you need to send the settings to Outfitting beforehand. See Send Settings.
Tip: Saving the construction is faster than saving the whole block.
If you have selected a block and any CGF files are missing or outdated, they will be recalculated. In this case, the Model creation dialog opens showing you the progress of the operation. If you cancel the operation, saving will be aborted.
Check Out/In
Check out – Check out the selected data, and update your local data with the latest changes from the COS server. You have to exit from the block before checking out data. This operation sets a lock on the selected objects preventing changes at other sites.
Check in – Save your local changes to the COS server and release the lock. After checking in, other sites can do a checkout on the data and change it.
Note: If the object is open by multiple users at the same time, there will be a warning message prompting the users to exit the block before performing the Check in operation.
Note: If there is a COS status conflict regarding one of the selected objects during Check in procedure, there will be a warning message asking whether to proceed with the other objects or not.
If you have selected a block and any CGF files are missing or outdated, they will be recalculated. In this case, the Model creation dialog opens showing you the progress of the operation. If you cancel the operation, saving will be aborted.
Admin
Note: The Admin operations are enabled only when the dialog is opened from System Management.
Check Out Without Get – Check out the selected data without updating your local data with the latest changes from the COS server. You have to exit from the block before checking out data.
Cancel Check Out – Release the lock set by a previous checkout, without saving the local changes to the COS server. You have to exit from the block before canceling checkout.
Checking the operation results
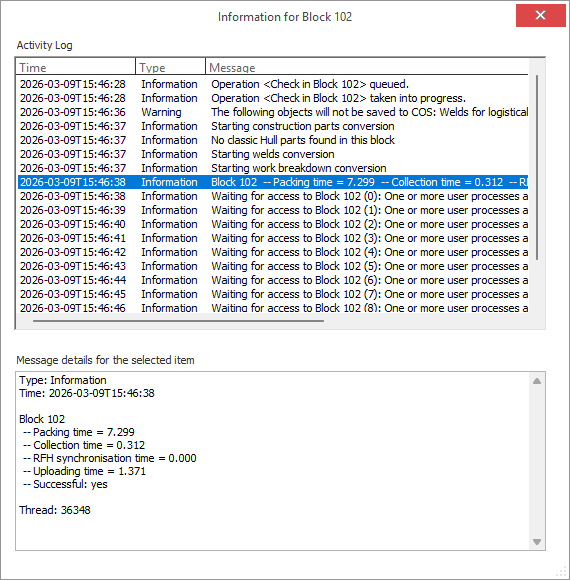
The result of each operation is shown both in the Check Out/In Progress and Last Action Result columns, and also in the Information panel, which provides detailed messages, warnings, and errors for the selected data set.
Information panel
Show the information panel – Shows or hides the information panel, which displays the Activity Log containing messages logged during the operation performed on the block that is currently highlighted in the data table. The panel indicates whether the operation was successful and lists any errors or warnings. It also displays the details of the selected message in the log.
Refresh button
Refresh the whole tree structure. Alternatively, press F5. You can use refresh to see the progress of an action being processed, for example.
The buttons are disabled after each operation, but clicking the Refresh button checks and enables them once there are checked items for which the operation is finished and thus another operation can be performed.
Also see Check out and check in operations in User's Guides and Check out and check in operations in Administrator's Guides.