Batch Plotting
Hull > Batch Plotting
Plot several drawings in one single action.
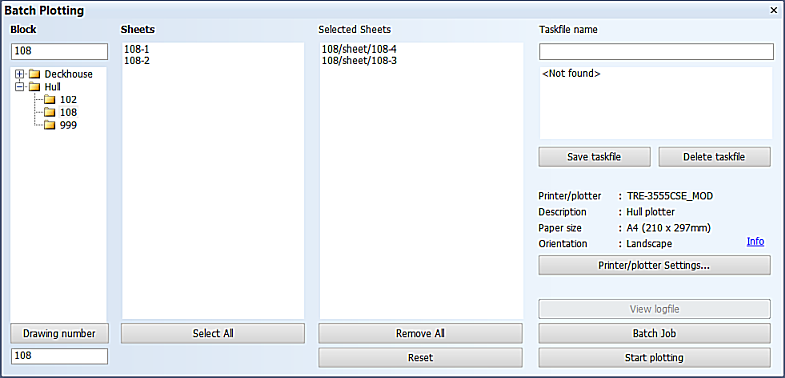
Selecting sheets to plot
Under Block, select the block you want to plot sheets from by clicking on it. Then under Sheet, select the sheet(s) to plot by clicking on them, or click Select All to select all the displayed sheets in one go. Repeat for each block containing sheets to plot.
The selected sheets now appear under Selected Sheets. To remove a sheet, click on it, or click Remove All to remove all sheets in one go. The sheet(s) are moved back to under Sheets.
Plotting
The current plotting settings are shown on the right, including the current printer/plotter. Only a limited number of settings is shown. To display all current plotting settings, click  .
.
To select another printer/plotter, click Printer/plotter Settings. Here you can also change the plotting configuration. For more information, see Plot.
Click Start plotting to begin plotting or click Batch Job to define or start a batch job.
Batch jobs
With a batch job you can schedule an export job to a later time and date. Note that the export only starts, if you are at that time logged in to the system where the run is scheduled to happen.
The Batch Job dialog shows previously created batch jobs. A job name consists of the date and time for running the job, a follow-up number, and the user name of the job creator. A check mark indicates a finished job.
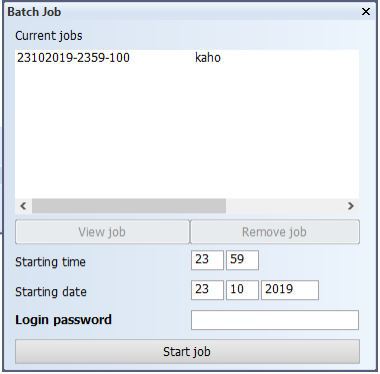
To create a batch job, do the following:
- Enter the desired time and date, and your Windows login password.
- Click Start job to create the job. The Batch Job dialog closes.
When you open the Batch Job dialog again, the new job appears on the list. Click View job to see the contents and settings of the job in the main export window.
Jobs are not removed automatically. To remove a job, select it and click Remove job.