Hatches
Draw > Draw > Hatches

Insert hatches and surface colours to the drawing. Select from the following functions:
- Hatches – Insert hatches.
- Surface Colour – Insert surface colours.
See also Indicating points.
Hatches
First select the hatch pattern, and then indicate where to insert hatches. The insertion areas can be closed areas, or you can indicate the boundary points in a open area.
Selecting the hatch pattern
Select the hatch pattern from the list in the Hatches dialog.
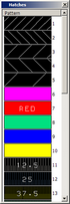
Once you have chosen the hatch pattern the panel closes.
Indicating the area
Indicate area (as far as possible to the right) - Indicate a point in the area where you want to create the hatch. This point must be on the right side of the indicated area, or the hatch may be created in the wrong area. The pictures below give an example on how to indicate the area when creating a hatch on the outer circle.

Wrong area indication |

Correct area indication |
Indicate island or press <Enter> - Indicate areas where you want to create hatch islands. An island is a closed area within another area. When you are done with indicating the islands (if any), press Enter to create the hatch pattern.
- Closed Area [on | off]: Switch between closed area and open area. When Closed Area is on, the hatch will be placed in a closed area. If the Closed Area is off, the system will ask you to indicate at least three boundary points for the hatch. Press Enter to create the hatch pattern. Some temporary lines are created between the indicated points. The lines are removed after the hatch is created. This option becomes available after you have selected a hatch from the list. Closed Area is on by default.
- Hatch Pattern [current hatch]: Activate the Hatches dialog again for re-selecting the hatch pattern. The number of the currently chosen hatch is shown in the option. This option becomes available after you have selected a hatch from the list.
Surface Colour
First select the surface colour, and then indicate where to insert the colour. The insertion areas can be closed areas, or you can indicate the boundary points in a open area.
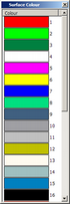
Selecting the surface colour
Select the surface colourfrom the list in the Surface Colour dialog.
Indicating the area
Indicate area (as far as possible to the right) - Indicate a point in the area where you want to create the surface colour. This point must be on the right side of the indicated area, or the surface colour may be created in the wrong area. The pictures below give an example on how to indicate the area when creating a surface colour on the outer circle.

Wrong area indication |

Correct area indication |
Indicate island or press <Enter> - Indicate areas where you want to create hatch islands. An island is a closed area within another area. When you are done with indicating the islands (if any), press Enter to create the surface colour.
- Closed Area [on | off]: Switch between closed area and open area. When Closed Area is on, the surface colour will be placed in a closed area. If the Closed Area is off, the system will ask you to indicate at least three boundary points for the surface colour. Press Enter to create the surface colour. Some temporary lines are created between the indicated points. The lines are removed after the surface colour is created. This option becomes available after you have selected a colour from the list. Closed Area is on by default.
- Surface Colour [current colour]: Activate the Surface Colour dialog again for re-selecting the colour. The number of the currently chosen surface colour is shown in the option. This option becomes available after you have selected a colour from the list.