Export Block
File > Export Block
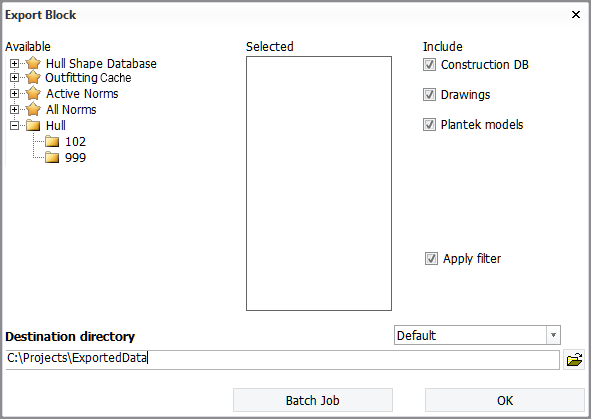
Export blocks, norms, central project settings, and/or a hull shape database. Each type of item and each block is exported to a separate archive file.
A maximum of 2000 blocks can be exported in one go.
Exporting items
Settings related to exporting blocks, such as the available destination directories, are defined in System Management > Extra > Customize > Import/Export Blocks.
Do the following:
-
Select the blocks or other items to be exported from the Available list.
-
Outfitting Cache is available if the active project contains hole request or Outfitting marking data. Selecting this option exports all data related to hole requests and Outfitting markings to a separate file that can be used when creating a new project. The file cannot be imported to an existing project. The hole request data is saved to the Outfitting Cache subfolder in the project folder, in file holereq_db-<objectnr>.gz. In the Diagnose database (diagdb.exe) command line tool, Outfitting Cache is shown among the block folders in the Section number drop-down list.
- When Active Norms is selected, the norms folder that is assigned to the active block group is exported as a single archive file.
- When All Norms is selected, all norms folders that are used in the active project are exported. A separate archive file is created for each norms folder.
- Norms folders are exported using the file name format: ncgnorms_<name of norms folder>-<project object number>.gz - ncgnorms_ncgn61-1000.gz, for example.
- When exporting norms, the central project settings folder %ncgpath%\norms\cvar\ is automatically included. The lvar folder is ignored but it can be manually copied into the norms folder, if necessary.
- When exporting norms, the sectiongroup.dat file is created/overwritten in the root of the norms that are selected when creating a project in Hull. This file imports a predefined set of groups into project administration.
-
-
Select what to include in the export from the options under Include.
-
The default value for the options Hole models and Plantek models in the exported data can be configured in System Management > Extra > Customize > Import/Export Blocks from the following settings: Export Hole Models, Default and Export Plantek Models, Default.
-
When Apply filter is selected, the function will apply an export filter, which specifies which files are not included in the exported block. The filter can be set in System Management > Extra > Customize > Import/Export Blocks > Export Filter.
-
-
Select or enter the destination directory. This is the output location for the archive files.
The drop-down menu can be used to select predefined destination directories. These presets can be defined in System Management > Extra > Customize > Import/Export Blocks > Default Export Paths.
-
Click OK.
Batch jobs
With a batch job you can schedule an export job to a later time and date. Note that the export only starts, if you are at that time logged in to the system where the run is scheduled to happen.
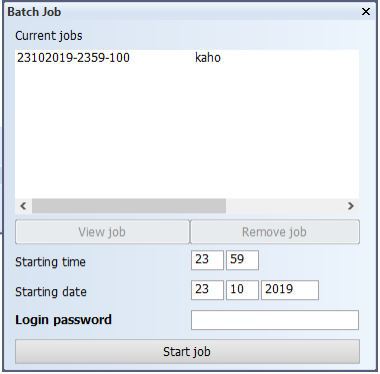
The Batch Job dialog shows previously created batch jobs. A job name consists of the date and time for running the job, a follow-up number, and the user name of the job creator. A check mark indicates a finished job.
To create a batch job, do the following:
- Enter the desired time and date, and your Windows login password.
- Click Start job to create the job. The Batch Job dialog closes.
When you open the Batch Job dialog again, the new job appears on the list. Click View job to see the contents and settings of the job in the main export window.
Jobs are not removed automatically. To remove a job, select it and click Remove job.
Log files
All block import and export operations are logged into a central log file, statusimportexportlog.list, which is located in the project folder.
All import and export operations of a specific block are logged into a block-specific log file, importexportlog.list, which is located in the block folder.
Log files can be viewed with the Help > Supporting Tools > View Log Files function.