Profiles as property
Modify profiles that have been added as a plate property, or convert them to regular profiles.
Profiles as property
Modify profiles that have been added as plate property.
Note: Profiles are not created within a half grid distance to a parallel part of the plate boundary, in positions where a plate in cross section exists, or in positions where a regular profile with the same body direction already exists. Also, the profile must have the minimum length set in System Management > Construction > Profiles > As Plate Property > Minimum Profile Length. Profiles shorter than the minimum length will not be created.
Because of these conditions, modifying (and recalculating) the plate may result in profiles being removed or added.
Do the following:
-
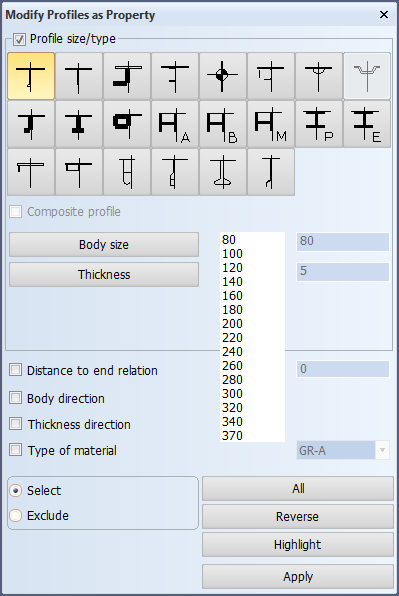
Select Construction > Profiles > Modify > Profiles as Property > Profiles as Property. The Modify Profiles as Property dialog opens.
-
Select the profiles as property to modify. Any profiles added as property to a plate can be selected, regardless of the presentation (cross section, plan view, or bulb view). If just one profile is selected, its values are shown in the dialog. If several profiles are selected, the values of the first selected are shown.
Note: Selecting a profile selects the Profile as Property plate attribute that the profile belongs to (as a sub-attribute). The modifications apply to all the profiles that belong to the same Profile as Property attribute.
-
Define the new values for the profiles that belong to the selected Profile as Property attributes.
-
Profile type – Select the Profile size/type check box and then the profile type. The thumbnails show the structure of each available profile.
-
Composite profile – When selected, the body and flanges of the profile are coded separately. The design system still treats the profile as one complete construction item. This in only available for certain profile types. For more information, see Composite profiles.
-
Body size and Thickness – Set the size and thickness for the body of the profiles.
-
Flange and Flange Thickness – Set the size and thickness for the flanges of the profiles. These setting are only available for composite profiles.
-
Distance to end relation – Change the distance of the profile ends to the plate boundary. Select the check box, and then enter the new value.
-
Body direction – Select this to change the current orientation of the body of the profiles. The orientation is either towards or from reversed frame.
-
Thickness direction – Select this to change the current thickness direction of the profiles. The direction is either towards or from base (horizontal profiles) or center line (vertical profiles).
- Type of material – Change the material type of the profiles. Select the check box, and then select the new value from the drop-down menu.
-
-
Click Apply. The system applies the modified properties to the selected Profile as Property attributes.
Note that only those values are applied whose property (Profile size/type, Distance to end relation, Body direction, Thickness direction and Type of material) is selected when you click Apply.
-
The dialog stays open, and you can continue selecting profiles and modifying the values. Click Apply each time you want to apply the modified properties.
To close the dialog, press Esc or click the close button (X) at the top of the dialog.

Convert profiles as property to regular profiles
With this function profiles that have been added as plate property can be converted to regular profiles. This must be done before the production phase starts. After conversion, it is possible to add hole requests for the profiles in Plant Modeller.
When profiles are added to a plate as a property, the plate gets a Profile as Property attribute, with individual profiles as Profile sub-attributes. The conversion applies to the main attribute and includes all of the sub-attributes. This means that all of the profiles in the Profile as Property attribute will be converted.
Important: The conversion cannot be undone.
Do the following:
-
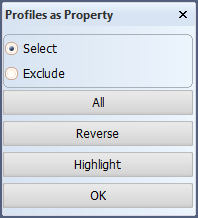
Select Construction > Profiles > Modify > Profiles as Property > Convert Profiles as Property. The Profiles as Property dialog opens.
-
Select the profile(s) to be converted. Any profiles added as property to a plate can be selected, regardless of the presentation (cross section, plan view, or bulb view).
Note: Selecting a profile selects the Profile as Property plate attribute that the profile belongs to as a sub-attribute. All the profiles contained in the attribute are converted.
-
Click OK. The system converts all the profiles that belong to the selected Profile as Property attribute(s).