Using the Pattern tab
Creating the pattern
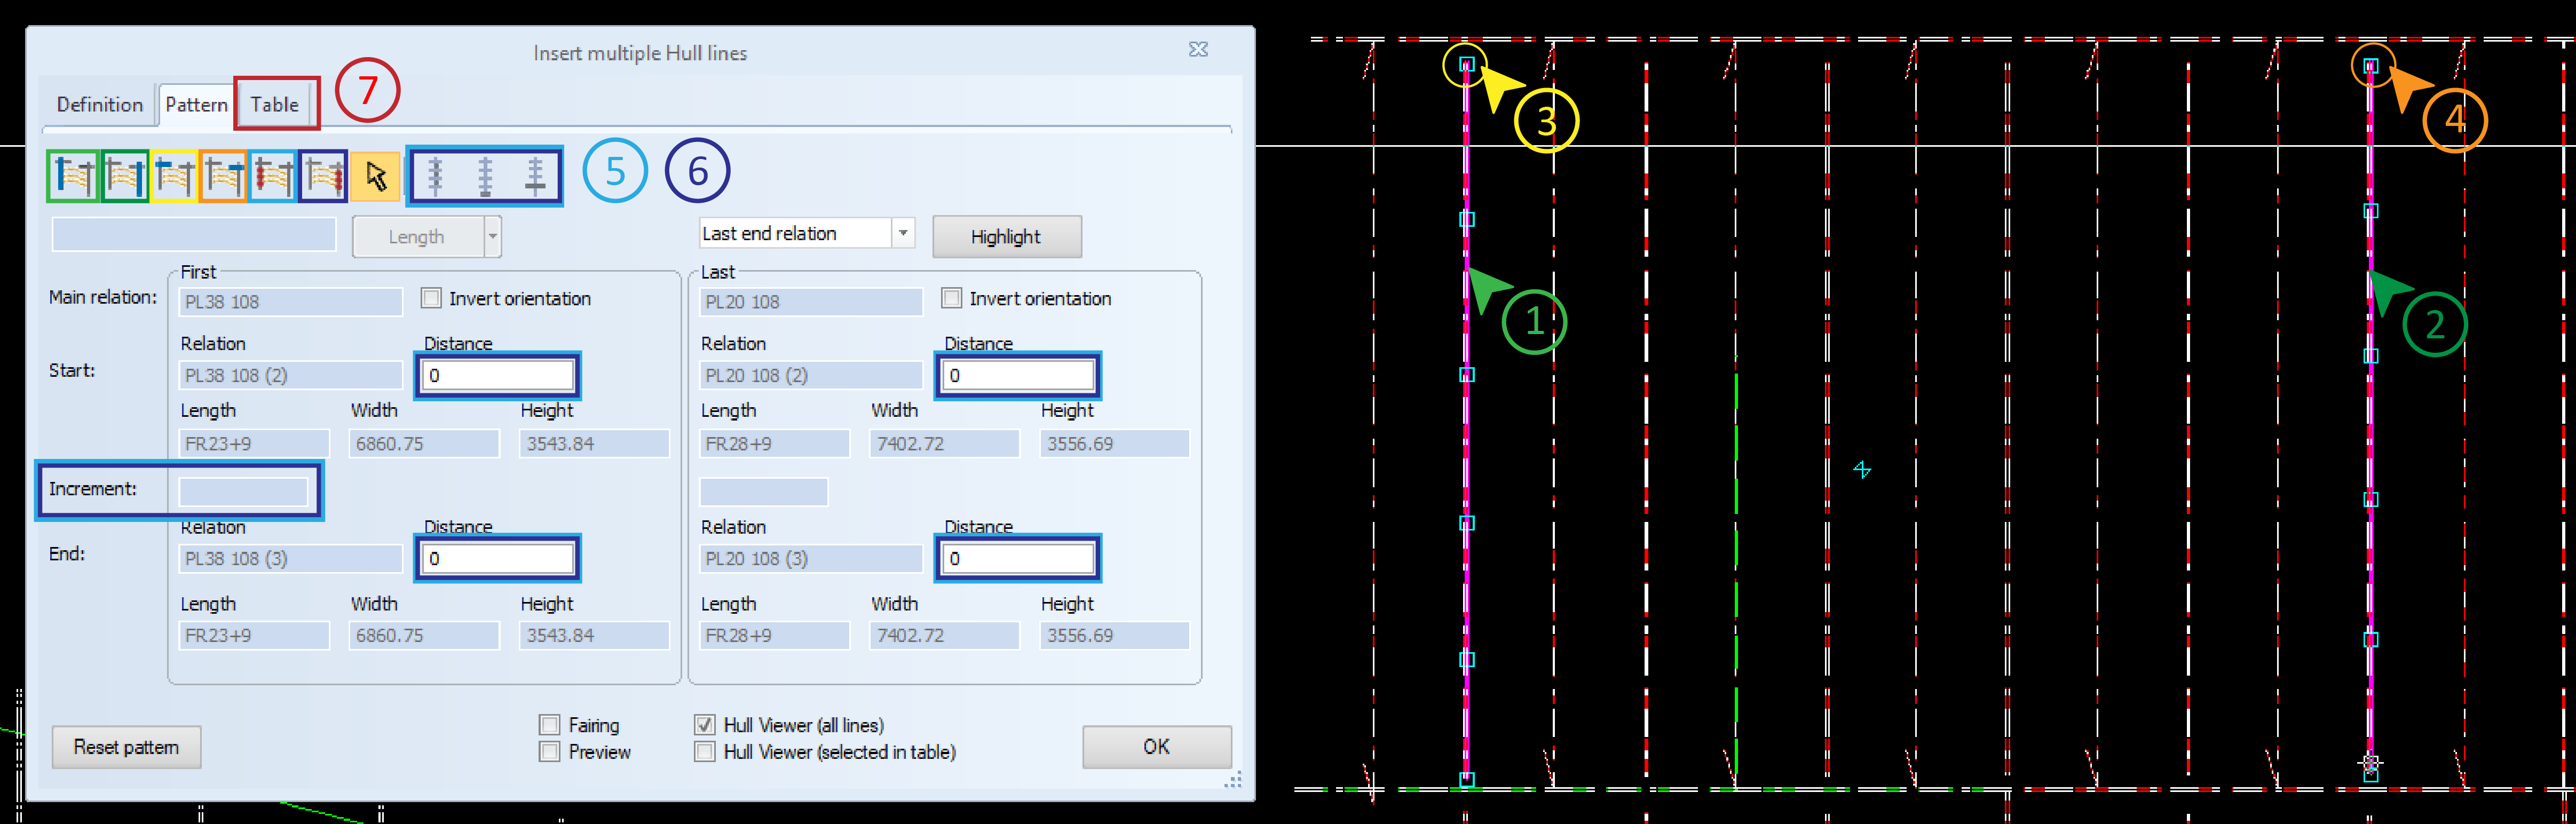
After setting the desired values on the Definition tab, switch to the Pattern tab to draw your hull lines. Follow the steps below to successfully design your hull lines.
-
 The first main relation is used to determine the first point of the hull lines. Define the first main relation of the series of hull lines by entering a value in the Length/ Width/ Height field or indicating a construction item in the graphical window. As soon as you have selected the first main relation, the system automatically jumps on to the next step.
 -
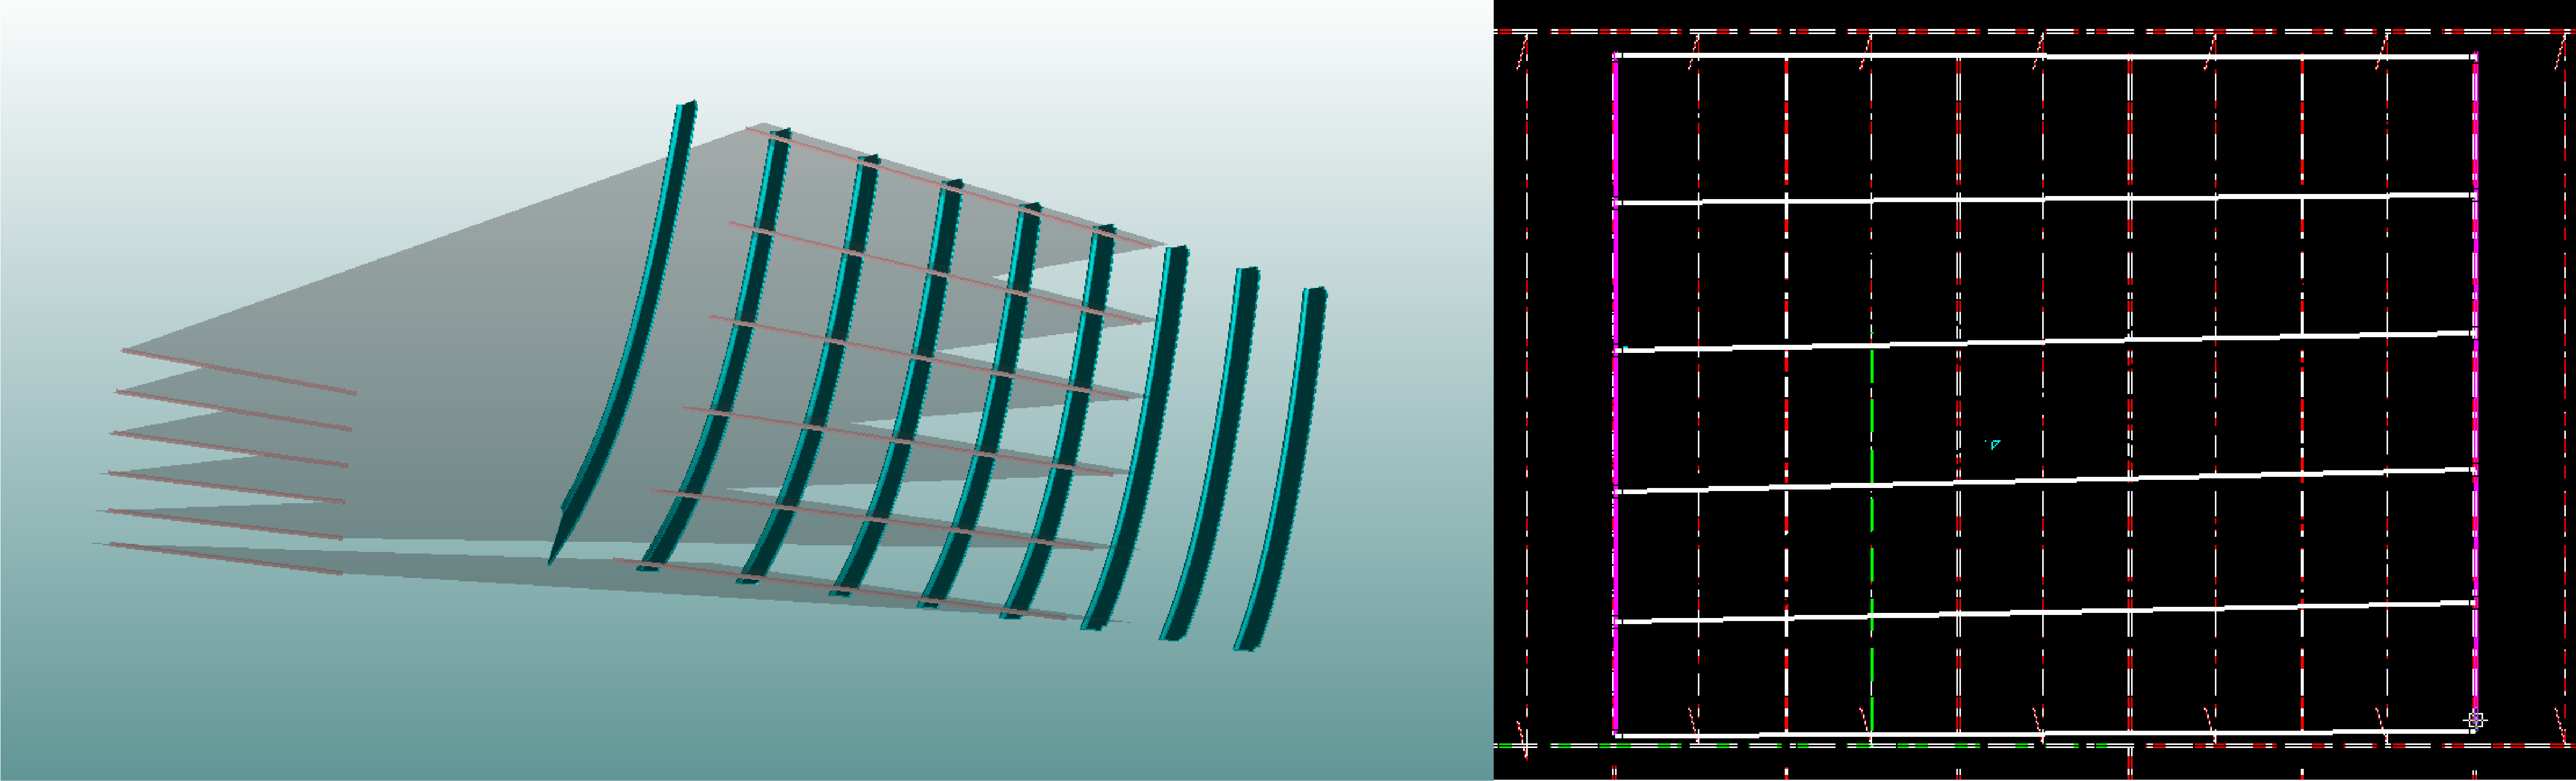
 Define the last main relation of the series of hull lines by entering a value in the Length/ Width/ Height field or indicating a construction item in the graphical window. Now you specified the topological space where your hull lines will be located. As soon as you selected the last main relation, the system automatically jumps on to the next step.
 -
 Define the first start relation of the series of hull lines by entering a value in the Length/ Width/ Height field or indicating a construction item in the graphical window. As soon as you selected the first start relation, the system automatically jumps on to the next step.
 -
 Define the last start relation of the series of hull lines by entering a value in the Length/ Width/ Height field or indicating a construction item in the graphical window. Now the first and last starting point of your hull lines are defined. As soon as you selected the last start relation, the system automatically jumps on to the next step.
 -
 Select the first method of the hull lines by selecting one from the available three methods:
 using an increment
Go to chapter Using an increment in order to read how to define end relations with increments end of main relation: using a customized end relation
Go to chapter Using an end of main relation in order to read how to define end relations with end of main relation. end relation: using a relation as end relation
Go to chapter Using an end relation in order to read how to define end relations with end relations.
-
 Select the last methodof the hull lines by selecting again from the available three methods.
 - Move to the Table tab. Go to Using the Table tab to read how you adjust the hull line points available in your table.
Note: The system checks for first order circular dependencies every time a relation is defined. If the relation chosen has circular dependencies, the system displays an error message and the pattern will not be valid to create multiple hull lines.
Note: If a fixed value relation results in several branches, several relations are created and will become candidates. From the candidates the system chooses the good branch (i.e. indication point) automatically and informs the user: "… has been chosen as … relation."
Further options on the Pattern tab
Highlight
In order to localize an already defined relation in the graphical window select the relation and click Highlight. The selected relation is highlighted.
Preview Points
Preview points are always displayed in the graphical window. If a side pattern or specific points are not valid, all invalid points are drawn at (0,0). When the point are moved due to changes made by the user, the preview points are updated automatically to show the changes.
Relations
All relations are displayed in the graphical window, including candidates that are currently not used.
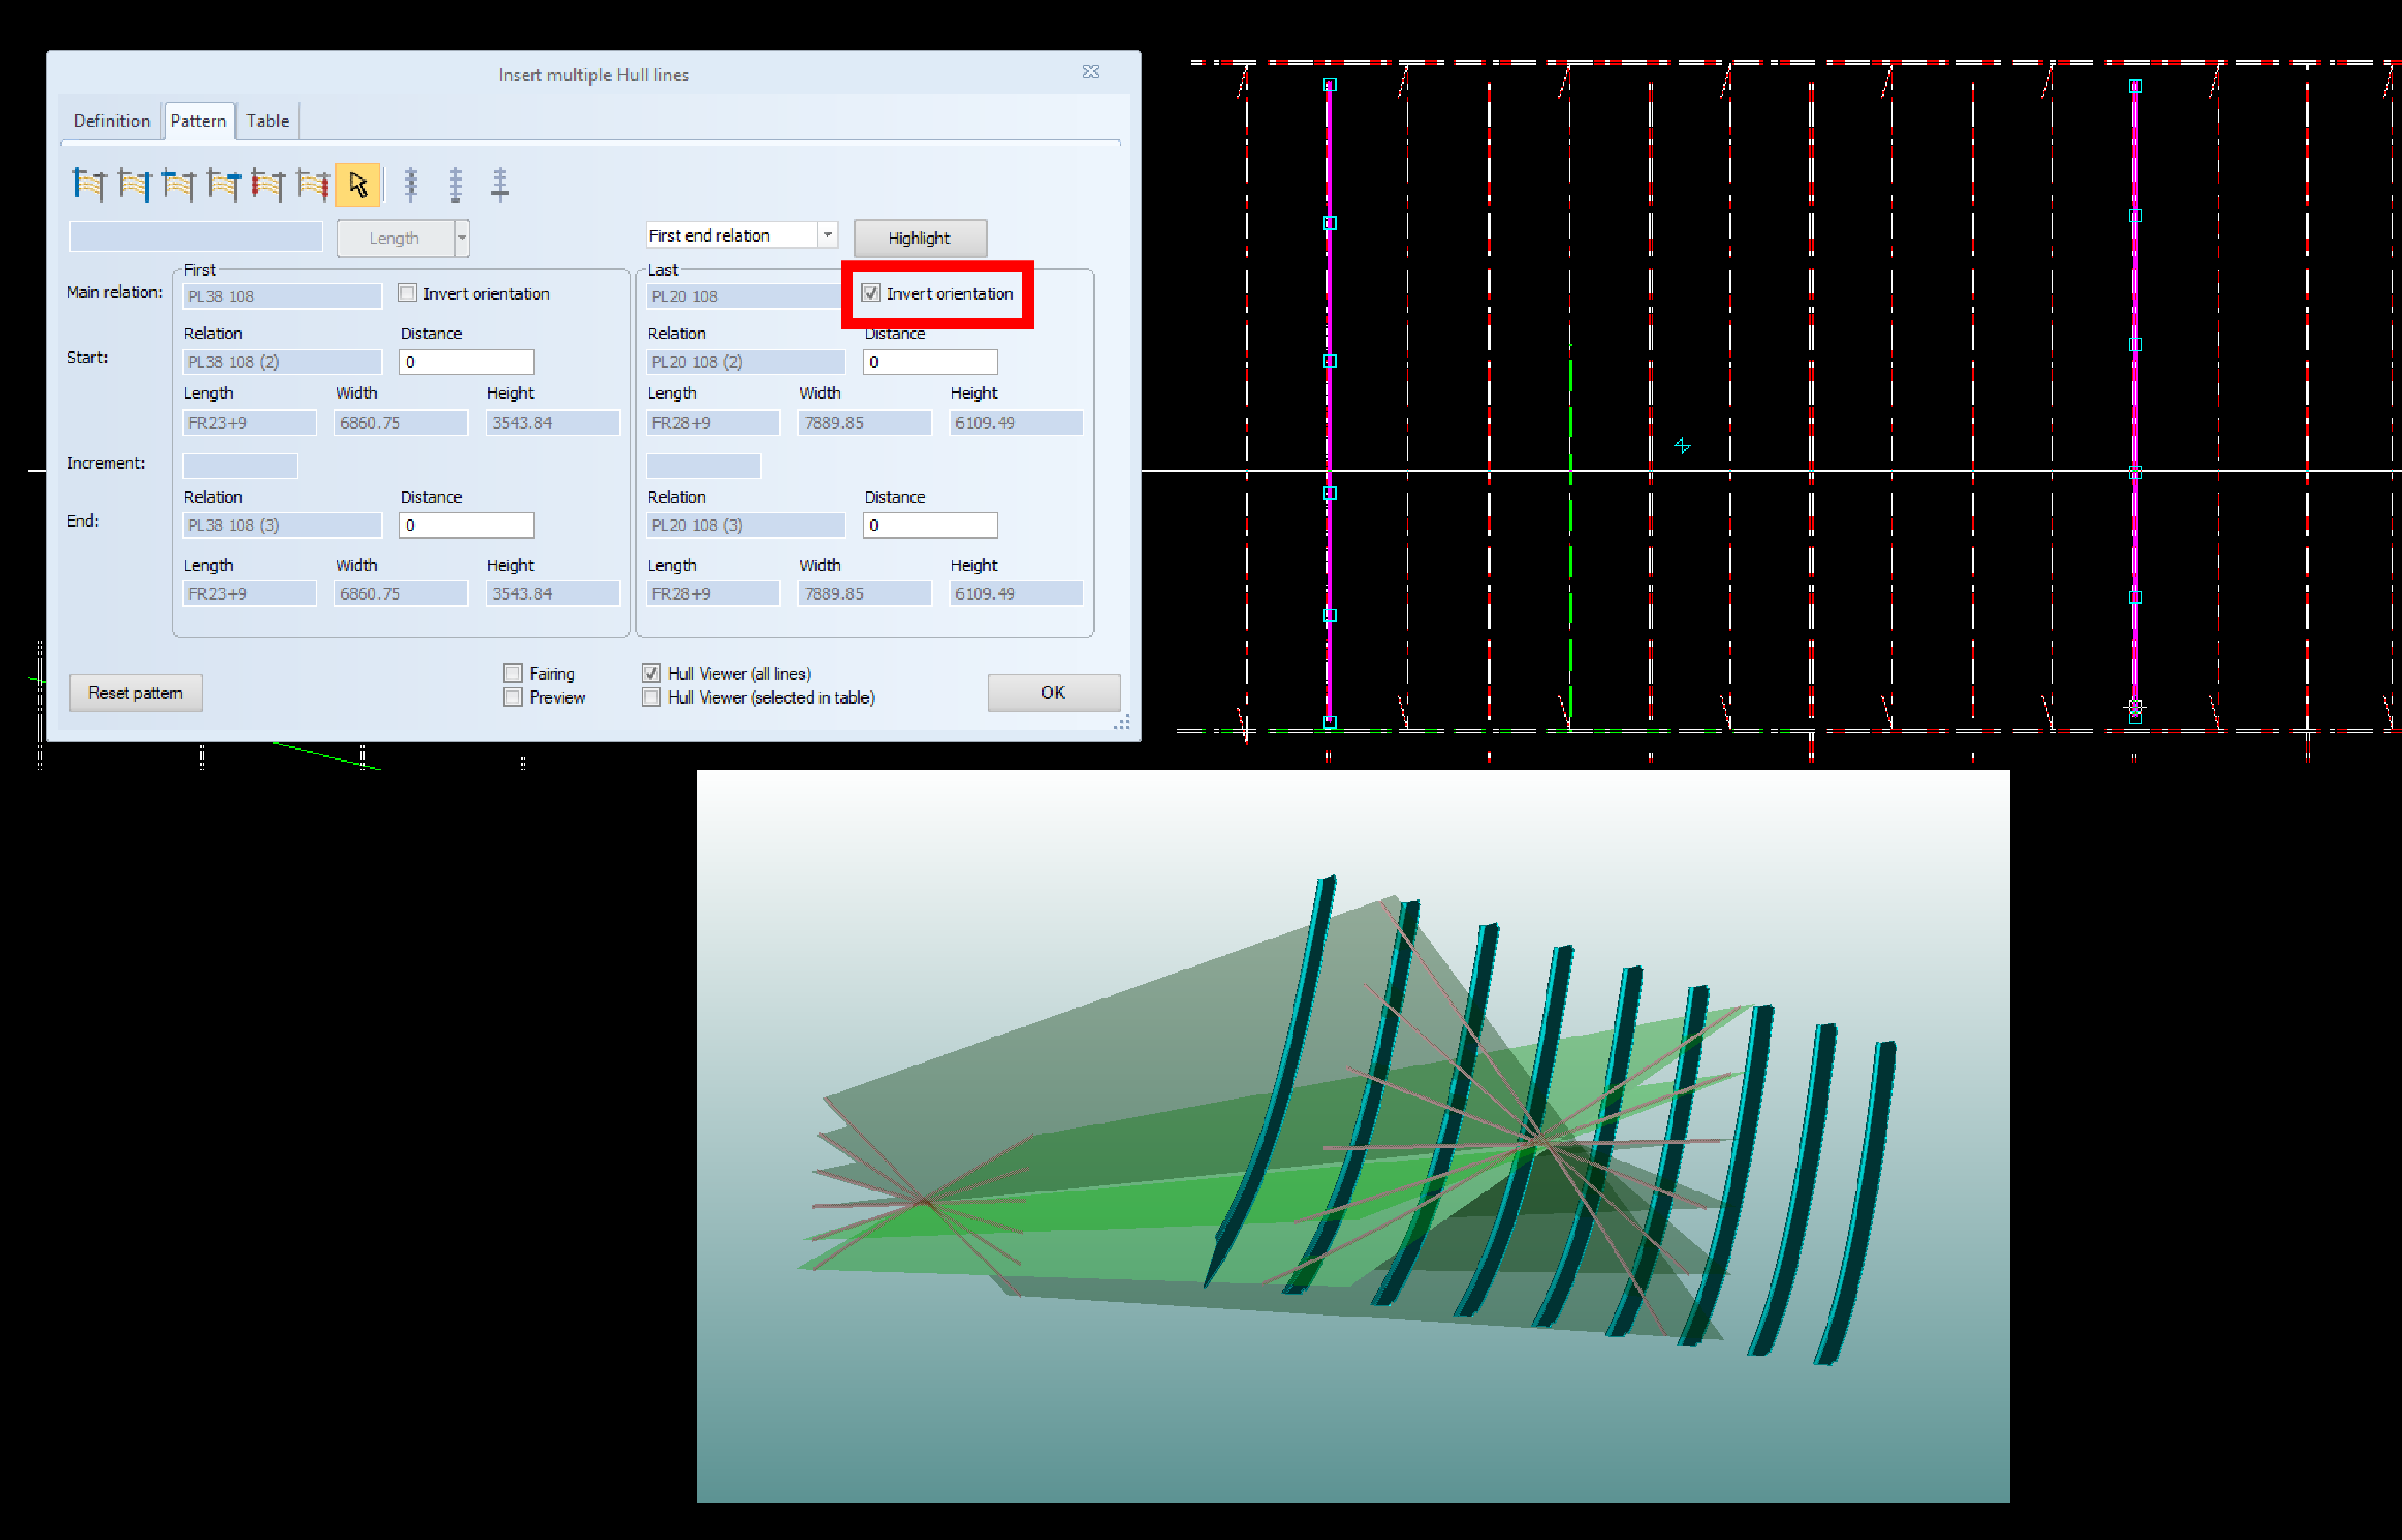
Invert orientation check box
Use the Invert orientation option on the first and last main relations to reverse order of the hull points on a side pattern. The default orientation is the direction of the relation. When a main relation is inverted:
- the higher percentage values get close to the start relation
- the start relation will become end clipping relation of the final hull line relation
- the end relation will become start clipping relation of the final hull line relation
The image below shows multiple hull lines where the last main relation has been inverted.
 The system automatically jumps to the Idle button after you defined all necessary relations for your hull lines, showing that no obligatory input is required for the pattern at the moment. You can also click this option and use it to "freeze" the interface in the dialog box. This makes it easier to navigate in the graphical window and observe your hull lines without accidentally changing the values.
Reset pattern button
You can go back and adjust values in all relations steps by clicking the relevant button. The pattern can be reset at all times and from all tabs with Reset pattern. This will clear all data defined for the pattern and will reset the values back to the default ones.