Modifying shell plates
You can modify the relations and properties of shell plates in the Shell application. An extended selection helps you to select a shell plate in cases when it is difficult to select the desired shell plate in the graphical window. Quick menu options exist for opening the modify functions.
Modifying shell plate relations
Do the following:
-
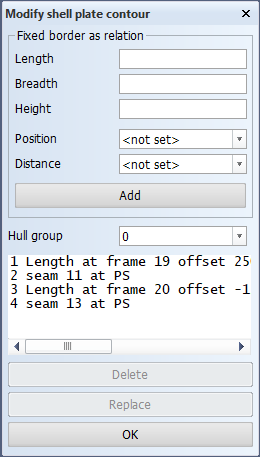
Select Construction > Shell Plate > Modify > Shell Plate Relations > Shell Plate Relations. The Modify shell plate contour dialog opens.
-
To modify a relation, select it from the relations list, and make the desired changes.
The relations can be relations to hull lines, or they can be relations to fixed value borders. For more information, see the following:
For detailed information on how to define the relations, see Defining shell plate relations.
If a related hull line is not present anymore in the graphical window, the relation number of the relation involved is drawn inside a square. In the list, this relation is presented with an asterisk (*).
-
Click OK to save the changes.
In the graphical window, a cross symbol shows the center of gravity of the plate.
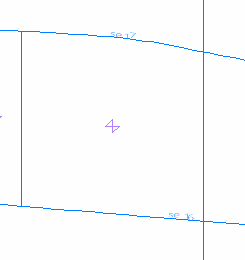
When the contour relations of a shell plate are changed, the position of the cross symbol is recalculated and repositioned in the view.
If the shell plate has a part label, it is removed from the view when the shell plate is modified. Updating the view will recreate the part label at the correct position with the correct values.
Note: Relation lines can be selected and modified from Hull Viewer also when there is no active shell drawing open. Hull Viewer enters the relation selection state when the Construction > Shell Plate > Modify > Shell Plate Relations function is started in Hull.
Extended selection for modifying shell plate relations
The Extended Selection Shell Plate Relations function helps you to select a shell plate in cases when it is difficult to select the desired shell plate in the graphical window.
Select Construction > Modify > Shell Plate Relations > Extended Selection Shell Plate Relations. The system provides you with a list of all the shell plates present in the drawing.
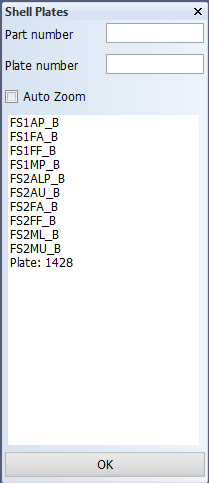
The shell plates that have part numbers/names are listed first. After that, all the shell plates that do not have a part number are listed. Shell plates that do not have a part number are listed with their key numbers.
You can select shell plate to modify in the following ways:
- Select a shell plate with a part number in the list. The system fills the text field for part numbers automatically.
- Select a shell plate with a plate key number in the list. The system fills the text field for plate numbers automatically.
- Enter the part key number in the Part number field.
- Enter the plate key number in the Plate number field.
Auto zoom – If you select Auto zoom, the system zooms to the selected shell plate automatically and highlights it. In cases when you enter the part or plate number manually, press enter first to start the zoom function.
Click OK to start the search for the plate. When the plate is found, the Modify Shell Plate Relations dialog, where you can modify the shell plate relations. See Modifying shell plate relations above.
You can also select the shell plate by indicating it in the graphical window.
Modifying shell plate properties
Do the following:
-
Select Construction > Modify Shell Plate Properties in the Shell application.
-
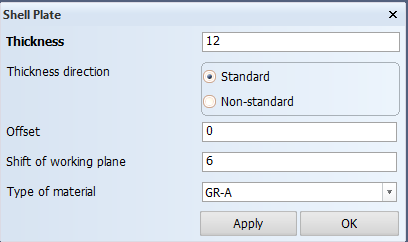
Select the shell plate to modify by indicating it in the graphical window. The Shell Plate dialog opens.
-
Modify the properties as desired. See Defining shell plate properties for more information on the shell plate properties.
-
Click Apply to apply the changes and keep the dialog open. If Hull Viewer is open, the changes are reflected there as well.
-
Click OK to save the changes and close the dialog.
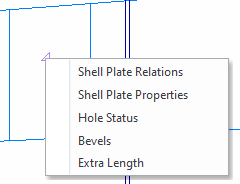
Opening the Modify dialog from the quick menu
You can use the Modify Shell Plate Relations and Modify Shell Plate Properties functions by right-clicking the cross symbol of the shell plate and selecting the relevant option from the quick menu.