Shell plate cutting data
Coding an individual shell plate in the Shell application works similarly to coding regular plates in 3D-Contek.
Follow the steps below to code a shell plate:
- Click Production > Code One Part in the Shell application.
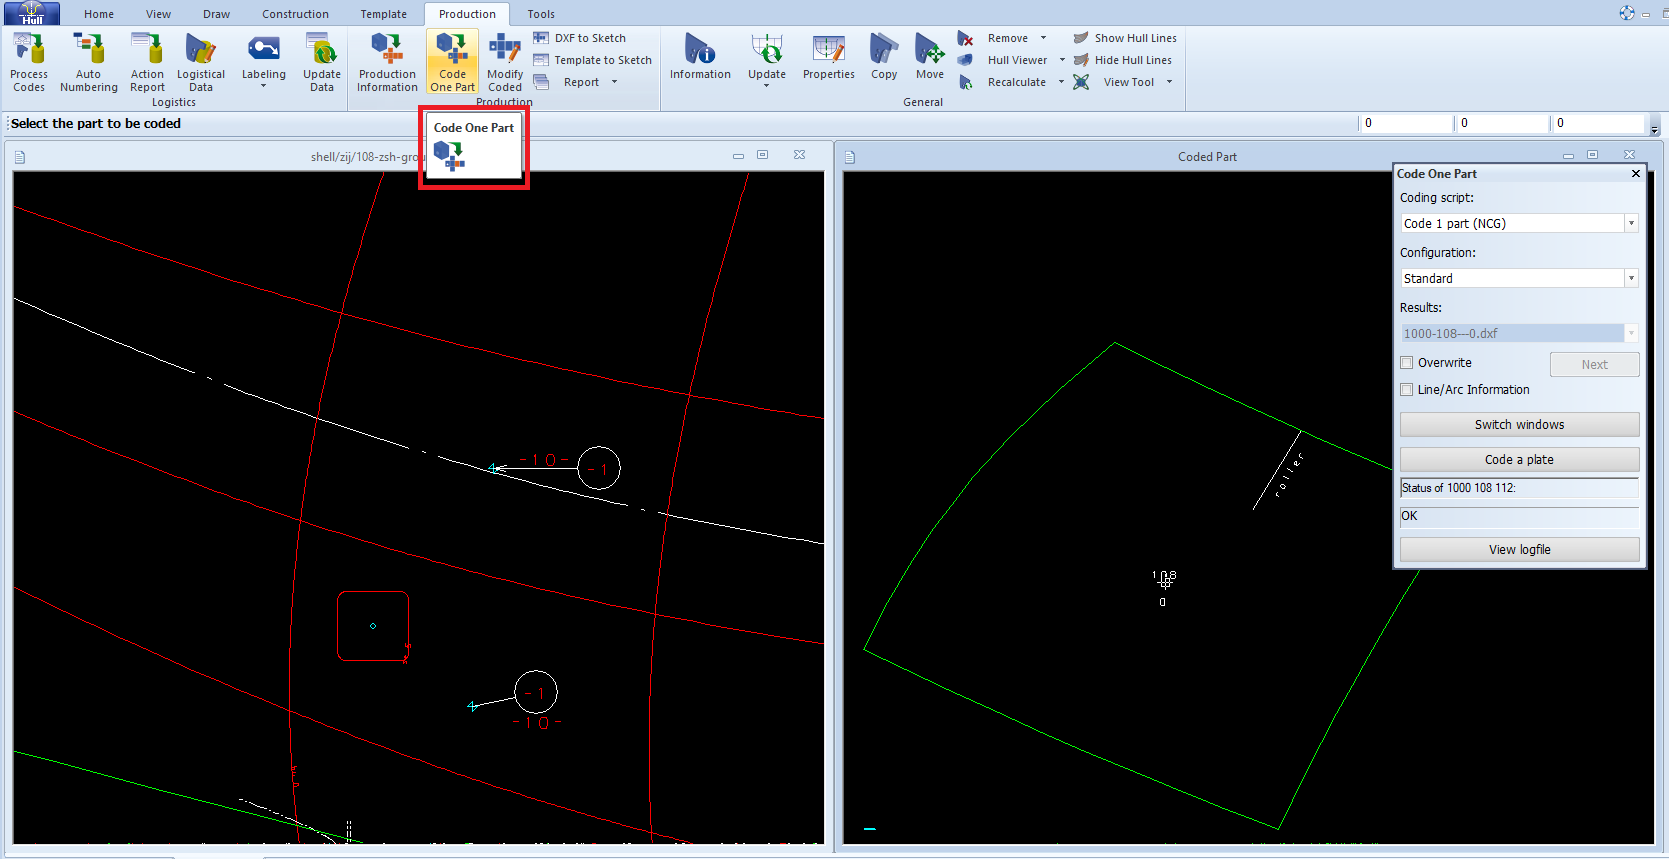
- The Code One Part dialog box appears. Select coding script and configuration in the drop-down menu. The system asks you to select the part you wish to code.
- Indicate the plate you want to code in the graphical window. After the plate is selected the screen is split in two parts and the coded part will appear next to the overview of the drawing. You have the possibility now to review the coded part before saving your changes. The name of the coded part is displayed in the Results field.
- If you wish, you can view the log file by clicking the View logfile button.
- In case you wish to go on and code another plate, you can proceed without closing the dialog box. Click Code Plate and indicate another shell plate in order to code it. The system codes the next shell plate and displays it in the split window.
- Close the dialog box to complete the coding process.
Read more about how to code parts in chapter Coding plates and shell frames.
Modifying coded shell plates
Use the Production > Modify Coded Parts function of the Shell application in case there is a need to modify the DXF file. For more details on how to modify the DXF data of coded shell plates, see topic Modifying the plate cutting data.