3D Space
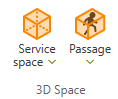
On the Layout tab, the 3D Space group includes the following tools.
Service space

On the Layout tab, the Service space menu includes the following tools for creating, modifying, and deleting service spaces for objects of type Equipment and Structural.
A service space defines a space reservation for a component that needs to be operated or serviced. In CADMATIC, service spaces can be modeled as 3D Space objects and attached to equipment, structural components, pipes, air ducts, and cable ways. There are two different methods for defining service spaces:
-
When the administrator is creating a new object (GDL) in the Component Modeller, the administrator can mark a primitive as a service space, as described in Role markings. When a designer inserts a model object using that GDL, the service space is automatically included. These service spaces the designer should not try to edit or delete in Plant Modeller.
-
When a designer inserts an object that does not have a service space defined in the GDL, for example, because the object has been modeled in a third-party application, the designer can use the tools in Plant Modeller to insert and manage service spaces.
Insert | Insert for equipment | Attach to equipment | Insert for structural | Attach to structural | Edit | Set system | Delete
Insert
You can create a new service space object in the 3D model.
Do the following:
-
Select Layout tab > 3D Space group > Service space > Insert.
-
In the Select system and group for service space dialog, select a system and group for the service space, and click OK.
-
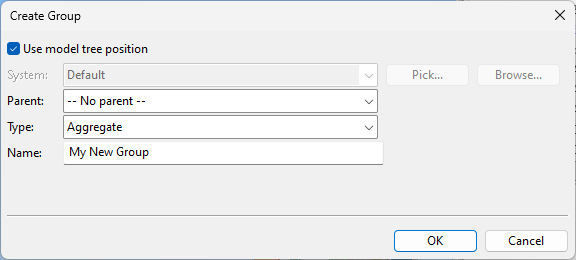
If you chose to create a new group, the Create Group dialog opens. Define the properties of the group to be created, and click OK.
-
Pick a location for the origin of the service space.
-
Component Modeller opens for defining the geometry.
-
When ready, save the service space model and close Component Modeller.
-
Use Attach to equipment or Attach to structural to attach the service space to a model object.
Insert for equipment
Select Layout tab > 3D Space group > Service space > Insert for equipment to create a new service space for a piece of equipment that uses a GDL with a service space definition but the service space is missing from the model. Otherwise, the command works like Service space > Insert.
Attach to equipment
You can attach a service space created with Service space > Insert to a piece of equipment.
Do the following:
-
Select Layout tab > 3D Space group > Service space > Attach to equipment.
-
Select the service space, and press Enter.
-
Select the Equipment, and press Enter.
Insert for structural
Select Layout tab > 3D Space group > Service space > Insert for structural to create a new service space for a structural component that uses a GDL with a service space definition but the service space is missing from the model. Otherwise, the command works like Service space > Insert.
Attach to structural
You can attach a service space created with Service space > Insert to a structural component.
Do the following:
-
Select Layout tab > 3D Space group > Service space > Attach to structural.
-
Select the service space, and press Enter.
-
Select the Structural Component, and press Enter.
Edit
You can edit service spaces.
Do the following:
-
Select Layout tab > 3D Space group > Service space > Edit.
-
Select the service space to edit, and press Enter.
-
Component Modeller opens for editing the model.
-
When ready, save the changes and close Component Modeller.
Set system
You can set the system for a service space.
Do the following:
-
Select Layout tab > 3D Space group > Service space > Set system.
-
You are prompted that the service space and the possibly attached model object must be set to the same system. Click Yes to continue.
-
Select the service spaces whose system to change, and press Enter.
Delete
You can delete service spaces.
Note: You should not delete a service space that is part of the GDL definition of the host object.
Do the following:
-
Select Layout tab > 3D Space group > Service space > Delete.
-
Select the service spaces to delete, and press Enter.
Passage

On the Layout tab, the Service space menu includes tools for creating, modifying, and deleting passages associated with equipment and structural components. Typically, these tools are used when passages are not defined in the GDL of the model objects.
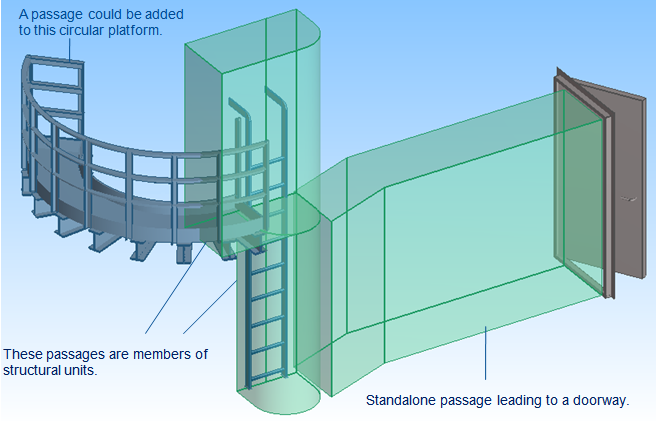
A passage is the area reserved for a passage way such as a staircase, ladders, or a platform. It can be a standalone 3D Space or a member of a structural unit. Objects in a structural unit are not tested for collisions against each other or for collisions between the insulation of these objects.
Route | Insert | Edit | Delete
Route
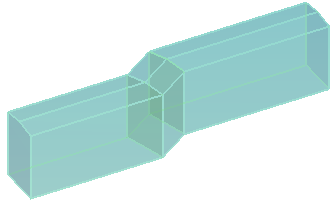
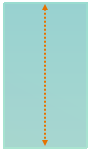
You can insert a passage by routing a predefined shape in the 3D model. The shape has a five-corner cross-section where the relative heights of the sides and the midpoint of the top determine whether the ceiling is raised, flat, or lowered at the center.
Do the following:
-
Select Layout tab > 3D Space group > Passage > Route.
-
Pick a start point for the passage.
-
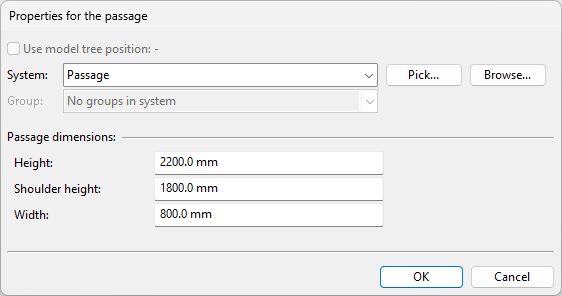
In the Properties for the passage dialog, select a system, define the passage dimensions, and click OK.
-
Height – The passage height at the center.
-
Shoulder height – The passage height at the sides.

-
If this is the same as Height, the passage is rectangular.

-
If this is smaller than Height, the sides are lower than the middle of the passage.

-
If this is greater than Height, the sides are higher than the middle of the passage.

-
-
Width – The passage width.
-
-
The default routing reference point is at the bottom center. Select a different point with Set reference point (R), if needed.
-
Start routing the passage. Press Space or click at each routing point.
-
Press Enter to complete the passage.
Insert
You can insert a passage by modeling the geometry in Component Modeller.
Do the following:
-
Select Layout tab > 3D Space group > Passage > Insert.
-
In the Select System and Group dialog, select a system and group for the passage, and click OK.
-
Pick a start point for the passage.
-
Use the Component Modeller application to define the geometry of the passage using, for example, a sweep primitive, then save and close the model.
Tip: Use a special line type such as dashed line to better visualize passages in wireframe views.
Edit
You can modify a passage using Component Modeller.
Do the following:
-
Select Layout tab > 3D Space group > Passage > Edit.
-
Select the passage to edit, and press Enter.
-
Use the Component Modeller application to modify the passage, then save and close the model.
Tip: You can also modify passages through Layout > Component model > Edit > 3D space geometry.
Delete
You can delete passages from the 3D model.
Do the following:
-
Select Layout tab > 3D Space group > Passage > Delete.
-
Select the passages to delete, and press Enter.