Markup mode
Note: This functionality is only available in the licensed version of eBrowser.
Opening an existing markup or starting to create a new one activates the Markup mode. Accepting or canceling the changes to the Markup item exits this mode. When in Markup mode:
-
Instead of showing a tab the sidebar displays a pane for entering the following information.
-
Title — Enter a descriptive title (required).
-
Creator — You can enter your name when creating a new markup; you cannot change or remove it later.
-
Status — Select the status. (The status list is defined when publishing the 3D model from a design project.)
-
Importance — Select "Low", "Normal", or "High".
-
Comments — Enter any comments that you want others to see.
-
-
The 3D view displays the markup editor toolbar.
Markup editor toolbar

The Markup editor toolbar provides a set of drawing tools that allow you to highlight specific aspects of the model, using the color selected from the color field. You can add detailed model information by taking measurements, and adding coordinate, or attribute labels to objects.
Rectangle, ellipse, cloud

You can draw a rectangle, ellipse, or cloud.
Freehand line, straight line, arrow

You can draw a freehand line, straight line, or arrow.
When drawing a straight line or arrow, you can hold down Shift to make the line snap in 15° increments.
Text

You can add text.
Measure lengths

You can add measurements. See Measure on how to use the measuring tool.
Coordinate label

You can add coordinate labels.
Activating this tool displays a coordinate label in the 3D view, showing the coordinates of the current cursor location. Right-click the location to use, drag the coordinate label to a place where it does not cover anything important, and right-click to accept the location of the label.
Attribute label

You can add attribute labels.
Activating this tool displays an attribute label in the 3D view, showing the attributes of the object in the current cursor location. Right-click the location to use, drag the attribute label to a place where it does not cover anything important, and right-click to accept the location of the label.
Remove selected shape

You can delete any shape you have added with the Markup editor toolbar by selecting the item and then clicking the removal tool.
Email drawing as an image
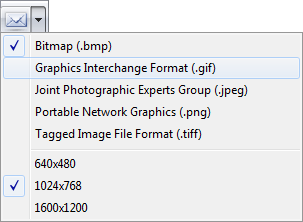
You can e-mail the 3D view with its markings as an image file to another user.
You can select the graphics file format and image size to use. The selections are saved in Windows Registry.
Color

You can select the color to use for each shape that you add with the Markup editor toolbar, either before activating the drawing tool or by selecting an existing shape and then the required color.
Current, mixed, original, photo

You can select how to display the 3D view:
-
Current — Show the 3D model using current object visibility settings.
-
Mixed — Show the current view and the original view at the same time.
-
Original — Show the 3D model as it was in the original Markup.
-
Photo — Browse photos attached to the markup. Use the on-screen arrow buttons to move between the images.