Creating catalog parts by import from Excel
The Import from Excel tool allows an administrator to create a new catalog part and define its dimension table by importing the dimension data from a Microsoft Excel file. This is useful, for example, when there are many different sizes of the part, and, instead of adding each size manually, you can simply import all dimension variations from a data sheet. The preview function allows you to review the data before adding it to the library or the project database.
Prerequisites
- Excel file with data that can be used to define the dimension table and part sizes of a catalog part. The cells to be used as header cells (attribute names) must not contain spaces or special characters, words that are reserved for the GDL, or duplicate values. The data to import must be in consecutive columns/rows.
- An existing catalog part to be used as a template. The template part should have dimension attributes for the imported dimension data. If the template part contains alternate dimensions, also their values must be present in the Excel file.
Do the following:
-
In the Project Environment dialog, browse to [library or project] > Components > Catalog Parts > Catalog Parts.
-
There are two ways to start creating the new part:
- Select New > Catalog Part. You will select later which catalog part's dimension table to use as a template for the new part.
- Right-click an existing catalog part and select Edit. The specified part's dimension table will be used as a template for the new part.
The Corporate Catalog Edit dialog opens.
-
Click Import from Excel. The Import from Excel tool opens displaying two tabs: Dimension Table Mapping and Catalog Part Mapping.
-
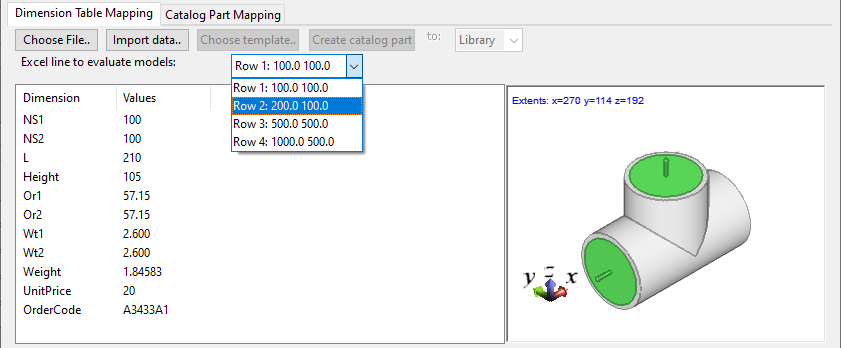
On the Dimension Table Mapping tab, you can import the part's dimensions from the Excel file and map imported dimensions to dimension table attributes.
 Show/hide details
-
Click Choose File, select the Excel file from the file system, and click Open.
-
Select the data to import by selecting consecutive header and value cells from the Excel file. The selection should include the required dimension data and also any required part size specific data such as ordering information.

-
Import the data:
-
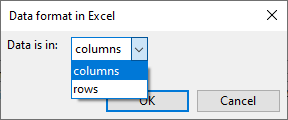
Click Import data. The Data format in Excel dialog opens.
-
Select columns or rows, depending on how the data is arranged in the Excel, and click OK.
The imported attributes are displayed in the tool.

-
-
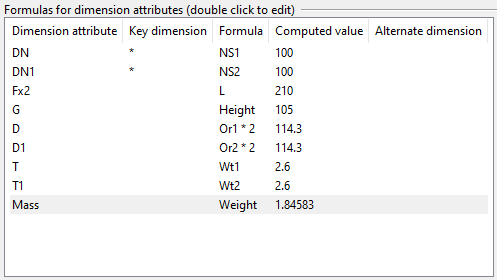
If you did not select the template catalog part at the beginning, select it now. Click Choose template, select a part that uses the dimensions described in the Excel file, and click OK. The template part's dimension attributes are listed in the Formulas for dimension attributes pane. If the template part is linked to a GDL that contains imported images, you can browse the images on the right.

-
Map the dimension attributes to dimensions imported from Excel:
-
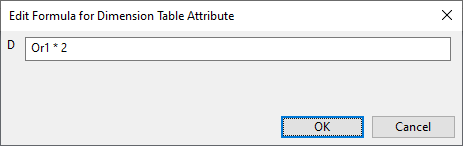
Double-click the row of an unmapped dimension attribute. The Edit Formula for Dimension Table Attribute dialog opens.
-
Specify which imported dimension to map to the dimension attribute. If the imported values require additional calculation, define the calculation formula.
-
Click OK. The Computed value column displays the resulting value.
Continue the mapping as described above until all dimension attributes have been mapped.
-
-
You can now evaluate the results. Select an imported definition from the evaluation drop-down list to preview the part that can be created with the current settings.
-
In the Dimension table name field, enter a descriptive name for the dimension table to be created. If the name can be copied from the Excel file, select the appropriate cell and then click From Excel.
-
-
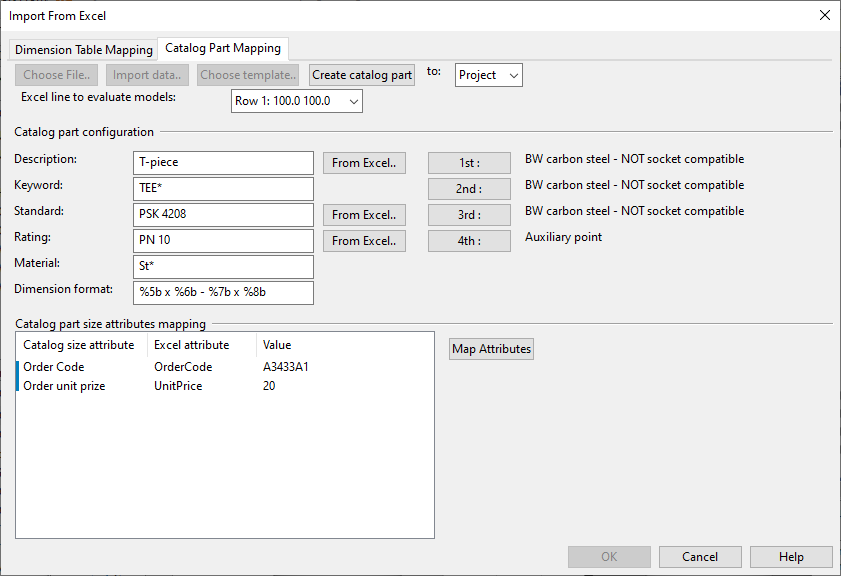
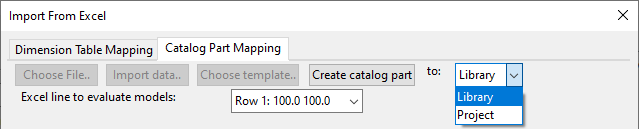
On the Catalog Part Mapping tab, you can define the catalog part to be created and map imported attributes to part size attributes.
Show/hide details
-
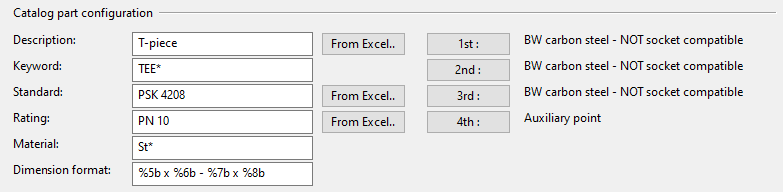
In the Catalog part configuration section, define the following information.
-
Description – Enter a name for the catalog part or copy it from an Excel cell.
-
Keyword – Enter the part's keyword. You can right-click the field and select the keyword from the menu.
-
Standard – Enter the part's standard. You can select it from the menu or copy it from Excel.
-
Rating – Enter the part's rating. You can select it from the menu or copy it from Excel.
-
Material – Enter the part's material. You can select it from the menu.
-
Dimension format – Enter the format string to use. You can select formatting codes from the menu. See Format strings.
-
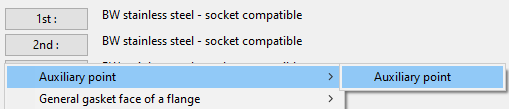
1st, 2nd, etc. – Select the node point's primary face type.
-
-
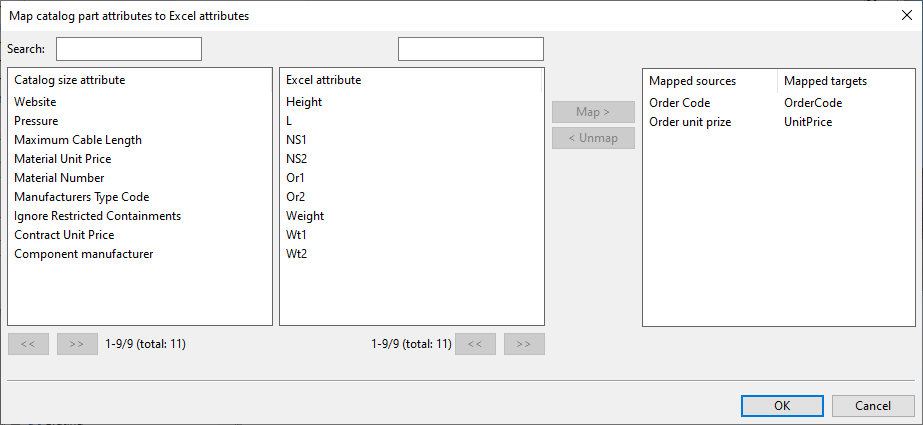
If the imported data contains part size specific attributes, do the following:
-
Click Map Attributes. The Map catalog part attributes to Excel attributes dialog opens.
-
To create a mapping, select the catalog size attribute from the left pane, the Excel attribute from the middle pane, and click Map.
-
When you have made the required mappings, click OK. The mappings are displayed in the tool.

-
You can now evaluate the results. Select an imported definition from the evaluation drop-down list to preview the attribute values of the current mappings.
-
-
Select whether to create the part in the library or the project.
-
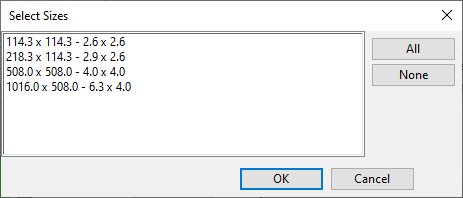
Click Create catalog part. The Select Sizes dialog opens.
-
Select which of the sizes defined in the dimension table to include in the catalog part, and click OK.
-
Click OK to close the import tool, then close the Corporate Catalog Edit dialog.
-