Using a group to manage model objects
The example procedures below describe how to create a group that contains selected model objects and then manage the group of objects as a single unit, either directly or via a query, when picking model objects for a move operation.
Creating a user-defined group
In this example, we create a group called 'Water_PumpStation' whose members are the model objects of one of the pumping stations that can be found in the CADMATIC example project.
Prerequisites
- Project administrator has created a custom group type called 'UserDefined'. For details, see Group types.
Do the following:
-
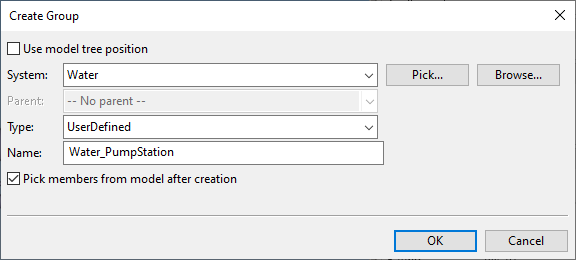
In the Model Tree pane, right-click the model tree and select Groups > Create group. The Create Group dialog opens.
-
Define the group's properties:
-
System – Select Water.
-
Type – Select UserDefined.
-
Name – Type 'Water_PumpStation'.
-
Select Pick members from model after creation.
-
-
Click OK.
-
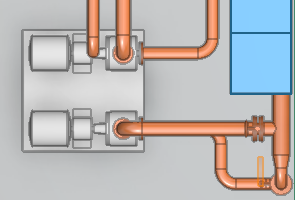
Select the members of the group:
-
Pick two pumps and their base.
-
Press Enter to accept the set of objects.
The group is now defined, and you can use it for object selection as described below.
-
Using a group to select objects
In this example, we use the 'Water_PumpStation' group to pick objects for a move operation.
Do the following:
-
On the Home tab, click Move. You are prompted to pick the objects to be moved.
-
Right-click the work view and select Select by group.
-
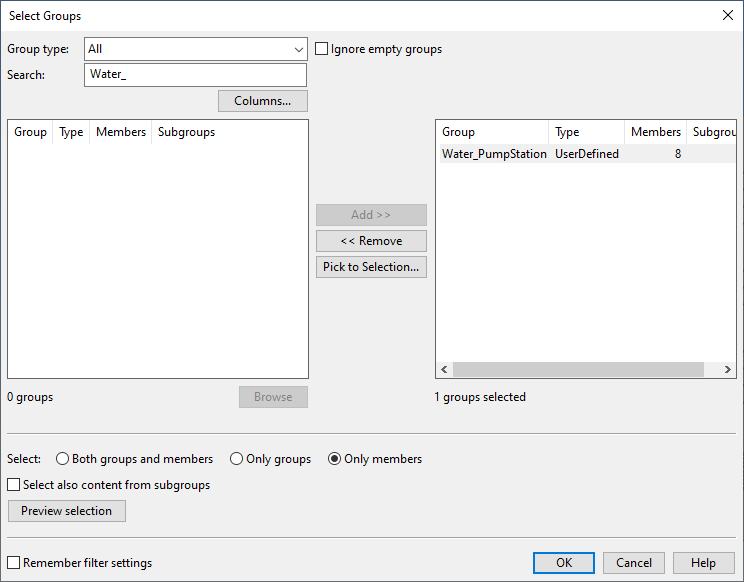
In the Select Groups dialog, start typing "water_" in the Search field. The search pattern is not case-sensitive, and the program starts to filter the group list as you type.
-
Select the 'Water_PumpStation' group and click Add.
-
You can set the Select option to Only members, although in this case the active command (Move) does not apply to the group anyway. Setting this option correctly is important when the active command is applicable to both groups and group members—for example, when you want to delete the members but not the group (or the other way round).
-
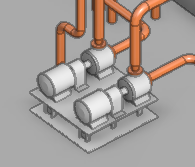
Click OK. The objects of the group are highlighted in the model.
-
Press Enter to accept the set of objects. You can now move the objects as a group.
Adding a group to a query
In this example, we add the 'Water_PumpStation' group to a private query, so that the query could be used to pick objects for a move operation.
Do the following:
-
On the Home tab, in the Information group, click Find.
-
Set Search method to Private query.
-
Click New to create the query.
-
In the Edit Query 'New' dialog, select all object types to be included in the query and click New to define the selection test.
-
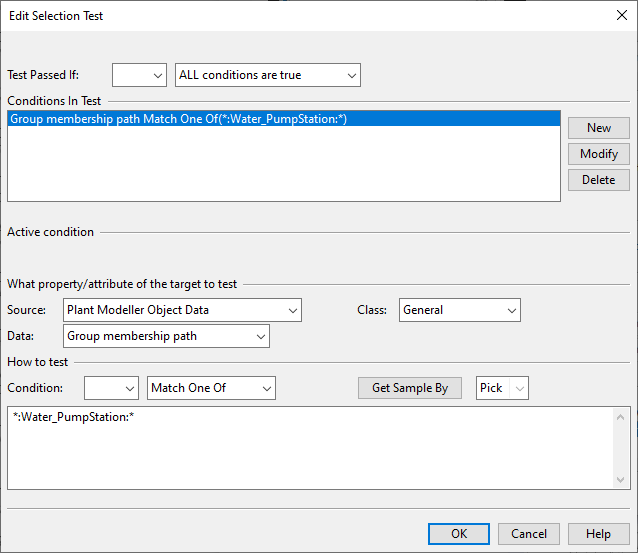
In the Edit Selection Test dialog, create a selection test that checks the condition Group membership path Match One Of(*:Water_PumpStation:*), and click New and then OK.
-
Save the query as Water_PumpStation.qsr and close the query editor.
-
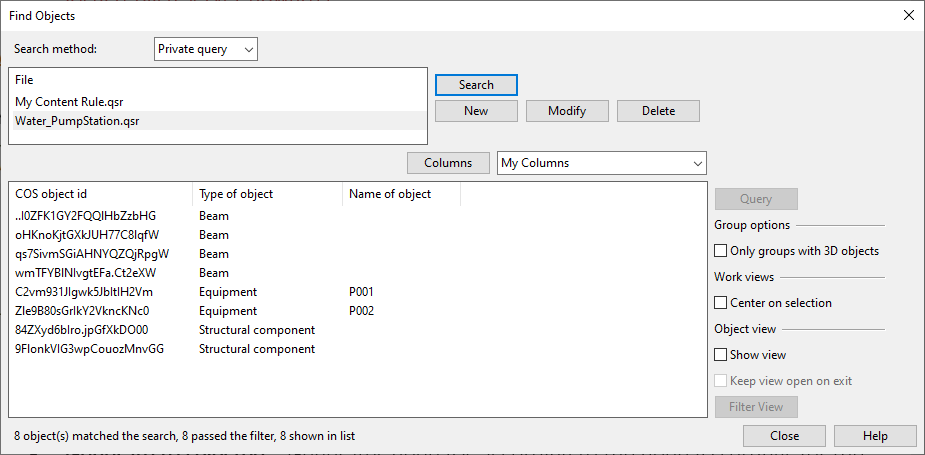
In the Find Objects dialog, select the query from the list and click Search to test that the query finds the objects of the group. Then close the dialog.
-
You can now use the stored query in contexts where you want to pick the objects of the group.
Using a query to select objects
In this example, we use the Water_PumpStation.qsr query to pick objects for a move operation.
Do the following:
-
On the Home tab, click Move. You are prompted to pick the objects to be moved.
-
Right-click the work view and select Queries > Execute Private Query.
-
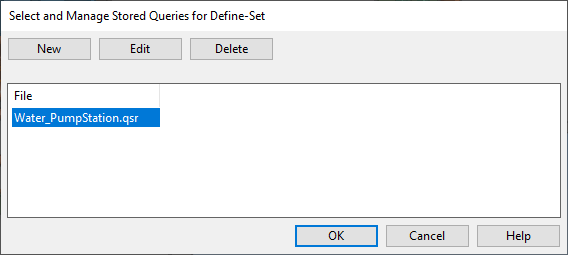
Select Water_PumpStation.qsr from the list.
-
Click OK. The objects of the group are highlighted in the model.
-
Press Enter to accept the set of objects. You can now move the objects as a group.
Copying group members into a new group
You can create one or more copies of a group of objects by copying the group members and assigning them to a new group. Using the Copy command directly on model objects that belong to a group can, depending on group type, result in the objects being assigned to no group at all, to the original group, or to a new group whose name is requested from the user (which is what you usually want in this case).
Using the Copy command with the Select by… Group (G) selection method, you can copy all the members of a group and assign the new objects to a new group. You can use this, for example, to copy the members of a user-defined 'Aggregate' group into a new group.
In this example, we make a copy of the members of the 'Water_PumpStation' group and put the new objects in a new group.
Do the following:
-
On the Home tab, in the Sets group, click Copy.
-
Press G or select Select by group from the context menu. The Select Groups dialog opens.
-
Find the group 'Water_Pumpstation', add it to the right pane, select the option Both groups and members, and click OK.
-
The Select Groups dialog is closed, press Enter to accept the selection.
-
Specify the direction for the copying.
-
Specify how many copies to create and the distance between the copies, and click OK.
-
You are prompted to specify a name for the new group. Type the new name and click OK.
-
You are prompted to specify a position ID for the new pumps. For each new pump, type the new ID and click OK.
-
The new pumping station is now in the model and assigned to a different group than the original pumping station. You can, for example, use the Move command with the Select by… Group (G) selection method to select the new group and move the new pumping station to its designated place in the model.