Document
On the Weld tab, the Document group includes the following tools.
Edit

You can create a weld document for the active weld group if the document does not exist yet, or open the existing document for editing. This enables the weld-specific drawing functions described in Welds.
Note: Although you can use the standard Plant Modeller Document browser to manage weld documents (browse, regenerate, publish, and so on), opening a weld document from the document browser does not enable the weld-specific drawing functions.
Prerequisites
-
The project administrator has defined Weld Drawing settings for the project.
Do the following:
-
Select the required Logistic 3D space and Weld group.
-
Select Weld tab > Document group > Edit.
-
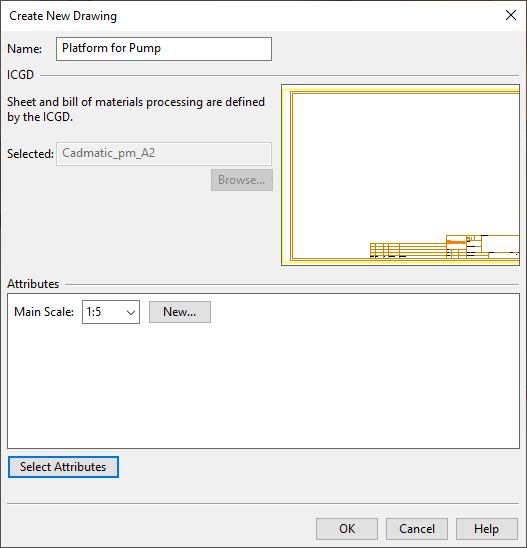
If the weld document does not exist yet, the Create New Drawing dialog opens.
Specify the properties for the new document:
-
Name – Enter a descriptive name for the document.
-
Attributes – By default, a new document has attributes defined as Recommended in the 'Drawing' COS object. You can click Select Attributes to add or remove attributes.
Specify a value for each included attribute.
Then click OK.
-
-
The weld document opens in the Document editor, displaying one drawing view named 'Plan_view'; for more details on this view type, see Create plan view. You can use the standard editing tools and the weld drawing-specific editing tools described in Welds to edit the document.
-
Save and close the document. The document editor closes and the Weld tab re-appears.
Export

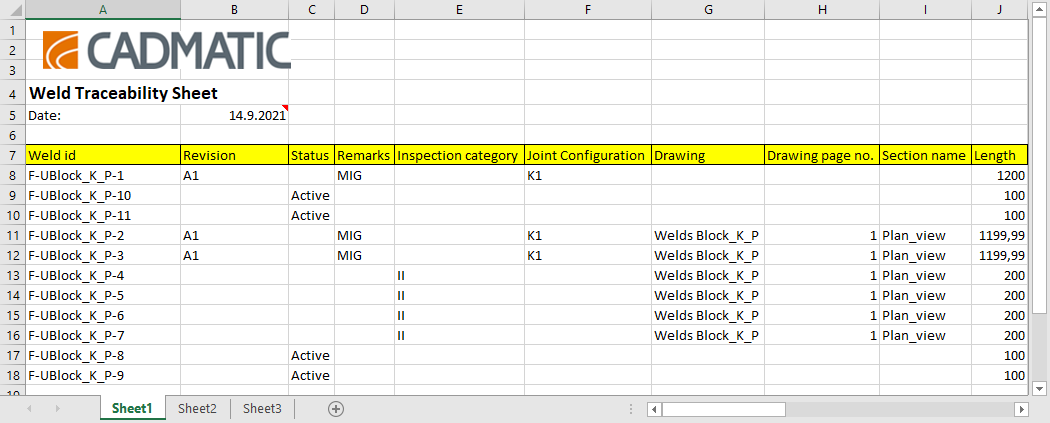
You can export a weld report into a Microsoft Excel (.xlsx) workbook.
Prerequisites
-
The project administrator has defined an ICGD that generates a Microsoft Excel file. See ICGDs.
Do the following:
-
Optionally, open the Weld List dialog and use it for selecting the welds to include in the report. For details, see List.
-
Select Weld tab > Document group > Export.
-
If not using the Weld List to select the welds, select the welds now from the 3D model. You can, for example, use the context-menu command Select by type to select all welds in the project. Then, press Enter to confirm the selection.
-
In the ICGD for Weld Excel Report dialog, select the ICGD to use, and click OK.
-
In the Select Folder and Filename for the New Report dialog, specify the filename and saving location, and click Save.
-
The program generates and displays the weld report.