Take SQL Server project management into use
Before you implement project management, log into the workstation with the username that you defined as the main user for the SQL Server.
Do the following:
-
Start CADMATIC Electrical.
-
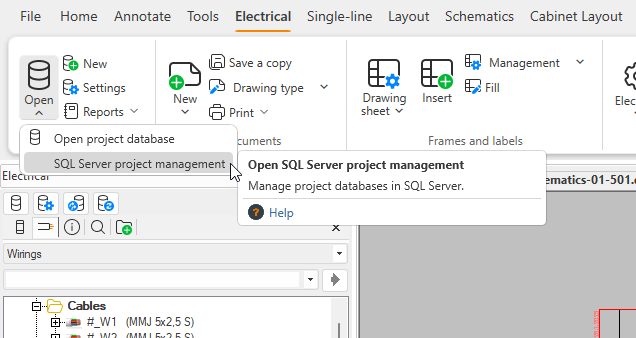
Select Electrical tab > Projects group > Open menu > SQL Server project management.
When you start the project management for the first time, the program asks you about the configuration of the database.
-
Click Yes. The New Database dialog opens.
-
In the Server field, enter the name of the server in the same way you did when connecting to the SQL Server database, i.e. the server, server and instance, or server and port as follows:
-
If the instance uses the default port 1433, enter the name of the server only, e.g. SERVER01.
-
If the instance uses a static port other than 1433, enter the name in the format [server name],[port], e.g. SERVER01,1910.
-
If you did not define a port at all or you defined a dynamic port, enter both the server name and the instance name in the format [server name]\[instance], e.g. SERVER01\MSSQLSERVER.
In this example, the instance uses the default port 1433 so the connection will be made with the server name SERVER01.
-
-
Test the connection by clicking Test. If the database connects, the Testing database connection dialog opens and informs you of the success of the connection.
-
Click Yes. The Update / create database tables dialog opens.
-
For Database type, select SQLServer.
-
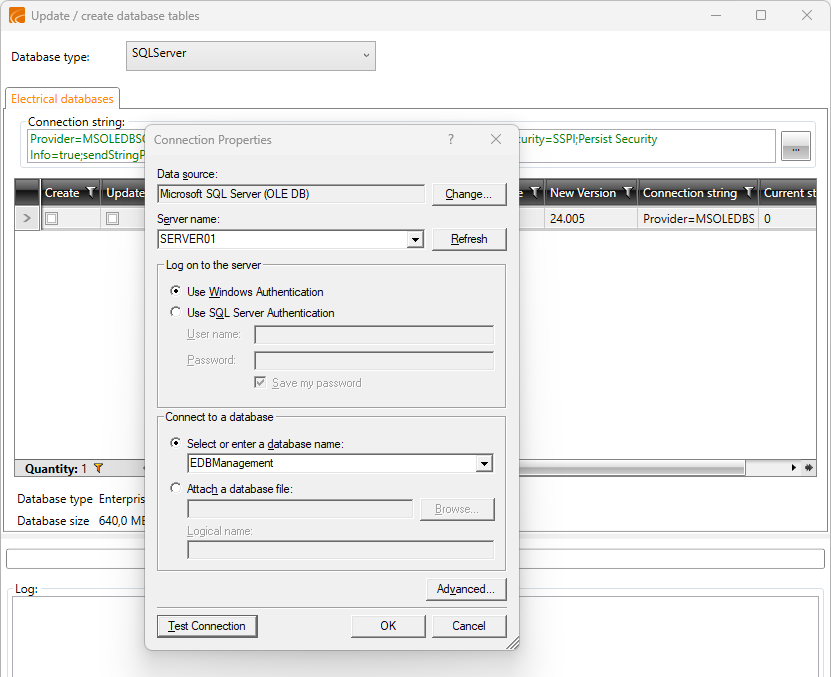
Next to Connection string, click the
 button. The Connection Properties dialog opens.
 -
In the Server name field, enter the server name as before, i.e. the server, server and instance, or server and port. In this example, only the server name SERVER01 is used.
-
For Select or enter a database name, select the management database. In this example, the management database is called EDBManagement.
-
Click OK.
-
In the table's Create column, click the checkbox to select it.
-
Click Update / create database tables. The program informs you of a successful creation.
-
Click OK.
-
Click Close.
-
Close the New database dialog by clicking OK. The program informs you of the folders where the other users have to save their files so that they can start using the shared files.
-
Click OK. The SQL Server project management dialog opens.
Next, create the project database structure.