In import definitions, you link columns in the source (e.g. Excel file) to the columns in the target table.
For example, if you import I/Os to the project, you can define from which source file column the device to be created gets the channel number. The I/O card information needs to be linked in the I/O table but more specific I/O card information needs to be linked in the I/O Cards table. Furthermore, in the Devices table, you need to link the location but more specific location information (e.g. description) needs to be linked in the Locations table. The same logic is applied to the following:
-
Device + circuit
-
Device + plate
-
Device + hierarchy
-
Cable + plate
-
I/O + circuit
Create import definitions as follows:
-
Select Functions tab > Import menu > Import definition management. The Import definition management dialog opens.
 Show/hide details
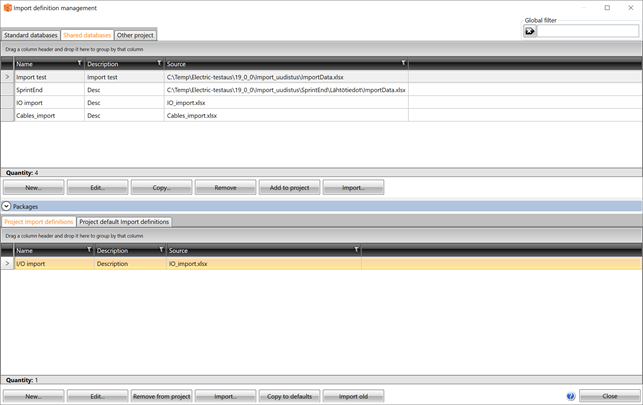
There are three tabs in the upper part of the dialog:
-
Standard databases is a read only database. The import definitions come with the program and overwritten whenever the program is upgraded. You can share import definitions to the shared database.
-
Shared databases is a shareable and modifiable database, to which all new and modified import definitions are saved.
-
Other project enables importing import definitions from another project database. You can also easily move definitions to the shared databases by right-clicking and selecting Add to shared database.
There are two tabs in the lower part of the dialog:
-
Project import definitions – You can edit these definitions.
-
Import – Import project data according to the import definition.
-
Copy to defaults – Copy the selected definitions to the project defaults.
-
Import old – Import definitions from the 18 version (or older) to the current version.
-
-
Project default import definitions – These definitions are automatically used for new projects.
For more information on this user interface, see Management tools.
-
-
Click New. The New import definition dialog opens.
-
Browse to the source file by clicking the
 button. The source file type can be one of the following:
-
.xsl, .xslx, .xlsm, .xlsb, .xlt,.xltx, .xltm
-
.mdb, .accdb
-
.xml
Note: The path added to the Source field is absolute, and you can edit it. If you define the path as Input data\IO_import.xlsx, for example, the file is looked for in the sub-directory Input data. Sub-directories are useful, if the project is moved to a different computer or server – the import definitions are then looked for in the sub-directory instead of the project directory.
The file name is automatically added into the Name field.
-
-
If necessary, edit the name. The name has to be unique; two definitions cannot have the same name.
-
If you want, add a description in the Description field.
-
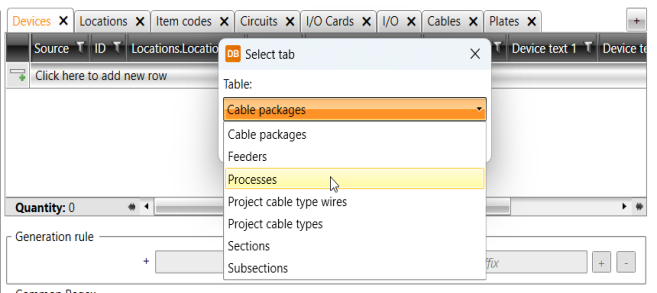
With the
 button, you can select more tables.
 -
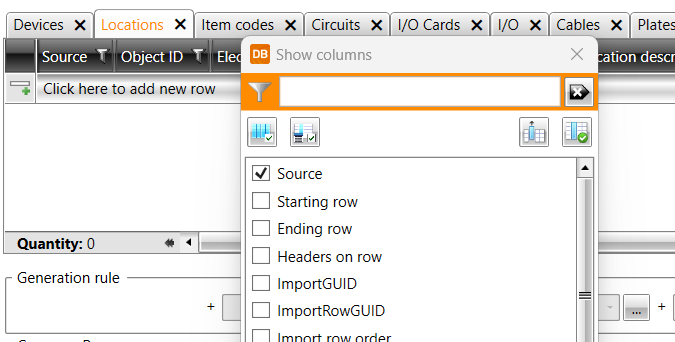
By right-clicking on the header row and selecting Show columns, you can select the columns you want shown in the table.
-
By right-clicking the column header and selecting Additional information, you can select the desired additional columns to the table.
-
By right-clicking the column header and selecting Hide column, you can hide an individual column from the table.
-
After you have selected the desired columns you can copy them to the clipboard by right-clicking and selecting Copy column header/s to the clipboard. After that you can select whether to copy the selected column or all columns.
Tip: You can easily paste the column headers from the clipboard to the Excel file, to have the same column headers in both the source file and the import definition.
-
Link the source to the target by dragging the desired column from the source table to the target table. For example, if you are creating an import definition for I/Os, drag and drop the desired column (e.g. I/O tag) from the Source table to the corresponding column (e.g. Tag name) in the target table.
The link created means that the I/O created in the import will get its tag name from the column I/O TAG.
Note: The option Column headers on row is on by default and the link text is based on the first row. If you remove the check mark, the link is based on the column letter (e.g. $A$).
You can drag several source columns to one column in the target table. After that, you can edit the link by adding standard characters. In the next image, three columns have been dragged from the source and separated with hyphens:

-
If you want to link data from different columns or sheets in an Excel file, create more rows in the target table and drag the columns as described.
-
Save the changes by clicking the button. Alternatively, start the import by clicking Import. The program then asks whether you want to save the definitions.
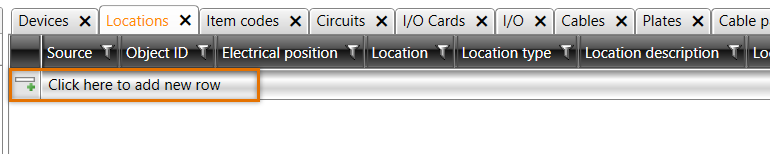
The data from the file you selected is shown in the Source table. The project database tables and the columns to which the source columns are linked are shown in the table next to the Source table.
You can use the ![]() button to refresh the data from the source, in case the file has been modified during the creation/modification of the import definition.
button to refresh the data from the source, in case the file has been modified during the creation/modification of the import definition.

Note: If you rename sheets in the Excel file, you need to manually change them in the Source column in the target table.
The source table colors show how columns are linked:
-
Yellow – linking has been made to the active target table.
-
Green – linking has been made to another target table.
-
White – the column has not been linked.

If a column linked in the import definition is removed from the source Excel file, the link is highlighted with red in the target table.
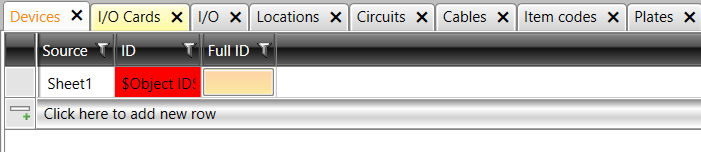
Remove an unnecessary link by clearing the cell marked with red. Alternatively, add the column to the Excel file again.