Sheet Drawing
Home > Create > Sheet

Opens the sheet drawing environment where you can create and modify sheet drawings. A sheet drawing is a drawing that contains user-selected views. A sheet drawing also contains a title field showing various types of user-defined information, and a revision table containing revision information.
Note: The sheet can also be published as a zero revision, an initial version of a document without a revision marker. The zero revision marker will be used if no revision is set or an existing revision has not been re-saved in Hull COS.
In the sheet drawing environment you can:
- Open and save and print sheet drawings. See Drawing functions: Blank, Open, Save, Plot.
- Create new sheet drawings. See Creating a new sheet.
- Edit existing sheet drawings by inserting and replacing views in them. See Inserting views into a sheet and Replacing views in a sheet.
- Modify details within the views in sheet drawings. See Modifying a sheet drawing.
- Show and hide details within the views in sheet drawings. See Showing and hiding items in views with object control.
- Fill in and edit the title field and revision table in a sheet drawing. The title field and the revision table help to keep track of the changes made in the sheet drawing and the review process of the sheet drawing. See Editing the title field and adding or editing revisions.
You can close the sheet drawing environment by clicking Close.

Drawing functions: Blank, Open, Save, Plot
The Drawing group of the Sheet ribbon contains the following functions:
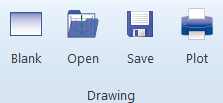
- Blank – Opens a blank drawing.
- Open – Opens the Open dialog where you can select a sheet drawing. Select Sheet in the View list to see all the available sheet drawings.
- Save – Saves the sheet drawing.
- Plot – Opens the Plot dialog where you can change you printing settings for your sheet drawing and print the sheet drawing.
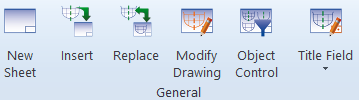
Sheet functions
The General group of the Sheet ribbon contains the following functions to create and modify sheet drawings:
Creating a new sheet
Do the following:
-
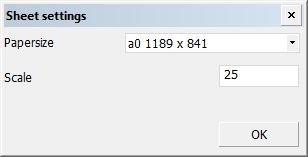
Select New Sheet. The Sheet settings dialog opens.
-
Select the paper size and scale.
The available sizes are set in System Management > Drawings > Sheet Drawings > Sizes.
-
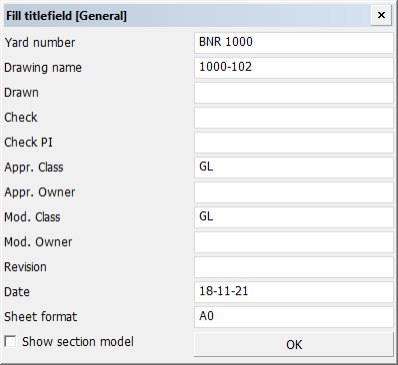
Click OK. The Fill titlefield dialog opens.
The fields shown in this dialog are defined in System Management > Drawings > Sheet Drawings > Titlefield Layout.
- Enter the desired title field information.
-
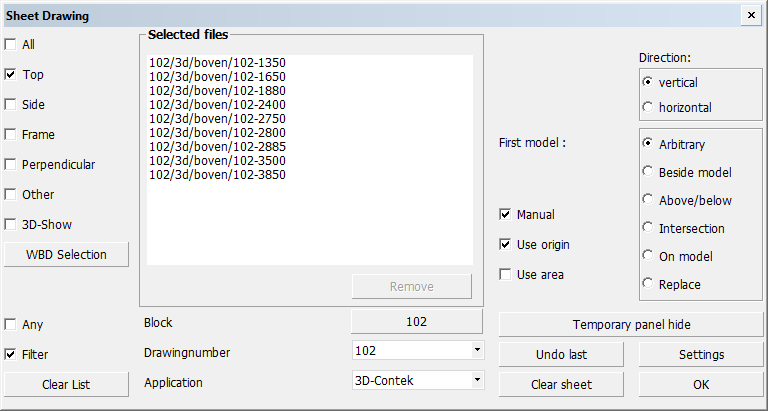
Click OK once you have entered all the desired title field information. The Sheet Drawing dialog opens.
In this dialog you can:
- See all the available views or views by the view type.
- Select views based on Work BreakDown selection.
- Filter which views are shown by drawing number, block number, or application.
- Make the system define the arrangement of the drawings automatically or select to place the views in the sheet manually.
Select the views to include in the sheet drawing one by one. As soon as you select a view, it disappears from the list of the available views and appears in the sheet drawing in the graphical window.
-
If you selected Manual, drag the view to the desired position in the sheet.
- If you did not select Manual, make the selections on the right side of the dialog to adjust the direction and positioning of the view.
- Once you have loaded all the desired views into the sheet drawing, end this function by clicking OK. The system asks if you wish to stop loading views in the sheet drawing. Confirm your decision by clicking Yes or No.
Inserting views into a sheet
You can add more views to an existing sheet drawing.
Do the following:
-
Open a sheet drawing.
-
Select Insert. The Sheet Drawing dialog opens.
-
Select the views to include in the sheet drawing one by one. As soon as you select a view, it disappears from the list of the available views and appears in the sheet drawing in the graphical window.
-
If you selected Manual, place the view on the sheet manually by dragging it.
- If you did not select Manual, make the selections on the right to adjust the direction and positioning of the view.
-
-
Once you have loaded all the desired views into the sheet drawing, end this function by clicking OK. The system asks if you wish to stop loading views in the sheet drawing. Confirm your decision by clicking Yes or No.
Replacing views in a sheet
You can replace views with other views in a sheet drawing.
Do the following:
-
Open a sheet drawing.
-
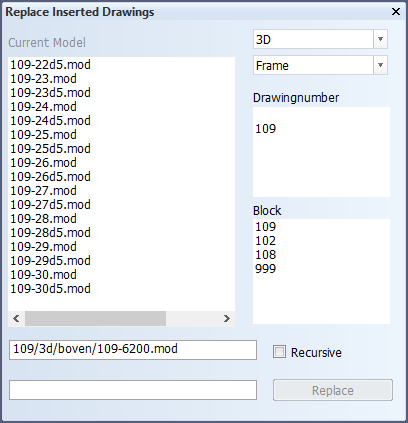
Select Replace. The Replace Inserted Drawings dialog opens.
-
In the , select the view that you wish to have replaced. You can also select the view to replace by indicating it in the sheet in the graphical window.
-
Select from the list the view that you wish to replace the previously selected view with.
-
Click Replace to confirm your selection. End the function and close the dialog box with the X in the top right corner.
Modifying a sheet drawing
You can modify a sheet drawing by adding shapes, labels and dimensions to the views in the sheet drawing.
Note: You can only add items using the functions in the Draw ribbon. You cannot make any changes that affect construction.
Do the following:
-
Open a sheet drawing.
-
Select Modify Drawing. The Select dialog opens.
-
Select the view in the list that you want to modify. The system highlights the selected view in the sheet drawing.
-
Click OK.
-
Add shapes, labels or dimensions by using the functions in the Draw ribbon.
-
Once you have added the desire items, return to the Sheet ribbon. You can either continue using the sheet functions or click Close to quit the sheet drawing environment.

Showing and hiding items in views with object control
With object control you can select which items to show or hide in the views in a sheet drawing.
Do the following:
-
Open a sheet drawing.
-
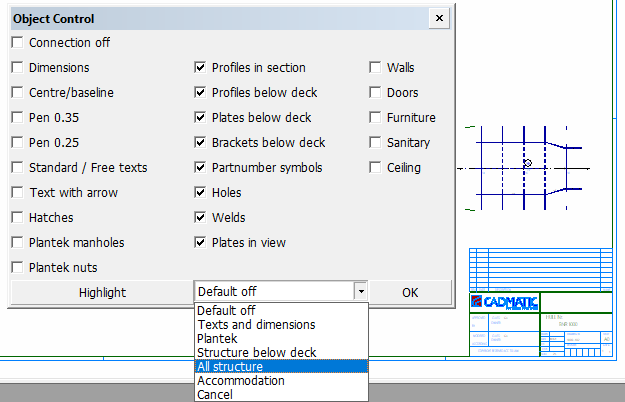
Select the views you wish to modify in the graphical window, and click OK. The Object Control dialog opens.
-
Select the items to show. The drop-down menu contains preset selections. You can check the result of your selections in the sheet drawing by clicking Highlight.
-
Click OK to save the changes.
Editing the title field and adding or editing revisions
You can edit the information in the title field, and add a revision or edit a previous revision. The title field is placed at the bottom right corner of the sheet drawing. The revision table is placed above the title field.
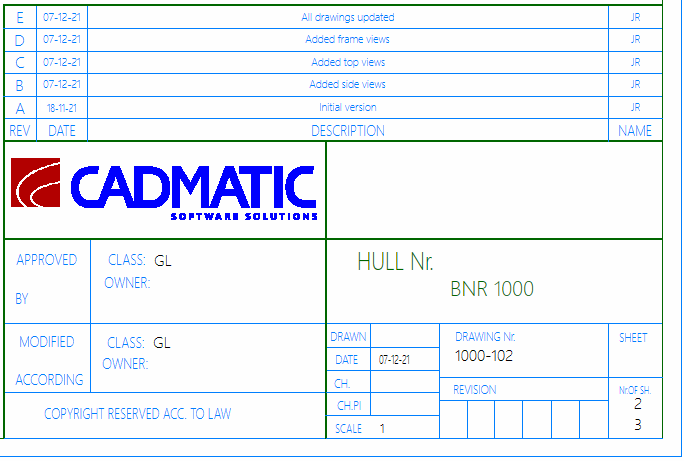
Title field at the bottom, revision table above the title field
The title field layout and text properties can be defined in System Management > Drawings > Sheet Drawings >Titlefield Layout.
Modify or add title field information.
Do the following:
-
Open a sheet drawing.
-
Select Title Field > Change Title Field. The Fill titlefield dialog opens.
-
Modify the current information and/or enter missing information.
-
Click OK to save the changes.
Add a revision or edit the information in a previous revision. The system automatically keeps track of the revisions and suggests a new revision version by default when you start the Revision Table function.
Do the following:
-
Open a sheet drawing.
-
Select Title Field > Revision Table. The Enter Revision dialog opens.
-
You can either add a new revision or edit the information in a previous revision. The preselected Revision version is for a new revision.
-
To add a new revision, keep the preselected Revision version, and enter the information for the new revision as desired.
-
To edit the information of a previous revision, select the version whose information to edit in Revision, and edit the information as desired.
-
-
Click OK to save the changes.

Note: The Enter Revision dialog is described above as it is in the default revision table functionality. The Hull administrator can customize it by defining different input fields and their default values, and even a different name and size for the dialog. The administrator can also define the exact placement of the entered information within the revision table. See Customizing the Revision Table for more information.