Creating reports
To create a report, first you choose the logistical selection menu to be usedfor the report. The logistical selection menu determines which logistical data is included in the report. Then you define the selection criteria for the parts to be included in the report.
Which logistical selection menus are available, and the selection criteria for the parts, is defined in System Management > Logistics > Logistical Selection Menu.
Note: By default, only information about the active block will be included in the report.
Do the following:
-
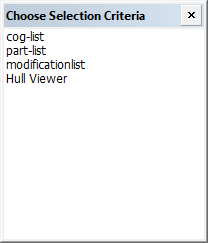
Select the Report > Create Report function in the menu. The Choose Selection Criteria dialog opens. This is where you choose which logistical selection menu is used for the report.
-
Select the desired logistical selection menu. The Create Report dialog opens. This is where you select the parts which will be included in the report.
Note: The content and layout of the Create Report dialog may vary in the different logistical selection menus.
-
Define the part selection criteria by entering a combination of range(s) and/or values in the input fields. The input fields represent logistical properties of the parts. You can use the operators available in the drop-down menu next to each input field to further define the values.
- If an option for selecting by block is available (as in the picture above), the active block number is the default value.
- If the dialog allows selection by date, the current date is the default value.
See Entering combinations and ranges of values for information on how to use the values and ranges, and on the available operators.
-
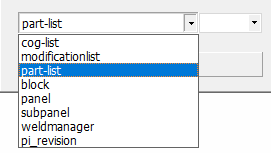
Select the report layout from the drop-down menu at the bottom left of the dialog. The report layout determines how data is presented, for example which data fields should be placed at which positions in the report.
If a report layout by the same name as the selection criterion list exists, it will be the default report layout.
-
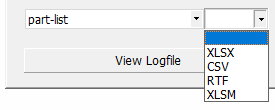
Select the output format from the drop-down menu next to the report layout selection.
XLSX, CSV, RTF, and XLSM are available as output formats.
-
The XLSX format requires that a report layout file for the desired report/list type and a matching Excel report template are present in the report subfolder of the active norms folder %ncgnorms. For example, to generate a part list, a part-list.rpt report layout file and a part-list.xlsx Excel report template file are required. See XLSX format. XLSX report format is used by default if the Excel report template for the selected report type is present in the project norms.
-
The XLSM format (XLSX which allows VBA code) is only available if the report.xlsm template file is present in the %ncghelps%\xls folder. Also the report.cmd file must be present in the folder. These files with the default content are included in the CADMATIC Hull installation. See XLSM format.
-
-
Select the action(s) that you want to perform:
Create and View New Report – Create a report with the current selections and view it. The information is presented in the selected report layout.
- See Logistical Selection Menu for more information on creating a report layout.
- See Creating selection menus for more information on creating selection panels.
View Current Report – Use this drop-down menu to display reports that have already been created.
View Logfile – View the error messages (if any) generated when the report was created.
Setup & Print Current Report – Print the current report. Select the print settings such as the font name and size.
Print Current Report – Print the current report immediately using the default printer.
Note: Select Unicode (UTF-8) as the Codepage language if the report contains Unicode text. This will ensure that non-Latin-alphabet text is displayed properly in the report.