Draw pipe runs
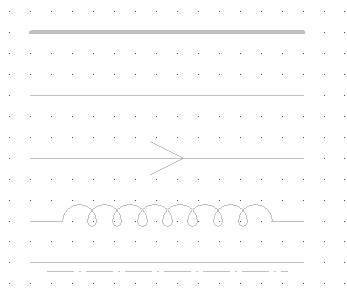
Simple line (solid line) is the most common pipe run type. There are two different solid lines, thin and thick one. The thick one is used most to show the primary pipelines in the diagram.
The line with flow arrows is an extension of the simple line. The flow direction is marked with arrows. The flow direction will initially be the same as your routing direction, but it can be changed.
There are also special types of pipe runs like hose, tubing, insulated piping and traced piping.
How to draw pipe runs
- Select the line type from the Template Pane.
- Pick the start point of the pipe run. Enable Ortho to ensure straight lines.
- Pick route points. You can undo the previous segment with Undo (U).
- After picking the last point of the pipe run, press Enter to complete the line.
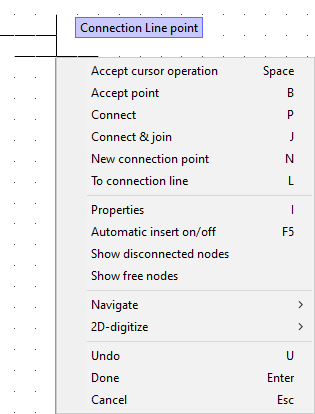
Note: You can open the right-click context menu during routing to see the available commands and their shortcut keys.
Using assisted routing to draw lines between diagram objects
When drawing a line for a pipe run or instrument line, or for a cable from one piece of equipment to another, you can use assisted routing to draw the line with two clicks.
You can use assisted routing when the connection node you select as the starting point has a known direction, but of course also the target node should have a suitable direction. You can specify node's direction by selecting Home tab > Node group > Modify and then the node.
Assisted routing works also when you have selected several points from the beginning of the route—then the route is calculated from the last selected point to the possible end connection currently under the cursor.
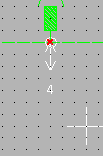
In the example below, the user selects two points and assisted routing proposes a route for the cable between them.

Defining points
There are the following alternatives to define the points of a pipe run:
- Create a free node.
- Join to the end of existing pipe run.
- Connect to an existing connection point of some object. Connection points are shown with a symbol and node number when appropriate command is active. The pipe run is automatically connected to the selected point.
- Make a branch.
- Create a new connection point to an existing object.
Creating a new connection point
You can connect the connection line you are inserting to an existing connection line.
- SeleMove the cursor to the intended location of the connection point.
- Click New connection point or press N.
- If a wrong object is highlighted, click No until the correct object is highlighted.
- Click Yes to confirm. A new connection point is created and the pipe run is connected to it.
Making a branch
You can make branches to existing pipe runs when you are drawing new ones. You can start with a branch or finish the pipe run with a branch.
- Move the pointer to the start point of the pipe run and select To connection line (L).
- Accept the highlighted object where the branch will be made.
- Route the pipe run and finish with Enter.
- If the selected pipe run does not belong to the active pipeline, you are asked which pipeline to use.
- Next question "OK to split line?" means that the existing pipe run is to be divided into two pieces. If divided then different pipelines can be used for these two parts. Usually click No.
- The branch is shown with Connection Point Symbol.
If you want to finish the pipe run with a branch, you don't have to end the pipe run because the last point is automatically connected to the main run when making the branch.