Penetration list in Cable Manager
When Penetrations is selected in the Category tree in Cable Manager, the middle pane shows a list of cable penetrations and the command pane shows tools for managing the penetrations.
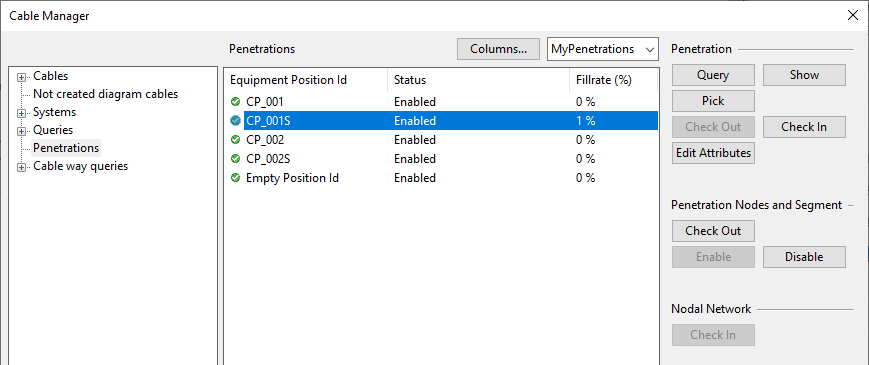
Penetration list columns
The penetration list shows the checkout status of each penetration as an icon.
By default, the columns of the penetration list show the Equipment Position Id and fill rate, and whether the penetration is enabled or disabled for cable routing.
You can click Columns to select which columns to show in the list. You can create one or more custom column layouts for different purposes.
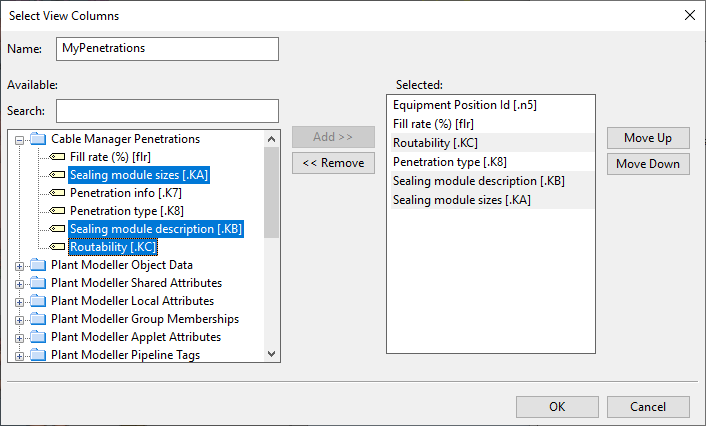
Examples:
-
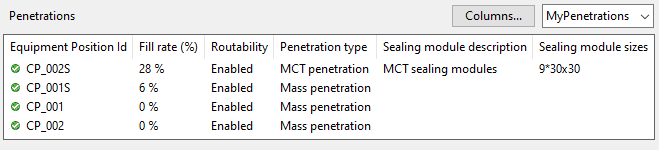
In the Cable Manager Penetrations section of the column editor, you can add the columns "Penetration type" (.K8), "Sealing module description" (.KB), and "Sealing module sizes" (.KA) to see information on sealing modules.
Penetration tools
You can select one or more penetrations from the penetration list to highlight them in the work views and to manage them with the following tools.
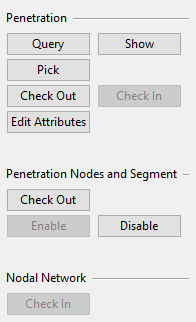
-
Query – Opens the Object properties dialog for the selected penetration.
-
Show – Shows where the selected penetration is in the model. Press Esc to return to the Cable Manager dialog.
-
Pick – Allows picking a single penetration from the model and then highlights this penetration in the penetration list.
-
Check Out – You must check out a penetration if you want to edit its attributes.
-
Check In – Check in a penetration after editing its attributes.
-
Edit Attributes – Opens a dialog where you can select which attributes to include in the selected penetrations and define their values. To remove an existing attribute from a penetration, clear the attribute value.
-
Check Out – Checks out the nodes and the segment of the selected penetrations. You must do this if you want to enable or disable a penetration.
-
Enable – Enables the nodes and the segment of the selected penetrations. If both the nodes and the segment are enabled, the penetration is set as enabled and it can be used in cable routing.
-
Disable – Disables the first node of the selected penetrations. If either of the two nodes or the segment is disabled, the penetration is disabled and cannot be used in cable routing.
-
Check In – Checks in all the nodes and segments of the cable routing network.