Excel Export Plus

The Excel Export Plus feature enables Plant Modeller to generate material lists, cutting lists, and other kinds of lists in Microsoft Excel format. There is one default report profile that you can use to generate a sample report. In the generated report, you can access tools that allow creating customized reports for different purposes. For information on how to configure and customize reports, see Excel Export Plus settings.
Prerequisites
To use the Excel Export Plus function, your environment must meet the following requirements.
-
CADMATIC License Server has licenses for Excel Export Plus.
-
Your CADMATIC Plant/Outfitting installation includes the optional Excel Export Plus module.
-
Your computer has 'Microsoft Excel with Visual Basic for Application (VBA)' installed.
-
Microsoft Excel has been set up to allow the execution of macros.
-
To use eBrowser integration, the 32-bit version of eBrowser must be installed in the same computer as Plant Modeller, and an eBrowser model must be published from the project.
Generating a report
You can use the Excel Export Plus function to generate a report in Microsoft Excel format.
Do the following:
-
Select Documents tab > Custom group > ExcelExportPlus. The Excel Export Plus dialog opens.

-
In the Report Profile field, select the report profile to use. A report profile is a text file with an .rpp file name extension and it describes the report format. Typically, you have a profile for each different type of report that you want to generate. If custom profiles do not exist yet or you want to create a new custom report, select the default profile.
-
The report profile includes an object filter that defines what kind of parts can be included in the report. For example, to create a beam list you might want to define a filter that only includes objects whose type is Beam, so that no other type of part will be included. To review or change the filter settings, click Edit Filter.
For details on how to edit the filter query, see Advanced queries.
-
Next, select the parts to include in the report. Click Define set, use a suitable view to select the appropriate parts, and accept the selection by pressing Enter.
For details on how to select objects, see Object selection context menu.
-
You can click Show set to see a 3D view of the included objects.
-
In the Report Name field, enter a name for the report file. By default, the name uses the format 'Report_<project name>'.
-
Click Generate. The system generates the report file and opens it in Microsoft Excel.
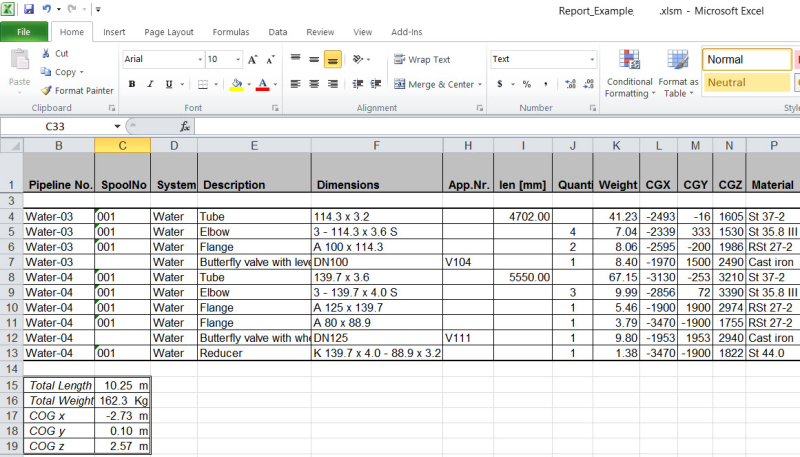
Example reports
Example report with standard formatting:
Example report with a customized header block:

eBrowser integration
A report generated with Excel Export Plus can interact with an eBrowser model as follows:
-
When the report is linked to an eBrowser model, eBrowser is embedded to a separate sheet of the Excel file.
-
Double-clicking a row in a data sheet of the Excel file opens the eBrowser sheet and displays the respective object.
-
Right-clicking an object in the eBrowser sheet of the Excel file and selecting Find Object in Report opens the relevant data sheet and highlights the respective data row.
You can link the report file to an eBrowser model from the CADMATIC Menu, as described in Excel Export Plus settings.