Tools
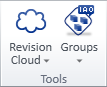
On the Drafting tab, the Tools group includes the following tools.
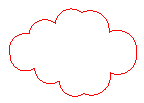
Revision cloud
Use revision clouds in drawings to indicate where design changes have been made. After drawing the cloud shape, you can add an arrow symbol that points to the revision cloud and displays the revision number. Revision clouds and arrows have the properties described in Revision Cloud Properties.
You can modify existing revision clouds with the generic tools described in Modify. The cloud shape is edited as a polyline object. The arrow is a 2D symbol whose properties you can change via the Parameters context-menu command.
Note: You cannot use Modify > Properties > Apply properties (see Objects in a set) to apply current default properties to existing revision clouds or revision arrows.
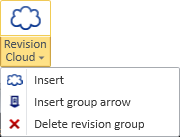
Insert | Insert group arrow | Delete revision group
Insert
You can draw revision clouds.
Do the following:
-
Select Drafting tab > Tools group > Revision cloud > Insert.
-
Pick a suitable number of points to define the boundaries of the revision cloud and press Enter. The revision cloud is created.
-
To draw another revision cloud, press Enter.
Insert group arrow
You can insert an arrow symbol that points to a revision cloud, 2D line or rectangle and identifies the revision with a text string. The text string should follow the revision numbering policy that your environment is using—see Document revisioning.
![]()
Inserting a group arrow creates a revision group named after the revision text and adds the drafting object to that group. All revision groups belong to a group type called "Cadmatic Revision". Group types and groups can be managed as described in Groups.
Prerequisites
-
Optionally, administrator has defined a custom symbol for the group arrow, as described in Custom revision group arrow.
Do the following:
-
Select Drafting tab > Tools group > Revision cloud > Insert group arrow.
-
Pick the revision cloud or the line/rectangle that you want the arrow to point to. The Input text for revision group arrow dialog opens.
-
Type the revision information to display on the arrow symbol and click OK.
-
Move the arrow to the required location and pick that location.
-
To add another revision group arrow, press Enter.
Delete revision group
You can delete a revision cloud that has a revision group arrow.
Tip: If you want to delete just the group arrow, or if you want to delete a revision cloud that does not have a group arrow, use the generic Delete tool for it.
Do the following:
-
Select Drafting tab > Tools group > Revision cloud > Delete
-
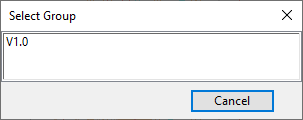
Select the revision cloud group to delete.
Groups
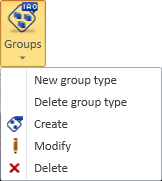
In 2D drafting, a group allows a set of drafting objects to be managed as a single unit. You can create new group types and assign drafting objects to groups of a specific type. There are also some predefined group types that are used when you create specific kinds of drafting objects: Revision cloud objects that have a revision group arrow are automatically in a group type called "Cadmatic Revision"; Annotate are automatically in a group type called "SectionMarker"; manually inserted Grid lines are automatically in a group type called "ManualRefLineGroups".
New group type | Delete group type | Create | Modify | Delete
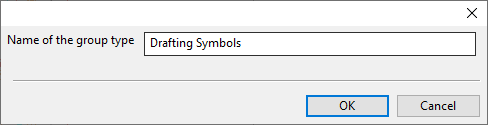
New group type
You must create at least one group type before you can create groups.
Do the following:
-
Select Drafting tab > Tools group > Groups > New group type. A dialog opens for defining the group type's name.
-
Enter a descriptive name for the group type to create and click OK.
You can now create groups that use this group type.
Delete group type
You can delete a user-defined group type. The group type to delete can contain groups if they are empty.
Prerequisites
-
If the group type to delete contains groups with objects, remove the objects with the Modify tool.
Do the following:
-
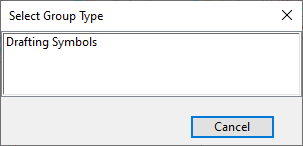
Select Drafting tab > Tools group > Groups > Delete group type. The Select Group Type dialog opens.
-
Select the group type to delete.
-
To delete another group type, press Enter.
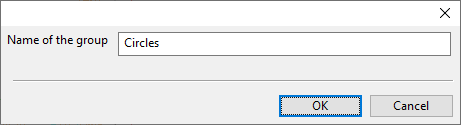
Create
You can create new groups. All groups must belong to a group type.
Prerequisites
-
A group type exists for the group to be created.
Do the following:
-
Select Drafting tab > Tools group > Groups > Create. The Select Group Type dialog opens.
-
Select the group type to use. A dialog opens for defining the group's name.
-
Enter a descriptive name for the group and click OK.
-
Pick the objects to include in this group and press Enter.
-
To create another group, press Enter.
Modify
You can change the contents of a group.
Do the following:
-
Select Drafting tab > Tools group > Groups > Modify. The Select Group Type dialog opens.
-
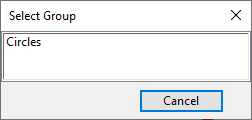
Select the group type to modify. The Select Group dialog opens.
-
Select the group to modify.
-
Pick the objects you want to add to the group or remove from it, and then press Enter to accept the changes.
-
To modify another group, press Enter.
Delete
You can delete an empty group.
Prerequisites
-
If the group to delete contains objects, remove the objects with the Modify tool.
Do the following:
-
Select Drafting tab > Tools group > Groups > Delete. The Select Group Type dialog opens.
-
Select the group type from which to delete a group. The Select Group dialog opens.
-
Select the group to delete.
-
To delete another group, press Enter.
Barcode

You can insert and modify 2D barcodes in the
You can modify existing barcodes also using the generic Modify tools, except their type and content can only be modified with the 'edit content' barcode tool.
Note: In DWG export, barcodes within the
Insert | Edit content | Rescale | Move | Delete
Insert
You can insert new barcodes into the
Do the following:
-
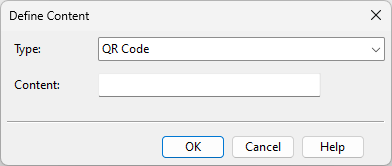
Select Drafting tab > Tools group > Barcode > Insert. The Define Content dialog opens.
-
Specify the barcode settings.
-
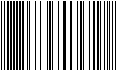
Type – Select the barcode type:
 Show/hide details
QR Code

Data Matrix
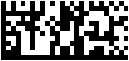
Code 39

Code 93
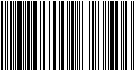
Code 128
Aztec

-
Content – Enter the text string to include in the barcode.
-
-
Click OK.
Edit content
You can change the barcode type and edit the content of barcodes in the
Do the following:
-
Select Drafting tab > Tools group > Barcode > Edit content.
-
Select the barcode to edit. The Define Content dialog opens.
-
Make the required changes, and click OK.
Rescale
You can rescale barcodes in the
Do the following:
-
Select Drafting tab > Tools group > Barcode > Rescale.
-
Select the barcodes to rescale, and press Enter to confirm the selection.
-
Pick a base point for the rescaling. The Rescale Objects in a Set dialog opens.
-
Enter the scaling value, and click OK.
Move
You can move barcodes to a different location in the
Do the following:
-
Select Drafting tab > Tools group > Barcode > Move.
-
Select the barcodes to move, and press Enter to confirm the selection.
-
Pick a base point for the move.
-
Pick a new location for the base point. You can move the barcodes incrementally by picking a new target point as many times as necessary.
-
Press Enter to confirm the move.
Delete
You can delete barcodes from the
Do the following:
-
Select Drafting tab > Tools group > Barcode > Delete.
-
Select the barcodes to delete.
-
Press Enter to confirm the deletion.