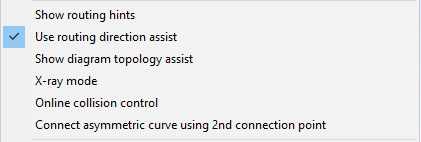
Use routing direction assist
In shaded views, you can use a graphical tool to define the direction of a new pipe segment. If the new segment is connected to a previously inserted pipe part, selecting the direction defines the curve angle of the pipe. After selecting the required direction, define the distance to the next routing point, and complete the pipe segment.
You can enable or disable the tool by selecting Use routing direction assist from the context menu.
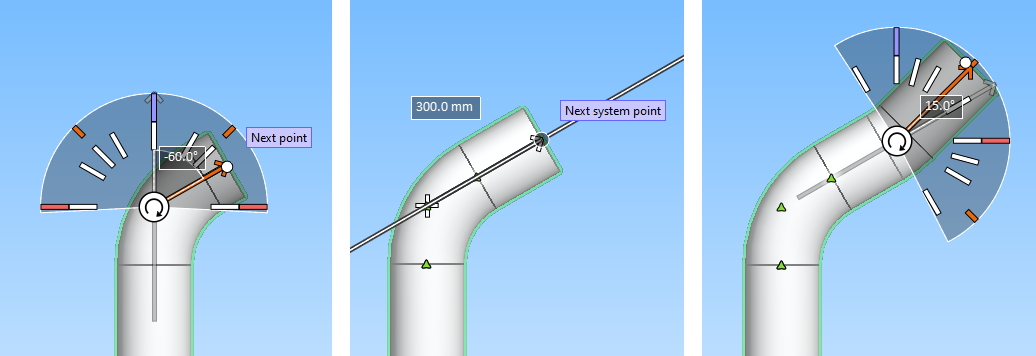
When routing direction assistance is enabled, the start point of a new pipe segment displays a selection tool. Depending on the context, this selection tool has the shape of either a circle or a half-circle. Do the following:
-
Select a routing direction for the new pipe segment from the selection tool.
 Show/hide details
-
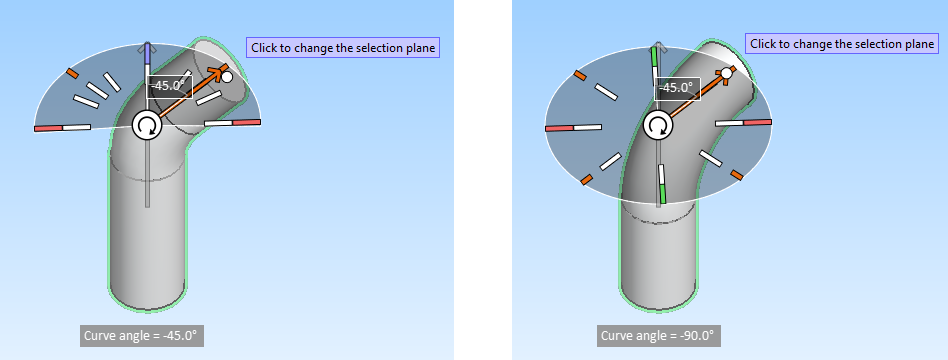
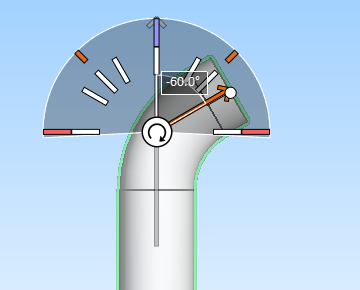
The selection tool can be in the plane XY, YZ, or XZ. Click the arrow icon
 at the center of the tool to switch to a different plane. Depending on the direction of the plane, the selection tool shows either the curve angle from the previous pipe segment or the angle within the selection plane. In both cases, you can see the curve angle from the previous pipe segment in the on-screen messages.
 -
Move the cursor in the empty area of the selection tool to define the direction by clicking any point in the plane.
-
Move the cursor so that it snaps to a line drawn on the selection tool. The lines are color-coded as follows:
- Main axis direction: X (red), Y (green), Z (purple).
- Halfway between main axis directions (orange).
- Fixed direction with a curve angle relative to the previous pipe segment: 0°, 30°, 45°, 60° or 90° (all white).
Snapping to these lines changes the color of the direction arrow to orange.
-
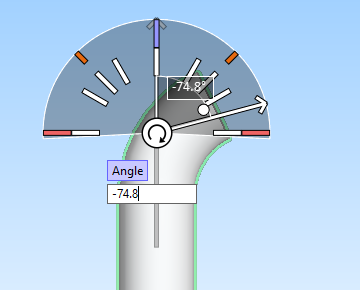
Press Ctrl+Tab to type the angle value, and then press Enter to accept the value.
Note: The angle you select in this tool is ignored if you have defined a fixed angle for flexible curves in the Routing group of the Piping tab. See Routing.
-
-
Select an end point for the new pipe segment.
Show/hide details
-
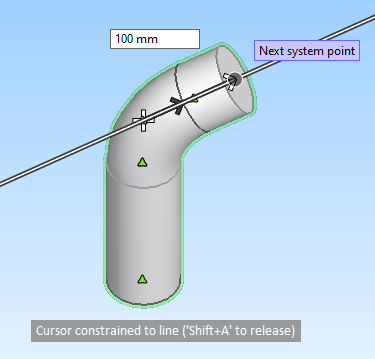
Move the cursor along the direction line, and click the point where the pipe segment should end.
-
Press Ctrl+Tab to type the distance value, and then press Enter to accept the value.
-

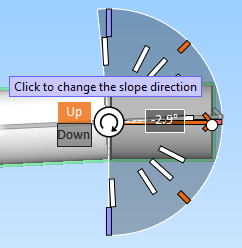
When routing direction assistance is enabled and the pipe you are routing is set to have slope, you can click Up or Down to switch to positive or negative sloping without changing the predefined slope angle. The current slope direction is shown in orange.
In this example, the previous pipe segment has been routed Up with the slope angle set to 1/20. If the user clicks Down, the slope angle of the next pipe segment will be
If routing direction assistance is disabled, the direction can only be changed by selecting a positive or negative slope angle from Pipe routing context menu.