|
|
Single-line tab > Cabinets and feeders group > Management |
|
|
Distribution Board tab > Cabinets and feeders group > Management |
|
|
Layout tab > Cabinets and feeders group > Management |
|
|
Schematics tab > Other functions group > Feeder management |
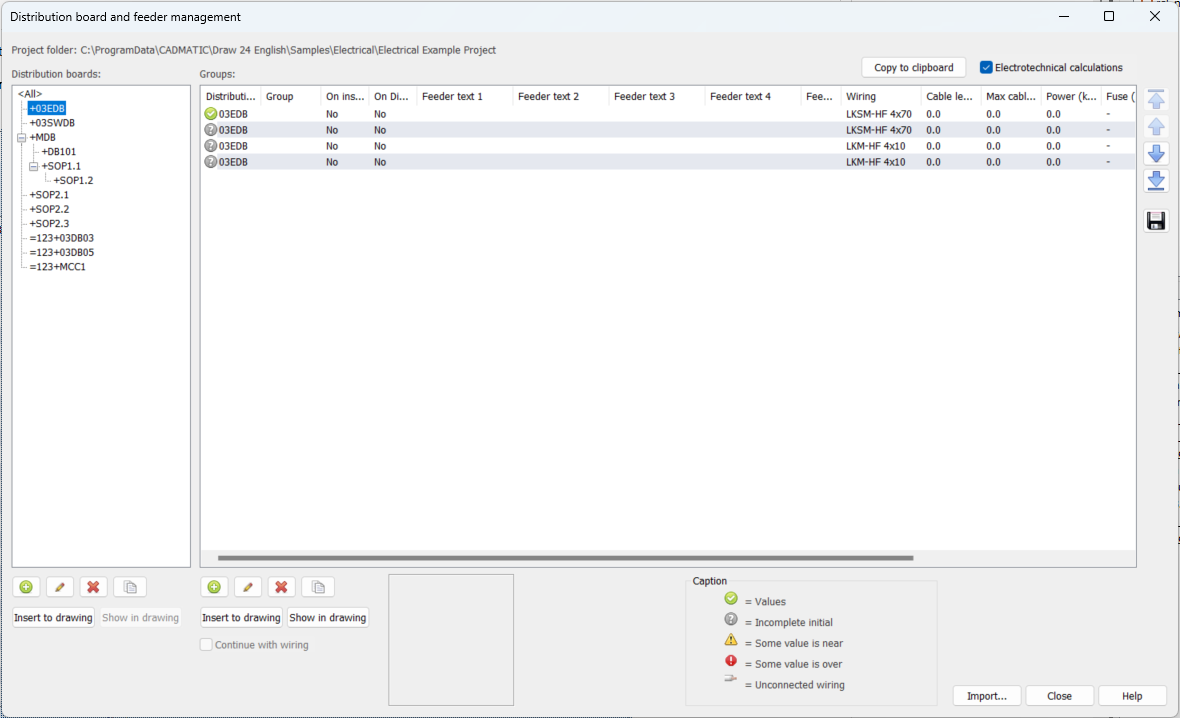
With this function, you can manage distribution boards and feeders in your project. You can also perform electrotechnical calculations by entering the required information.
This function collects all distribution boards and feeders of the project. In the Distribution boards list on the left, distribution boards and their relationships are shown. On the right, the groups in the selected distribution board are shown.

In the Groups grid, the icon in the first column indicates the status of that group. If there is a problem, hover on the row to see more details.

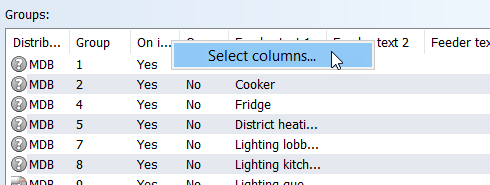
You can select the columns shown in the grid by right-clicking the column header row and selecting Select columns.

Then select the columns you want to show or hide. You cannot hide the Distribution board column.
The last column in the grid is the group order. This order affects, for example, in which order groups will be added to the Distribution Board.
You can change the order of the groups by selecting a group and moving it up or down with the arrow buttons.
|
|
Move to the beginning |
|
|
Move up |
|
|
Move down |
|
|
Move to the end |
After defining the order of the groups, save it by clicking the button. When saved, every group receives an individual order number.
-
Copy to clipboard – Copy the information from the Groups grid to the clipboard, to be pasted to another program (Excel, for example).
-
Electrotechnical calculations – Select this if you want the program to perform electrotechnical calculations (wiring lengths, short circuit current, voltage drop). Columns related to calculations are only shown if this option has been selected.
Disabling calculations will speed up loading the dialog when the project has many groups and distribution boards.
-
 (New distribution board / New group) – Add a distribution board
or group to the project. For more information on adding distribution boards, see Insert and edit cabinets. For more information on adding groups, see Insert and edit group marking.
 -
 (Edit distribution board / Edit group) – Edit the selected distribution board
or group. You can also right-click the desired item in the list and select Edit.
 -
 (Delete distribution board / Delete group) – Delete the selected distribution board or groups from the database. You can also right-click the desired item in the list and select Delete.
If group marking has been inserted into a drawing, the group cannot be deleted.
-
 (Copy distribution board / Copy group) – Create a copy of the selected distribution board or groups. You can also right-click the desired item in the list and select Copy.
 -
Insert to drawing – Insert the selected distribution board or group to the drawing. You can also right-click the desired item in the list and select Insert to drawing.
The distribution board's or group's design has been selected in their properties.
-
Show in drawing – Show the location of the selected distribution board or group in the drawing.
-
Continue with wiring – Continue with wiring after you have inserted the group.
-
Import – Import distribution boards and groups from another project.
-
Close – Closes the dialog.
Right-click the desired group in the grid to have the following functions available:
- Move to another distribution board – Move the selected groups to another distribution board.
-
Swap with another group – Swap feeder and cable information (including additional information and plates) with another group. The groups remain in their distribution boards with protective devices but the feeder information is changed.
-
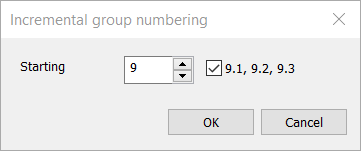
Number incrementally – With this function, you can renumber the desired groups incrementally from the desired starting number. If you want to use the X.X numbering style (1.1, 1.2, 1.3, etc.), also click the check box to enable the option.
