Settings

The Settings toolbar button opens a menu for accessing the 3D viewer and camera settings, and for updating the 3D model if it has changed on the disk after loading it into the 3D viewer.
Settings
In the Settings menu, select Settings to change the following viewer settings.
View/Movement | Measurement | Visualization | Point clouds | Advanced | Other options
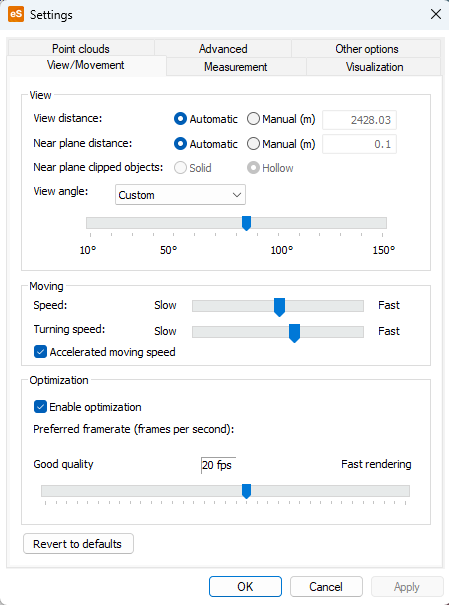
View/Movement
On the View/Movement tab, you can change settings that affect viewing the model and moving in it.
-
The View distance setting controls the distance at which objects become visible to the user. If set to automatic (default), all objects are visible regardless of distance. You can try to improve performance by limiting the view distance, especially if you already tried to adjust the frame rate in optimization settings and it did not help.
- The Near plane distance setting controls the distance from the camera to the plane from which the objects start to be visualized. If set to automatic (default), the distance is set automatically. To manually define the distance, select Manual and enter the desired distance.
- The Near plane clipped objects setting controls how the objects are rendered. If set to Hollow, the back faces of objects are drawn. If set to Solid, a solid surface is created on top of the clipped area.
-
The View angle setting controls the view angle of the camera. Adjust this setting if needed. The default view angle is defined in Plant Modeller, in the Walkaround tool, and the setting is saved in the Scene.
-
The Moving settings allow you to adjust the speed of moving in the model and turning the view. You can try different speed settings to find a level where it feels natural to control the movements. Slower computers and larger models typically require a smaller speed because slow visualization makes it more difficult to move around. Note that you can also try to affect the visualization speed by selecting a smaller subset of objects to display or by changing the view distance.
If "Accelerated moving speed" is not selected, the moving speed is linear (not accelerated).
-
The Optimization settings control the frame rate at which the view is updated when the user moves around in the model. You can select the target frame rate with the slider bar. If optimization is enabled, the system tries to reach the specified frame rate by decreasing the detail level of rendered images. Disabling the optimization forces every frame to be fully rendered, and this might cause performance issues especially in large models.
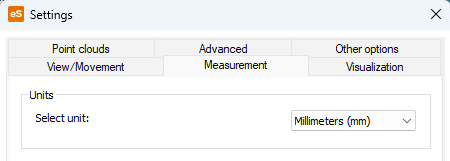
Measurement
On the Measurement tab, you can select the unit to use in measurements. It can be one of the following: millimeters, centimeters, meters, inches, feet+inches.
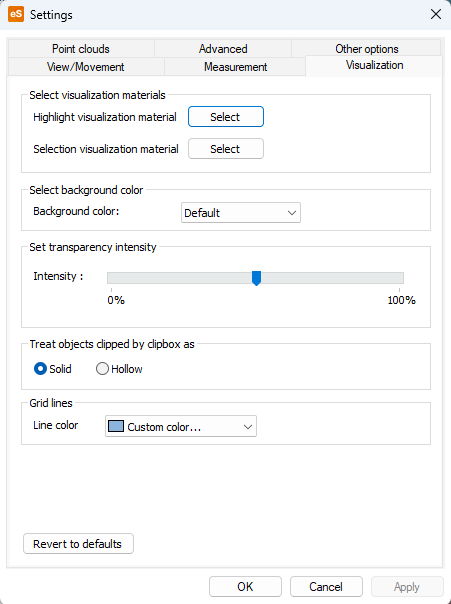
Visualization
On the Visualization tab, you can set visualization settings.
-
You can select the materials used to highlight objects and to indicate that an object is selected.
-
You can select the background color/image; see Background visualization for details. The background color setting is saved whereas the materials are not because they depend on the model’s publisher.
-
You can specify transparency intensity.
-
You can define how objects clipped by clipbox are handled.
-
You can define the line color for reference grid lines.
Point clouds
On the Point clouds tab, you can set point cloud details.
Note: Viewing point clouds, textured meshes, and their settings require eShare App.

-
You can define the splat size of the point clouds. The size of the splats has an effect on the rendering performance. If the point clouds are dense and you use splat rendering, set the value to 2.
-
You can define the tolerance for the difference comparison, which is given in millimeters determining how much the 3D model and the point cloud are allowed to differ while still colored as matching. The default value is 50.0 mm. You can also specify the colors used for highlighting the differences.
-
You can specify the number of detailed clouds closest to the camera position, which are loaded in full detail at once. Recommended range is 1 - 20.
-
You can define the distance in meters how far a point cloud can be from the camera position and still be loaded in full detail. Recommended range is 1 - 50 meters.
-
You can define the number of detailed meshes. Performance can be improved by lowering the value. If the selected value is too high, performance might suffer. The ideal value depends on the size of meshes and the hardware used to run eShare App, so results might vary.
-
You can define an area of interest for point cloud loading. Clouds with scanner position outside clip box area will not be loaded at all. This can be used in large projects to limit memory consumption.
-
You can select to cache mesh textures (dds files) to eShare App project cache on client. This will take some disc space. If mesh textures are not cached, after eShare App is closed the texture cache will be cleared and disc space is freed.
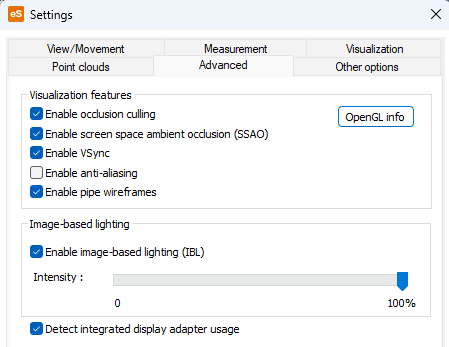
Advanced
On the Advanced tab, you can specify advanced visualization settings.
-
The OpenGL info button opens a text file that displays information about your system’s support for OpenGL based visualization.
-
Enable occlusion culling – If selected (default), occlusion culling is enabled.
-
Enable screen space ambient occlusion (SSAO) – If selected (default), the screen space ambient occlusion technique is used to approximate the occlusion (diminishing) of light on objects in shaded views. This technique provides realistic, real-time shading effects without putting too much stress on the hardware.
-
Enable Vsync – Enables Vsync. When vsync is enabled GPU can smoothen the moving image and uses the best refresh rate for the current display. Disabling vsync might help if navigation causes image to stutter. Vsync is controlled by Windows and GPU setting and they might overrule this application setting.
-
Enable anti-aliasing – Anti-aliasing smoothens lines in rendered image and tries to fade jagged edges. Enabling this option adds workload to GPU.
-
Enable pipe wireframes – If selected (default), pipe wireframes are included. If disabled, some GPU memory is saved but pipe wireframe representation will be missing some core feature lines.
-
Enable image-based lighting (IBL) – If this option is selected (default), the background image is used for applying lighting effects to shaded views; use the slider to adjust the intensity of lighting. If this option is disabled, the more realistic background images cannot be used; on the Visualization tab you can set the background to be blue gradient, solid black, or solid white.
-
Detect integrated display adapter usage – If selected (default), the note about using software with integrated display adapter is shown.
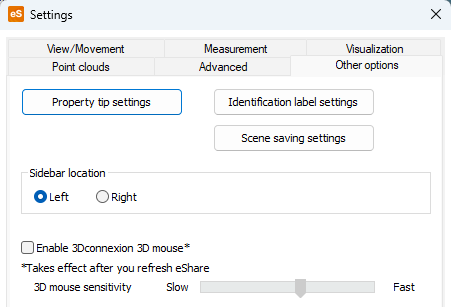
Other options
On the Other options tab you can specify the following settings.
-
Property tip settings – Opens the Property Tip Settings dialog where you can define which model attributes are displayed in the tooltip of an object or disable the function. See Property tip settings.
-
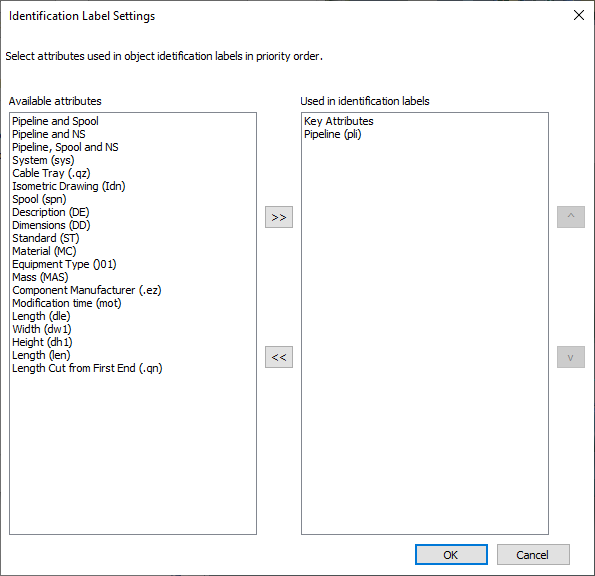
Identification label settings – Opens the Identification Label Settings dialog where you can define which object attributes can be displayed in object identification labels. By default the labels are set to use key object attributes and the pli attribute.
Move attributes from the left pane to the right pane to allow the attributes to be shown in object identification labels. The order of the items in the list defines their priority; each label shows the value of the attribute that is highest in this list, and if the object does not have any of the listed attributes the label is not displayed.
The displaying of labels can be enabled or disabled, as described in Coordinates.
-
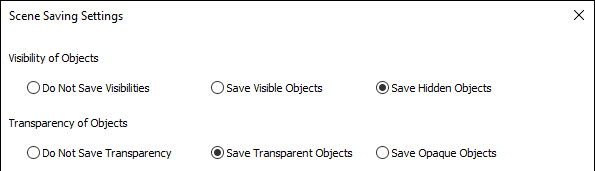
Scene saving settings – Opens the Scene Saving Settings dialog where you can define how the visibility of objects and transparency of objects is saved in scenes.
-
Sidebar location – Select whether the sidebar is located on the left or right.
-
Enable 3Dconnexion 3D mouse – If selected, you can use a 3Dconnexion 3D mouse to move in the 3D view. You must refresh the browser window after enabling this option. Use the slider to adjust mouse sensitivity.
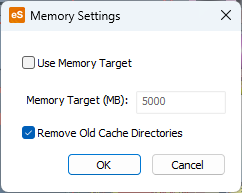
Memory settings
In the Settings menu, select Memory Settings to define how much memory the application can use when loading the model.
If you limit the memory, the application loads objects that are further away as simple geometrical elements. When the user moves in the model and the objects get closer, the application loads the details of the object.
To activate the memory settings, click the Use Memory Target checkbox and define the memory target. The minimum value is 500 MB.
Note that the system may slightly exceed the memory limit for a short time if the system must work close to the target memory value.
To save hard disk space, the system automatically removes cache directories that have not been used for over 30 days. The option has been set on by default, but you can turn it off by deselecting the Remove Old Cache Directories checkbox. If you open the model again, the system will automatically recreate the removed cache folders.
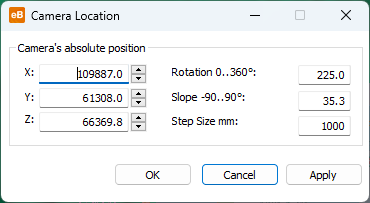
Camera location
In the Settings menu, select Camera Location to view the absolute coordinates of the camera position in millimeters.
You can move the camera by adjusting the X, Y, and Z coordinates, rotate the camera horizontally, and tilt the camera vertically by specifying the slope angle (90 degrees is straight down, -90 degrees is straight up).
Update model
In the Settings menu, select Update Model to reload the model into the 3D viewer. Models are cached locally, and when you open a model the system checks whether the model has been updated. If the model is being loaded over the Internet, you are prompted to confirm the updating, while locally stored models are automatically updated.
Typically, you perform this if you know that the model has been updated while you were browsing it. If the 3D viewer is embedded on a web page, refreshing the web page also updates the model.