Search results
Performing a search in the Search view of CADMATIC eShare shows how many entities were found in total and lists the found entities. In list view, all the results are shown, except for model items and documents, for which only the first 200 results are shown. In table view, all the results are shown, except for model items, which are not shown at all if there are over 100 000 results. The different entities are shown on separate tabs Model items, Smart Points, Model Markups, Document Markups, Documents, and External References each indicating the number of found entities.
Select Hide search criteria to show only the search results. Select Show search criteria to show the search options again.

Organizing search results
When you have performed a search, which has returned results, you can organize the search results.
-
Click the View as a list button
 to view the search results as a list.
 -
Click the View as a table button
 to view the search results as a table.
 -
When the results are shown as a table, you can select and filter from the drop-down menu which columns are included in the table. The options are:
-
Model items – model attribute definitions, types of status tracking, status tracking attributes, the key attribute, linked Smart Points, linked markups, and data from a data source.
-
Documents – document name and data source
-
Smart Points – Smart Point attributes and data from a data source.
-
Model markups and document markups – markup attributes and markup thumbnail images
-
-
The data in the columns can be organized using the Sort by
 and Filter by
  buttons in the column header.
 -
The columns can be re-ordered by dragging and dropping.
During a search, some columns are selected for the table by default (e.g. Title, Type, Status, Importance, Created by, Created at, Modified by, and Modified for the markups). Document markup columns include also Document name (for managed and external indexed documents) and Revision for managed documents.
If the user selects new columns for the table, a new search request is made to the server if even one of the selected columns was not included in the initial subset of columns. Columns that will require a new search request are marked with a Requires reload icon  in the columns drop-down menu. If none of the newly selected columns require reload, no additional search requests are made to the server, and the desired data is displayed in the table instantly.
Editing status tracking values in search results
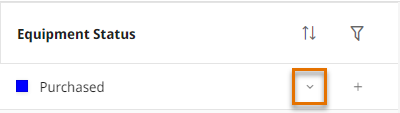
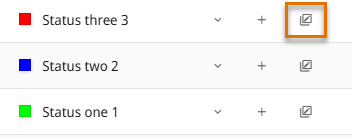
When the model items in search results have status tracking values, you can update the status in the corresponding column by selecting the Change status button. You can also select multiple model items by checking the checkbox at the beginning of each row and selecting the Change status button of one selected row.
Note: The status of multiple model items can be updated only, if all the selected model items share such status value(s) to which their current status value can be updated to.
Select the status value from the list, and after it is updated, the visual styles will be updated accordingly in Model view.

Adding new status tracking values in search results
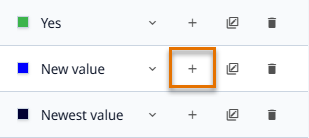
If adding new values has been enabled in status tracking configuration, you can add values to model items in the search results. Select Add new button in the corresponding column. You can also select multiple model items by checking the checkbox at the beginning of each row and selecting the Add new button of one selected row.
Enter a name for the new value and select Create new in the list. If the status tracking has templates enabled for new values, the template will be populated to the input.
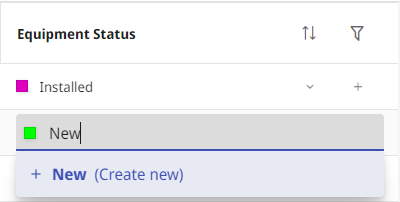
The new status value is added and a color is assigned for it.
Editing status tracking attributes in search results
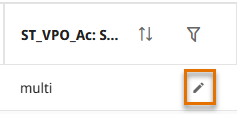
If you have permission to modify a status tracking, you can edit the status tracking attributes in the search results. Select Edit attribute button in the corresponding column.
Edit the attribute value and select Save.
Editing both status tracking values and attributes in search results
If you have permission to modify a status tracking, you can select to edit both the status values and status tracking attributes in one dialog. Select Update status and attributes button in the column. You can also select multiple model items by checking the checkbox at the beginning of each row and selecting the Update status and attributes button of one selected row.
In Update Status Tracking dialog, you can change the status, or add a new status. You can also edit or add status tracking values in the corresponding fields.
![]()
Select Update status tracking to save your changes.
Deleting a status tracking value in search results
If you have permission to delete a status tracking, you can delete the status tracking in the in the search results. Select Delete status tracking button in the corresponding column. You can also select multiple model items by checking the checkbox at the beginning of each row and selecting the Delete status tracking button of one selected row.

A confirmation dialog opens, select Delete status tracking to delete it.
Examining objects and groups found by search
When you have performed a search that found objects or groups, you can select to examine them in the Model view—directly from the search results.
-
Click the object ID in the search results. The Model view opens in examine mode, and you can use the navigation buttons in the properties pane to jump to the next or previous item.

-
To examine all the found objects or groups, you can select Examine objects in the search results.
Opening other entities found by search
When you have performed a search that found markups, Smart Points or documents, you can open a found entity directly from the search results.
Model markups
If the search found model markups, click the markup thumbnail to open the model markup in the Markup editor. Note that you must always close the editor properly, or you will not be able to open another markup.

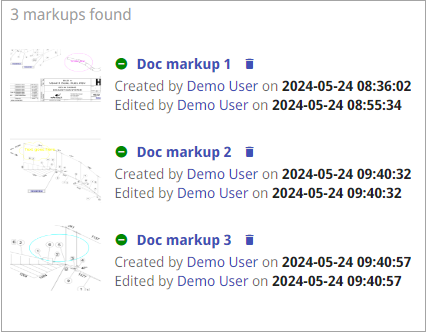
Document markups
If the search found document markups, click the markup thumbnail to open the document markup in editing mode in the Documents Viewer. Note that you must always close the markup properly, or you will not be able to open another markup.
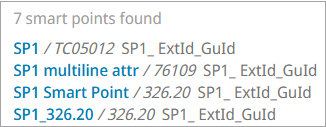
Smart Points
If the search found Smart Points, click the Smart Point name to show the Smart Point and its properties in the Model view.
Documents
If the search found documents, click a document name to open the document in the document viewer.
Exporting results to Microsoft Excel
You can export search results of model items, Smart Points, model markups, or document markups to a Microsoft Excel file. In the Excel file, different entity types are listed in separate sheets, and on each sheet the entity identifiers (such as object IDs, Smart Point names, model markup names, or document markup names) function as links to the entity in the Model view.
Do the following:
-
In the Simple tab, select Export to Excel, or in the Advanced tab, open the drop-down menu of the Export button and select Excel.
-
In the Export to Excel dialog, select the following:
-
Object, markup, point, and external data attributes included in the Excel file. The attributes available depend on the used search.
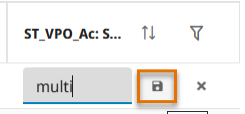
To save the export selections for later use, select Save in the dialog. Enter a name for the saved export and select Save. Saved export is available in the Saved exports drop-down menu in the Export to Excel dialog. To delete a saved export, select it on the list and select Delete.
-
-
In Conflict Detection Options (visible when exporting a model object search), select used export mode:
-
None – Exports all search results and does not check for conflicts. Selected by default.
-
Automatic – Automatic conflict detection mode, which finds the attributes with same names and compares the values in them per object basis. If the values in these attributes differ from each other the object is exported.
-
Skip Empty Values – Specifies if missing/empty attribute values are not compared for conflicts. The default is Yes.
-
-
Custom – Custom conflict detection mode, which works in the same way as the automatic detection but instead of detecting attributes with same names, it compares the attributes in the configured attribute pairs.
-
Skip Empty Values – Specifies if missing/empty attribute values are not compared for conflicts. The default is Yes.
-
Attributes to Compare – Configure the attribute pairs to be used in comparing the detected attributes. To add a new attribute pair, select Add new pair.
-
The conflicting cells are highlighted in red in the resulting Excel file.
-
-
Select Export.
-
You are prompted whether to open or save the Excel file.
Note: In the Excel file, you can configure the links to open the examine mode with specific settings. See Defining examine mode settings in URLs for details.
Exporting model markups and document markups to Microsoft Word
You can export model markups or document markups found via search to a Microsoft Word file. The report uses a default Word template (Markup Word Report Template.docx) included in the eShare installation. The template is located in the installation directory (<installation directory>\App_Data\markupReportTemplates). The default template can be customized and additional templates can be created in Word.
Note: In order to use a custom attribute in the Word template, you must remove any spaces, hyphens, underscores, and invalid XML characters from the attribute name, and convert it to camelCase.
For example, to use a custom attribute called "My custom_attribute - 123 / ABC" in the template, you must specify <# <Content Select="./myCustomAttribute123Abc"/> #> in the template.
Note: eShare will not display the template if it used by another process (such as Microsoft Word). Close the template before exporting the report.
Do the following:
-
Open the drop-down menu of the Export button, and select Word.
-
You are prompted whether to open or save the Word file.
Exporting a model markup file (.ebx)
You can export model markups found via search to a markup file (.ebx). Photos that have been added to markups are included in the export.
Features that are specific to eShare, such as the names of users the markups have been assigned to, are included in the export as special attributes. If the file is imported to some other application, this data can be viewed as regular markup comments.
Note: Document markups cannot be exported.
Do the following:
-
Open the drop-down menu of the Export button, and select Markups (EBX).
-
You are prompted whether to open or save the markup file. If you have CADMATIC eBrowser installed, selecting to open the markup file typically opens it in eBrowser.
Exporting a model markup file (.bcfzip)
You can export model markups found via search to a markup file (.bcfzip).
The exported file includes all markup information, for example title, type, status, importance, when the markup was created and last modified, and who by, assignee, all comments, and photos.
Note: Document markups cannot be exported.
Do the following:
-
Open the drop-down menu of the Export button, and select Markups (BCF).
-
You are prompted whether to open or save the markup file.