Draw and manage cable packages
A cable package presents several cables in one wiring. This simplifies the drawing, as you do not need to draw a separate wire for each cable.
You can create a cable package in Schematics and then draw it in an arrangement drawing, for example – when cables are edited, the changes are updated to both occurrences.
A cable package cannot include wires, only cables.
Create and draw cable packages
| Single-line tab > Wiring group > |
| Schematics tab > Wiring group > |
Note: Schematics-specific settings affect the drawing of cable packages.
Do the following:
-
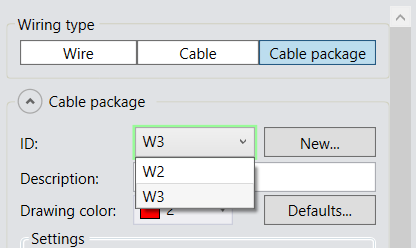
In the Wiring window, select an existing cable package from the ID drop-down menu. Alternatively, create a new cable package by clicking New.
The field shows the next consecutive cable package ID as a suggestion for a new cable package, and the field is then highlighted with green. In the following image, the ID W2 already exists and the suggestion for the new ID is W3:
-
If desired, select a new color for the cable package you are about to draw. After you have drawn the cable package, the default color is reset.
You can define the default cable package color in the Electrical settings. By default, the cable package color is red.
-
Define the settings:
-
After the first cable package, if you want to continue drawing with consecutive numbering, select Next cable package automatically.
-
If you want wiring marks to be shown in the drawing, select Add wiring marking.
-
If you want to add cable package marking, Add cable package marking. If necessary, also define the following:
-
Use default cable marking – Select this, if you want to use the default symbol defined for cable package markings in the cable marking settings.
-
Hide type info – Select this, if you want to hide the cable type information from the cable package marking. The setting is enabled when the project's cable marking settingVisibility of Type in drawing has been set to According to visibility setting of symbol's attribute.
-
-
If you do not want the cable package to be automatically cut when you draw across boundaries, clear the Cut cable package when drawn through boundary selection. By default, cable packages are always cut when drawn across boundaries.
-
-
Add the desired cable types in the package by double-clicking them in the Cable types list. Alternatively, select a cable type and click Add.
The cable types added in the package are shown in the Cable package content section. If necessary, you can remove cable types by selecting a cable type and clicking Remove.
By clicking the
 button next to the Cable package drop-down menu, you can access cable package definition management. By clicking Cable type management, you can access cable type management.
 -
Draw the cable package by selecting the first wiring point.
You can also draw a cable package from the project tree by right-clicking the desired package and selecting Draw cable package occurrence.
If the Schematics-specific setting Show the wiring dialog on modifying is enabled, clicking a cable package in the drawing opens the Wiring window.
Manage cable packages
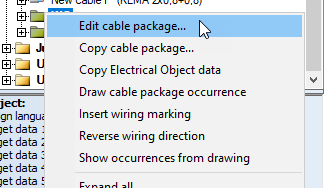
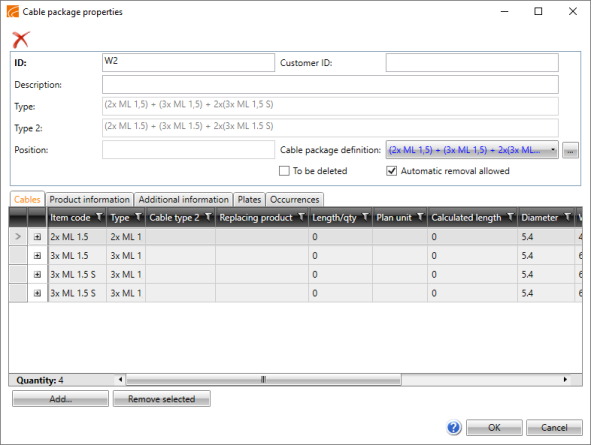
You can open the Cable package properties dialog by double-clicking a cable package in the drawing, or from the Wirings project tree by right-clicking the desired cable package and selecting Edit cable package.
In this dialog, you can add and remove cables and add product information, additional information and plates to the cable package.
Redraw cable packages
An existing cable package can be redrawn with existing data. In some cases this is easier than editing a cable package.
Right-click the cable package, and select Redraw cable package.
Draw the cable package in the same way as a normal cable package, as described in Create and draw cable packages.