Project/Block
File > New > Project/Block

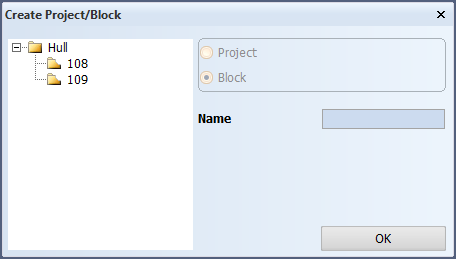
Create a new project or a block. Select Project to show the predefined projects, or Block to show the predefined blocks.
For details, see Creating COS projects, Creating standalone projects and Creating blocks below.
Creating COS projects
Creating a new COS project is a two-phased process: the project is first predefined by creating a new COS project with Hull support enabled in the CADMATIC desktop, after which the project is created in the Create Project/Block dialog.
Do the following:
-
Create the project in the CADMATIC desktop. See Creating COS projects.
-
In System Management, select File > New > Project/Block. The Create Project/Block dialog opens.
-
Select Project, and then select the desired predefined project from the left part of the dialog.
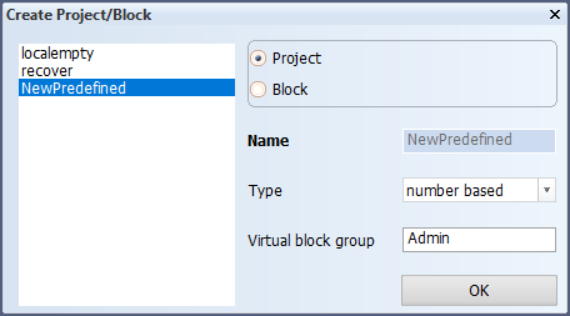
By default, the block name type is number based. The virtual block group contains the default block 999, and is by default named Admin.
-
Change the default type and virtual block group name, if necessary.
-
Click OK. The blocklist object is automatically checked out in order to prevent others from creating the same project.
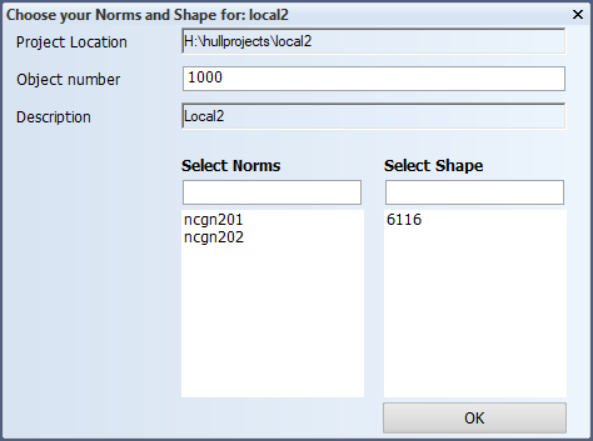
The Choose your Norms and Shape for: [projectname] dialog opens.
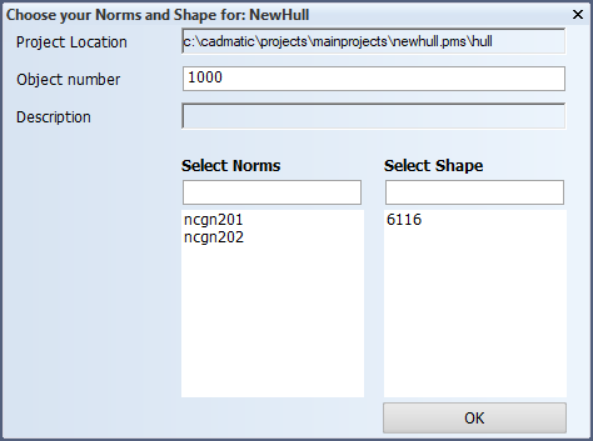
The project location and description have been defined when predefining the project, and they cannot be modified here. If the Description field is empty, the description has not been defined during project creation on the COS server.
-
Do the following:
-
If necessary, change the object number. The object number is a unique identification for the project.
-
Set the project settings by selecting one of the available norms directories from the directory specified by the environment variable %ncgcust%. This environment variable is defined while installing CADMATIC Hull. See CADMATIC Hull Installation Guide for more information.
-
Select from the shape databases present in the directory specified by the environment %ncgshape%. This environment variable is defined while installing CADMATIC Hull. See CADMATIC Hull Installation Guide for more information.
-
Click OK. The system starts to copy files.
If the norms directory you selected includes the subfolder cvar and/or lvar, they will be copied alongside the selected norms folder. If there is no cvar folder, an empty cvar folder is created for the new project. If necessary, the lvar folder can be copied into the norms folder manually.
Once the files are copied, you are prompted to select the Hull shape database version.
-
-
Enter the Hull shape database version or keep the default, and click OK.
-
Enter the reversed frame number, and click OK. The reversed frame is a virtual frame that can be used as a reference point to indicate a direction.
The project is now created.
Creating standalone projects
Creating a new standalone project is a two-phased process: the project is first predefined by selecting a non-existing or empty folder when adding the project via the Project Management Centre, after which the project is created in the Create Project/Block dialog.
Do the following:
-
Create the project in the CADMATIC desktop. See Creating standalone projects.
-
In System Management, select File > New > Project/Block. The Create Project/Block dialog opens.
-
Select Project, and then select the desired predefined standalone project from the left part of the dialog.
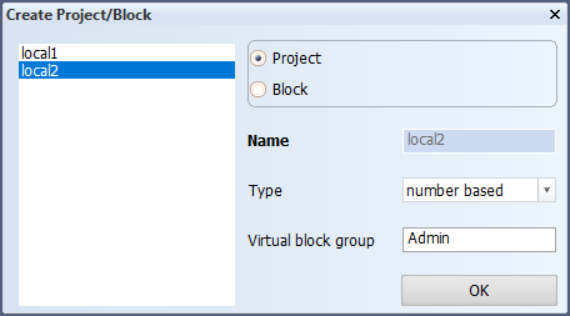
By default, the block name type is number based. The virtual block group contains the default block 999, and is by default named Admin.
-
Change the default type and virtual block group name, if necessary.
-
Click OK. The Choose your Norms and Shape for: [projectname] dialog opens.
The project location and description have been defined when predefining the project, and they cannot be modified here. If the Description field is empty, the description has not been defined during project creation in the Project Management Centre.
-
Do the following:
-
If necessary, change the object number. The object number is a unique identification for the project.
-
Set the project settings by selecting one of the available norms directories from the directory specified by the environment variable %ncgcust%. This environment variable is defined while installing CADMATIC Hull. See CADMATIC Hull Installation Guide for more information.
-
Select from the shape databases present in the directory specified by the environment %ncgshape%. This environment variable is defined while installing CADMATIC Hull. See CADMATIC Hull Installation Guide for more information.
-
Click OK. The system starts to copy files.
If the norms directory you selected includes the subfolder cvar and/or lvar, they will be copied alongside the selected norms folder. If there is no cvar folder, an empty cvar folder is created for the new project. If necessary, the lvar folder can be copied into the norms folder manually.
Once the files are copied, you are prompted to select the Hull shape database version.
-
-
Enter the Hull shape database version or keep the default, and click OK.
-
Enter the reversed frame number, and click OK. The reversed frame is a virtual frame that can be used as a reference point to indicate a direction.
The project is now created.
Creating blocks
Creating a new block is a two-phased process: the block is first predefined in System Management > Projects > Building Block Overview or Quick Block Definition Tool, after which the block is created in the Create Project/Block dialog. You can create blocks in regular groups and virtual groups.
Note: Block 999 needs to be in checked-in state before a new block can be created from it. Otherwise the creation gives an error message. The new block will be in checked-out state, so 999 needs to be checked in for permissions to files, otherwise it will not be properly created.
Do the following:
-
Predefine the block in System Management. See Predefining blocks.
-
In System Management, select File > New > Project/Block. The Create Project/Block dialog opens.
-
Select Block, and then select the desired predefined block from the left part of the dialog.
-
Click OK. If this is a COS project, the block is saved to COS and checked out. Next, the Solid/Dash dialog opens.
-
Define the presentation of other blocks; set blocks to be drawn using a solid or a dashed line, or to not be visible. In general, only the block you will be working in should be presented as drawn. The other blocks around it can be presented dashed if you want to see them as well.
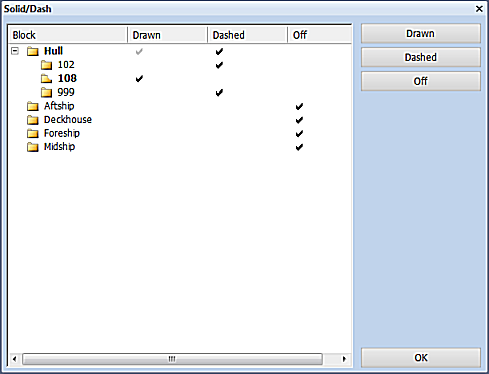
- The Block column contains the groups and their blocks for which you can define the drawing mode.
- The Drawn column shows which blocks are presented with drawn or solid lines.
- The Dashed column shows which blocks are presented with dashed lines.
- The Off column shows the blocks that are not presented at all.
-
Click OK to continue. The system asks whether you want to create the views. A view has an area in which the construction will be shown.
-
Select Yes to create the views. The system creates and then opens the block. For more information on creating the views, see Frame view, Side View and Top View.
Note: Blocks named as 99999 and 12346 can only be opened in the 2D-Contek application.