Pipe spool workflows
This topic describes recommended workflows for managing pipe spools with the tools on the Pipe spools tab of Plant Modeller.
Setting up the application
Perform the following to be able to manage pipe spools on the Pipe spools tab of Plant Modeller.
Tasks for Project Administrators
-
Go to File > Environment > All library and project > [library or project] > Configuration > Plant Modeller, and open the Containment Setup configuration object.
In the Logistics node, edit the logistics hierarchies as follows:
- In the root folder settings, clear the option Check containment of spools via main document groups.
- In the subfolder settings, make sure that at least one folder has Can host main document groups selected and at least one folder has Can host spool groups selected.
See Properties of logistics containment for details.
-
Go to File > Settings > Shared Settings > Piping > Pipe Spool, and specify the spool generation rule. It defines how the spool tool assigns pipes into separate spools. See Spools for details.
-
Go to File > Settings > Shared Settings > Documents > Pipe Spool Drawing, make sure Use pipe spool drawings is selected, and then specify the pipe spool drawing settings. See Pipe Spool Drawing for details.
-
Go to File > Settings > Shared Settings > Piping > Pipe Spool Checks, and select the pipe spool checks that users should be running on pipe spools. See Spool Checks for details.
Task for Users
-
On the Tools tab, in the Containment group, select Browse > Select Containments to Publish, and make sure that Logistics is selected. See Publishing containment for details.
Troubleshooting the pipe spool tool
Creating a new spool with spool drawings
Perform the following to create a new spool and generate spool drawings.
Prerequisites
- You have completed the setup actions described in Setting up the application.
Do the following:
-
On the Piping tab of Plant Modeller, use the routing tools to add a new pipe to the 3D model.
-
On the Pipe spools tab, in the Active group, set Logistic 3D space to the 3D space that contains the new pipe.
-
In the List group, click Spools. The Spool List dialog opens, and you can select the new spool from the spool list.
-
Use the Spool group tools to make any required modifications to the spool. See Spool for details.
-
In the Main document group, select Create > Document from selected spools to create a main document from this spool. See Main document for details.
-
In the Active group, make sure the main document you just created is selected, and then click Edit. If there are unsaved changes in the area model, you are prompted to save.
The Pipe Main Document window opens. New spools are listed in the "New" category.
-
In the Pipe Main Document window, select the required spools from the list, and click Create.
Spool drawings are generated, and the created spools are listed in the "Uptodate" category.
Moving a spool to another main document
Perform the following to move a spool from one main document to another. Note that if the spool has a drawing, the drawing will remain in the previous main document, in its "Deassign" category.
Do the following:
-
On the Pipe spools tab, in the List group, click Spools.
-
In the Spool List dialog, select the spool that you want to move.
-
In the Main document group, click Deassign Spools.
-
In the Active group, in the Main Document field, select the main document to which to assign the spool.
-
In the Main document group, click Assign Spools.
Note: If you cannot select the Assign Spools button because it is not active, the related objects are checked in. To check them out, select Check Out > Main document related objects.
Renaming the spools of the active main document
Perform the following to rename all spools in the active main document.
Prerequisites
- You have checked out all spools you want to modify. Checked in spools are not editable and they will not be renamed.
- The required spool numbering settings have been defined and Spool numbering style is set to Main document. See Pipe Spool Drawing.
Do the following:
-
In the Spool group, select Define > Rename spools of active main document.
-
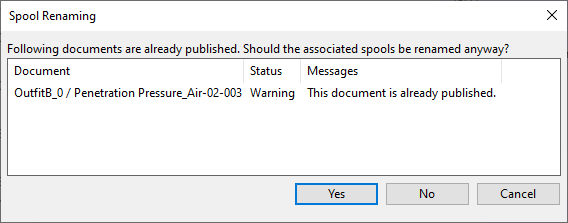
If the document has been published already, Spool Renaming dialog opens. Select Yes to rename the spools anyway or No to cancel the renaming.
-
The First Spool Number in Rename Sequence dialog opens.

-
Enter the number to use for the first spool, and click OK. If spool drawing settings define for example that spool numbers have four digits, entering "1" will set the first spool number to "0001".
Renaming the spools of pipelines
Perform the following to rename all spools that relate to a specified pipeline and are completely inside the active 3D space.
Prerequisites
- You have checked out all spools in the pipelines you want to modify. Checked in spools are not editable and they will not be renamed.
- The required spool numbering settings have been defined and Spool numbering style is set to Pipeline. See Pipe Spool Drawing.
Do the following:
-
On the Pipe spools tab, in the List group, click Spools. The Spool List dialog opens.
-
In the Spool List dialog:
-
Optionally, clear the filters Show Partially and Show Nearby to list only spools that are completely inside the active 3D space.
-
Either make sure that no spools are selected so that in the next step you will get a list of all pipelines, or select at least one spool from each pipeline where spools should be renamed.
 Show/hide example
In this example, selecting only "Spool JJ_Water-01-01" would rename also "Spool JJ_Water-01-02" in the same pipeline (JJ_Water-01), but the other spools are in different pipelines and would not be renamed.

-
-
In the Spool group, select Define > Rename spools of pipelines.
The Select Pipelines dialog opens. If you did not select any spools in the previous step, all pipelines are listed here, but if you did select some spools, only the pipelines of the selected spools are listed.

-
Select each pipeline where spools should be renamed, and click OK.
-
If the document has been published already, Spool Renaming dialog opens. Select Yes to rename the spools anyway or No to cancel the renaming.
-
The First Spool Number in Rename Sequence dialog opens.
-
Enter the number to use for the first spool of the pipeline, and click OK. If spool drawing settings define for example that spool numbers have four digits, entering "1" will set the first spool number to "0001".
Note: If you selected to rename spools in several pipelines, you are prompted to select the first spool number for each pipeline separately.
Renaming a spool manually
Perform the following to rename an individual spool.
Do the following:
-
On the Pipe spools tab, in the List group, click Spools.
-
In the Spool List dialog, select the pipe spool that you want to rename.
-
In the Spool group, select Define > Manually rename selected spool.
If the spool to rename is part of a numbered spool sequence, you are prompted either to select a suggested name from a list of candidate names or to enter the spool number to use.

If the spool is not part of a spool sequence, you are just prompted to enter the spool number to use.

Viewing the pipe spool check results
Perform the following to view the results of pipe spool production checks.
Do the following:
-
To view the check results of all pipe spools, on the Pipe spools tab, in the Spool group, select Checks > All spool groups.
Or, to view just specific check results, open the Spool List dialog, select the required pipe spools, and then select Checks > Selected spool groups.
The Local Spool Check Results window opens.
-
To re-check previously checked pipe spools, select the rows from the result list and click Check Again.
-
To investigate problems identified in failed checks, first review the information reported in the check-specific columns. For certain check types, such as the "delivered length" check (if enabled in Spool Checks), all necessary information is provided in this column. However, for some check results, you can delve deeper by selecting the rows from the result list and clicking Show Details. If there are several types of issues, you will be prompted to select which type to show.

Then, one of the following occurs:
-
Continuity check results open the Continuity Check Results dialog that lists the continuity problems, and you can select a check result from the list to show the continuity issues in a separate view window. See Check continuity of pipelines in set.
-
Volume check results open a separate view that displays the spool inside the bounding box of the tested container. Right-click the view to use the measuring tool or to view the boxed spool from above, side, or front.
-
Collision check results open the Collision Browser window—see Collision browser for general information. When you close the collision browser, the collision check is automatically re-run and the check results are updated.
-
Specification check results open the Spec Manager window. This is the same window that opens when do a specification check manually from Piping > Check / Change > Check specification status—see Check / Change for details.
-
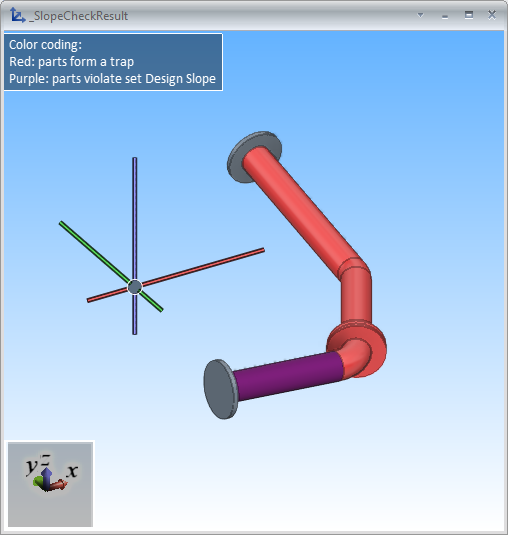
Slope check results open a separate view that displays parts that might form a trap that can prevent the gravitational flow of liquids out of the pipe and parts whose slope is less than the specified design slope.
-
Bending check results open a separate view that displays an animation of the problematic part. This requires that the bending machine is linked to a geometric model of the bending machine.
-
-
You can set a failed check to "Ignored" status by clicking Ignore a Fail. If more than one check has failed, you are prompted to select which one to ignore. The ignored checks will be skipped if you re-check the pipe spools.
If you set all failed checks as ignored, the spools are marked with the green "Successful" icon.

Note: These "Ignored" statuses are internal to this tool. If you want, for example, a given collision to be ignored in all future collision checks, you must properly set the ignored status for it in the collision browser.
-
You can remove the "Ignored" status from selected check results by clicking Cancel Ignore. If more than one check has been ignored, you are prompted to select which one's status to remove.
-
Click To excel if you want to export the current check results to a Microsoft Excel file.
-
Click Close to exit the check result window.


Troubleshooting the pipe spool tool
If Assigned Spools Disappear from Spool List
In the Spool List dialog (see List), if the spool list does not show spools that you have assigned to a main document and you know that this is not due to any filtering settings, ask your project administrator to check whether the option Check containment of spools via main document groups in the containment setup of the project has been cleared, as described in Folder properties.
If Action Center Reports Warnings or Errors
Problems that prevent the proper usage of the tools on the Pipe spools tab are logged in the Plant Modeller action center.
-
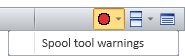
Warnings cause the action center's red icon to start blinking in the status bar, and you can open the notifications by selecting Spool tool warnings from the drop-down menu.
-
Errors cause the action center's notification list to open automatically, and all the tools on the Pipe spools tab are disabled until the errors have been resolved.
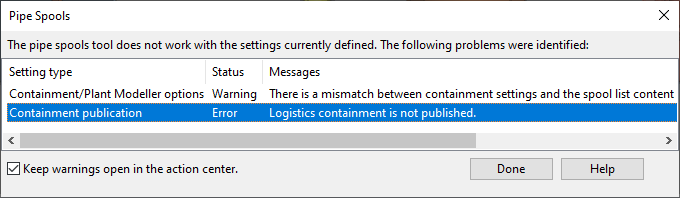
The possible warnings and errors are described below.
- Containment/Plant Modeller options (Warning)
- Containment setup (Warning)
- Containment publication (Error)
Containment/Plant Modeller options (Warning)
Message:
-
There is a mismatch between containment settings and the spool list content in pipe spool drawing settings.
or
-
There is a mismatch between containment settings (3D space "<name>") and the spool list content in pipe spool drawing settings.
Cause:
- The containment setup in the library or project configuration and the pipe spool drawing settings in Plant Modeller are incomplete or conflicting with each other.
Who can resolve:
- Project administrator.
How to resolve:
-
In File > Environment > All library and project > [library or project] > Configuration > Plant Modeller > Containment Setup, the Logistics node must define at least one logistics containment, and the containment properties must be set up as follows:
-
At least one logistics containment can host spools. This is enabled by selecting the options Can host spool groups and Check containment via spools.
-
At least one logistics containment can host main documents. This is enabled by selecting the option Can host main document groups.
-
-
In File > Settings > Shared Settings > Documents > Pipe Spool Drawings, the value of the Spool list content setting must match the containment setup:
-
If spools and main documents are hosted by the same containment, the value must be set to either "Logistic containment" or "System".
-
If spools and main documents are hosted by two different containments, the value must be set to "Sub block".
See Pipe Spool Drawing.
-
Containment setup (Warning)
Message:
- 3D space "<name>" in containment setup can host spool groups, but containment of objects is not checked via spools.
Cause:
- The containment setup in the library or project configuration is incomplete.
Who can resolve:
- Project administrator.
How to resolve:
-
In File > Environment > All library and project > [library or project] > Configuration > Plant Modeller > Containment Setup, in the properties of the required containment, enable the setting Check containment via spools.
Containment publication (Error)
Message:
- Logistics containment is not published.
Cause:
- This error is displayed if the user is trying to access the pipe spool tools but no logistics containment has been published in the project. Pipe spools cannot be managed without knowing which containment acts as their host.
Who can resolve:
- Project administrator or designer.
How to resolve:
-
Administrator can force publishing of logistics containments in the project.
If publishing is not forced, the user can publish them from Tools > Browse > Select Containments to Publish.