Edit cables
Edit properties of individual cables
In the Cables grid, you can edit the cells with white background right in the grid. Furthermore, you can change the cable type and the From and To information via the grid.
-
Change cable type by selecting the desired cables, right-clicking and selecting Change type. The list shows cable types currently in the project. If you want to select from all the cable types in the database, select Cable type selection.
-
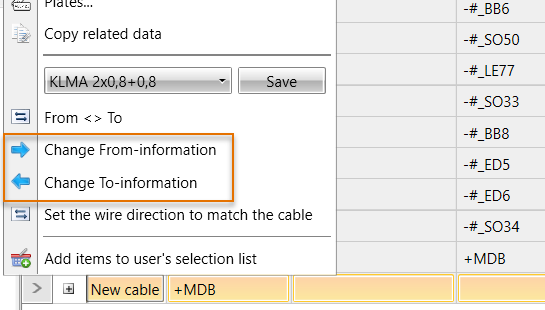
Change the From and To information by selecting the desired cables, right-clicking and selecting Change From-information or Change To-information. Editing is possible when there are no occurrences that impact the From/To data.
You cannot edit the item code in the grid. However, you can edit it with the Edit rows in Excel function. When you import rows back to the DB tool, the application checks whether it is possible to change the cable type. If not, the old cable type remains in the grid. For more information on the Excel function, see Edit column values in Excel.
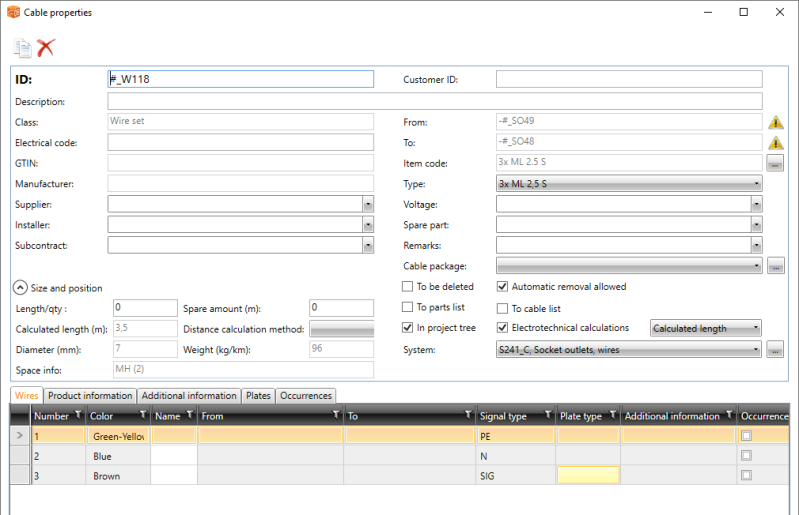
You can create and copy cables and edit cable information in the Cable properties dialog. You can open the dialog in different ways on the Cables tab:
-
By double-clicking the first column:

-
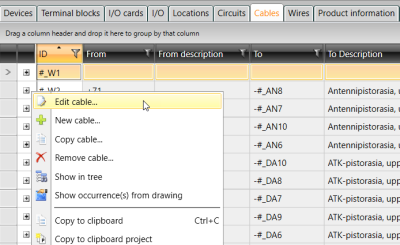
By right-clicking the desired row and selecting Edit cable:

Cable properties dialog

-
With the
 button, you can copy the cable with all its information (except for occurrences) as a new
cable.
 -
With the
 button, you can delete the cable.
 -
The Wires tab shows the cable wires and their connections. Right-click the desired wire to select a function.
 Show/hide details
-
Remove connections – Connection data is deleted from the database and drawing.
-
Reorder wires – The connection data can be shifted from one wire to another.
-
-
On the Product information tab, you can select and edit product information with the Select/Edit button.
-
On the Additional information tab, you can select and edit additional information with the Select/Edit button.
-
The Plates tab shows the plates attached to the cable. You can select and edit plates with the Select/Edit button.
-
The Occurrences tab shows cable occurrences in the project drawings. The tab has no functions, but it can be used to find cable occurrences from the drawings.
-
You can cancel editing with the Cancel button, with the cross in the top right corner of the dialog, or with the Esc key.
For more information on the Cable properties dialog, see Edit cables and cable packages.
Mass edit cable properties
There are two auxiliary grids on the Cables tab on the right: Devices and Locations. You can easily define the From and To information for cables as a mass by dragging and dropping information from the auxiliary grids to the main grid.
You can lock the auxiliary grids to the screen from the top right corner with the ![]() button. You can also make your work easier by organizing, grouping and filtering information as you wish.
button. You can also make your work easier by organizing, grouping and filtering information as you wish.
Do the following:
-
Select the Cables tab.
-
In the main grid, select one more cables for which you want to define devices or locations.
-
From the right side, clickDevices or Locations to open the respective auxiliary grid.
-
If necessary, organize, group and filter the information.
-
Select one or more devices or locations from the auxiliary grid. You can use Ctrl and Shift to select several rows.
-
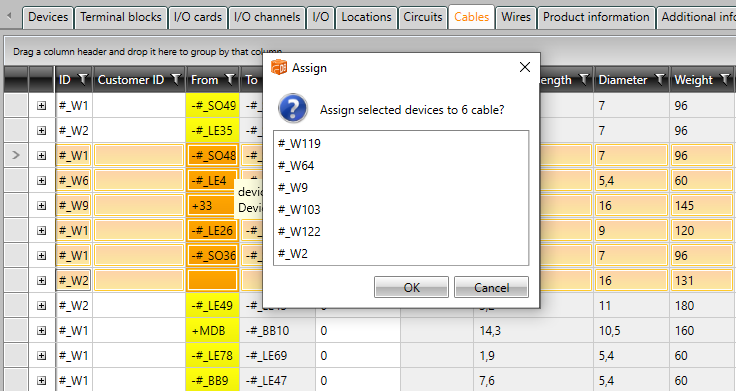
Drag the selected information to the main grid, on the corresponding column. You can only drop the information to the columns that are highlighted in yellow when you hover on the grid. The selected cables' cells are highlighted in orange in those columns. For example, if you have selected six cables in the main grid and you drag one device from the auxiliary grid and hover on the main grid, the highlights in the main grid before dropping look like this:

-
Drop the information. If you selected several cables, the Assign dialog opens.

-
Confirm assigning the selected information to the selected devices by clicking OK. The added information is now shown in the grid.

