| Electrical tab > Project group > |
| DB tool > Functions tab > Functions group > Reports |
With the report function, you can create customizable Excel and PDF reports. You can decide the number of fields and their order in your reports. You can save all the settings, after which you can easily select them from the Previously saved list option sets drop-down menu.
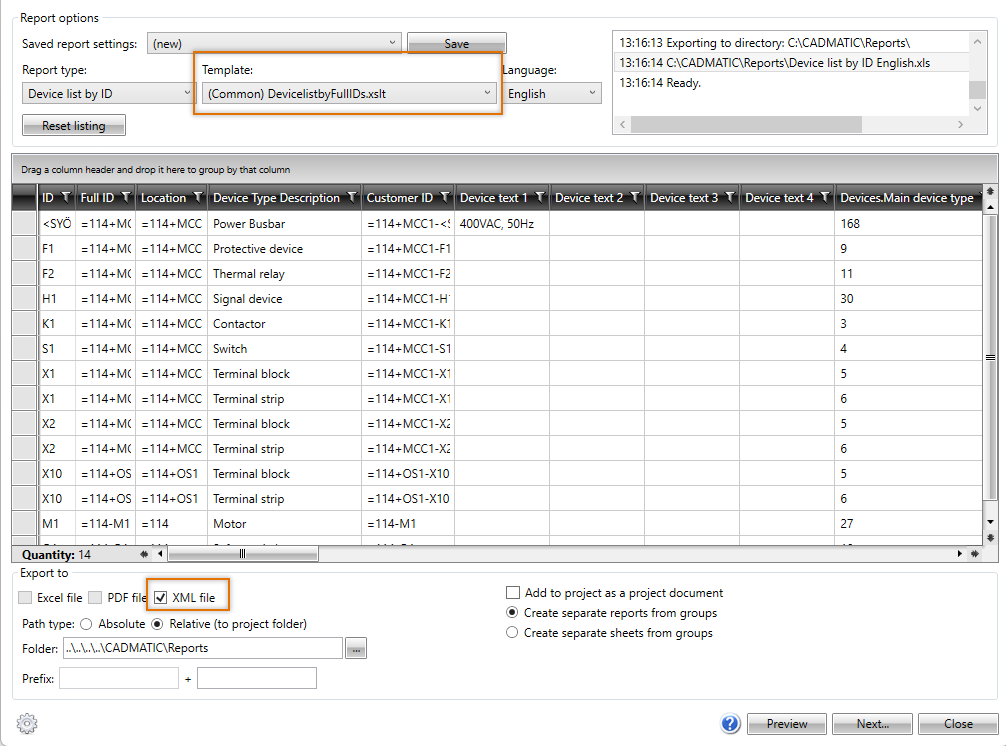
In addition to Excel and PDF, you can also export to XML which makes it easier to export information from CADMATIC Electrical to other systems. You can use the DevicelistbyFullIDs.xslt file located in the report template folder (by default C:\ProgramData\Cadmatic\Draw [version number]\Electrical\DB\ReportFiles), or create your own.
Note: You need Microsoft Excel 2007 or newer to use DB reports.
You can edit reports in any language regardless of the original project and report language. For example, if the report was created in an English project, you can edit it in a Finnish project.
With the ![]() button located in the bottom left corner of the reporting tool, you get to easily view and edit the settings.
button located in the bottom left corner of the reporting tool, you get to easily view and edit the settings.
You can update the selected reports with the Update reports function on the Documents tab. See Documents.
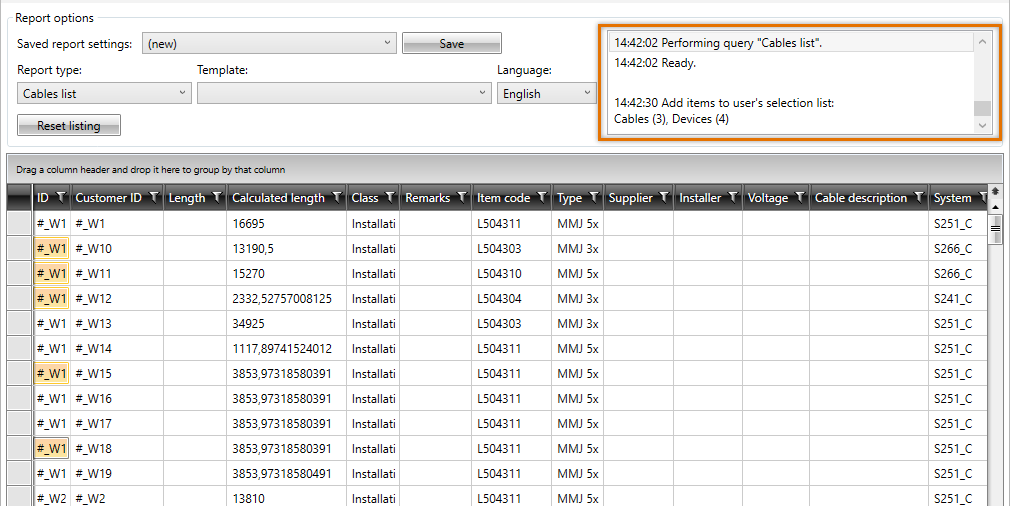
You can add report items to your selection list: select the items you want to add, right-click and select Add items to user's selection list. The status section shows what was added to your selection list:
Create Excel and PDF reports
Do the following:
-
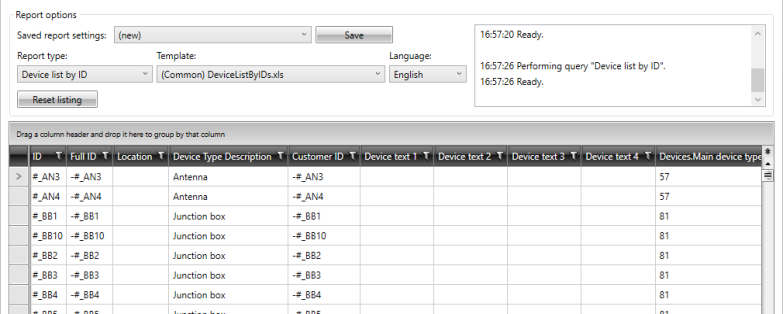
Select the desired report type. The report type determines which columns (= information) are displayed in the report tool.
Note: Only the information with a database link (e.g. $ID$) in the report template will be exported, even if you select to show other information in the tool.
-
Select the desired template for printing out the report. If you select a file with the .xslt extension, XML file is automatically selected as the export file type – for more information, see Create XML reports.
-
If necessary, select the language for the printed report.
With Reset listing, you can update the project data in the dialog.
-
Select columns and if you want, group and filter the information. The columns are printed in the report in the same order as they are in the preview window.
In addition, you can select functions by right-clicking the column headers and cells in the grid.
-
Show columns – Open the Show columns dialog, and select the columns you want to show.
-
Hide column – Hide the selected column. You can again show the column by selecting Show columns and then the desired column.
-
Remove filters – Remove filtering from the selected column.
-
Remove sorts – Remove the sorting based on the selected column.
-
Copy selected cells to clipboard – Copy selected columns to the clipboard.
-
Copy cells and column headers of selected cells – Copy selected columns and column headers to the clipboard.
-
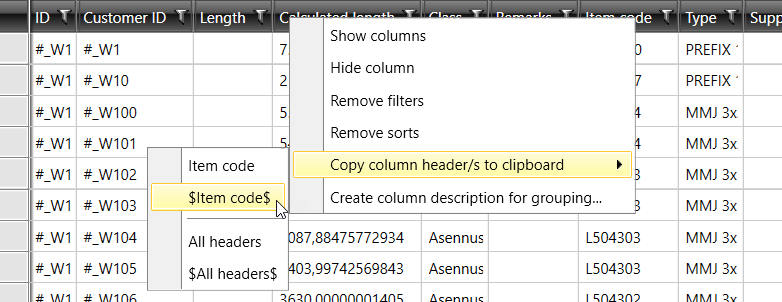
Copy column headers of selected cells as $header$ – Define report templates: you can copy a column header in the $header$ form to the clipboard, from where you can in turn copy it to an Excel template.
-
Edit device/location/I/O – Open the device, location, or I/O from the selected cell to be edited.
-
In the Export to section, define the following as necessary:
-
Select Excel file and/or PDF file as the file type. For instructions on XML file, see Create XML reports.
-
Select the path type:
-
Absolute – Select the desired path by clicking the
 button, or enter it in the field. The path is checked when you click Next. If the directory does not exist, you will be notified and you are required to enter a valid path before the report is created. Also, if the absolute path leads to the project folder or its sub-folder you are recommended to use the relative path – if you still choose to use the absolute path, reports from the project copies are also stored to the original project.
 -
Relative (to project folder) – Select the desired path by clicking the
 button, or enter it in the field. The path (e.g. ...\Reports) is checked when you click Next. If the directory does not exist, the program asks whether you want to create the directory.
In Excel files, the path information is saved to the ExportInfo sheet.
When updating the report, both the report in the project folder and the report in another directory will be updated.
-
-
In the Folder field, define the path where you want the report to be created.
-
Prefix – Depending on the report type you selected, the first field is either empty or shows the default prefix. In the second field, you can define your own prefix.
-
Add to project as a project document – Adds the created report to project documents.
-
Export to CADMATIC DM – If the project was opened via the CADMATIC DM document management system, the reports can be printed there.
-
Create separate reports from groups – Each group generates a separate report.
-
Create separate sheets from groups – Groups are on the tabs of one Excel/PDF file.
-
-
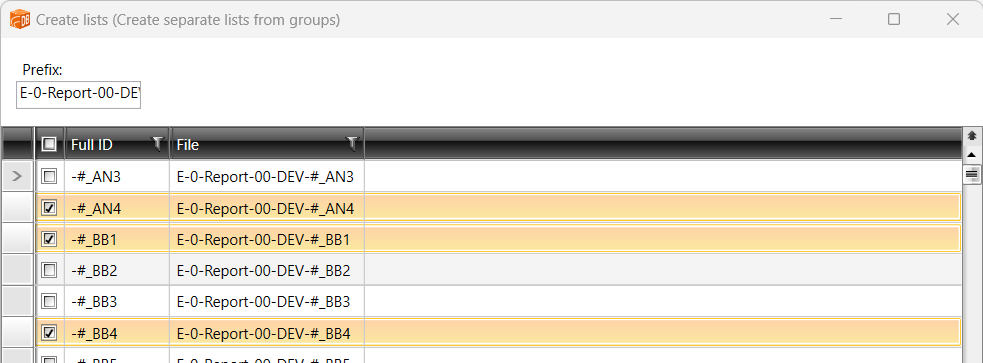
Click Next. The Create reports dialog opens.
-
Enter a prefix, if you want. If you defined a prefix in the previous dialog, it is shown in the field.
-
Select which groups you want to include.
-
Click OK.
You can open the report by double-clicking it in the status section:

Create XML reports
You can use the DevicelistbyFullIDs.xslt file located in the report template folder (by default C:\ProgramData\Cadmatic\Draw [version number]\Electrical\DB\ReportFiles), or create your own. You can, for example, add an empty .xslt file to the template folder and use that as the basis for the new file.
Do the following:
-
Select the desired report type. The report type determines which columns (= information) are displayed in the report tool.
-
Select the desired template with the .xslt extension. XML file is automatically selected as the export file type.
-
If necessary, select the language for the printed report.
With Reset listing, you can update the project data in the dialog.
-
Select columns and if you want, group and filter the information. The columns are printed in the report in the same order as they are in the preview window.
In addition, you can select functions by right-clicking the column headers and cells in the grid.
-
In the Export to section, define the following as necessary. XML file was automatically selected when you selected a template with the .xslt extension.
-
Select the path type:
-
Absolute – Select the desired path by clicking the
 button, or enter it in the field. The path is checked when you click Next. If the directory does not exist, you will be notified and you are required to enter a valid path before the report is created.
 -
Relative (to project folder) – Select the desired path by clicking the
 button, or enter it in the field. The path (e.g. ...\Reports) is checked when you click Next. If the directory does not exist, the program asks whether you want to create the directory.
When updating the report, both the report in the project folder and the report in another directory will be updated.
-
-
In the Folder field, define the path where you want the report to be created.
-
Prefix – Depending on the report type you selected, the first field is either empty or shows the default prefix. In the second field, you can define your own prefix.
-
Add to project as a project document – Add the created report to project documents.
-
Export to CADMATIC DM – If the project was opened via the CADMATIC DM document management system, the reports can be printed there.
-
Create separate reports from groups – Each group generates a separate report.
-
Create separate sheets from groups – Groups are on the tabs of one file.
-
-
Click Next. The Create lists dialog opens.
-
Enter a prefix, if you want. If you defined a prefix in the previous dialog, it is shown in the field.
-
Select which groups you want to include.
-
Click OK.
You can open the report directory by double-clicking it in the Status dialog.
