Insert
Construction > Items > Welds > Insert
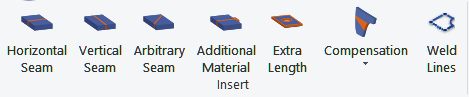
Select from the following functions:
Horizontal Seam – Add horizontal seams to a plate. See Inserting horizontal and vertical seams below.
Vertical Seam – Add vertical seams to a plate. See Inserting horizontal and vertical seams below.
Arbitrary Seam – Create arbitrary seams by defining seam relations. See Arbitrary Seams below.
Additional Material – Create additional material for welding.
Extra Length –Add extra length to seams. When extra length is added, the system adds a type I bevel which has extra length as property. See Extra length tab.
Compensation > Shrinkage – Add manual shrinkage compensation to plates by adding extra length horizontally and/or vertically. This way you can compensate plate shrinkage that occurs when parts are welded on them. See Manual shrinkage compensation in the Generating Production Information User's Guide for more information.
Compensation > Deformation – Add deformation compensation to plates by adding extra length to one side of a plate. This way you can compensate the shortening of the plate when a face plate is welded on it. See Plate deformation compensation in the Generating Production Information User's Guide for more information.
Weld Lines – Inserts weld lines between 2 connecting construction items. See Inserting weld lines manually in the Weld Management and Traceability Reference Guide.
See also: Note on manual bevels on a split plate edge.
Inserting horizontal and vertical seams
Do the following:
-
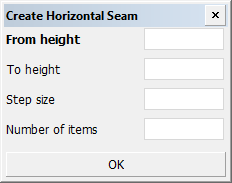
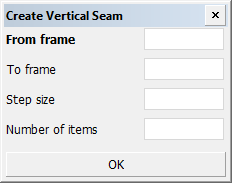
Select Construction > Items > Welds > Insert > Horizontal Seam or Vertical Seam. The seam creation dialog opens.
-
Specify the positions, step size and the number of the seams to be placed. Grid values can be used when defining the positions.
-
From breadth/height (horizontal) or From frame/breadth (vertical) – Position of the first seam to be placed.
-
To breadth (horizontal) or To frame (vertical) – Position of the last seam to be placed.
Inserting only 1 or 2 seams. To place one seam you only need to fill in the From breadth/height (for horizontal seams) or From frame/breadth (for vertical seams) value. To place two seams, the To breadth/height (for horizontal seams) or To frame/breadth (for vertical seams) values are needed. In both cases, the other fields can be left empty. They are only necessary when more than two seams are to be placed.
-
Step size – The distance between the seams. If left empty, the system applies an equal distance between the seams between the start and end seams.
-
Number of items – The number of seams to be placed. If left empty, the system determines the number of seams based on the other entered values.
-
-
Click OK.
Because horizontal and vertical seams are created based on relations they are always topological.
Arbitrary Seams
With the Arbitrary Seams function you can add topological seams to plates. Topological seams change when their relations change. For example, if a plate is made longer, a topological seam related to the plate will get longer too.
An arbitrary seam is created by defining its relations to the plate, and items on the plate. A seam can be related to holes, other seams, points and arcs on the plate. Grid values of default or alternate grids can also be used to define the relations.
Note: Arbitrary seams always start and stop at a plate edge, or other seam or hole on the plate.
Seam relations
An arbitrary seam can have multiple relations. The seam must have at least one relation. The relations are defined as relations to the plate contour, and holes, other seams, lines, points and arcs on the plate. Grid values with possible offsets can also be used as relations.
One relation
In case the seam has only one relation, the relation is defined as a fixed value. The following options are possible:
-
Frame grid value with a possible offset (plus or minus)
-
Breadth grid value with a possible offset
-
Height grid value with a possible offset
Multiple relations
In case the seam has multiple relations, the first relation is the starting relation and the last relation is the stopping relation.
-
The seam starts at the intersection point between the first relation and last relation.
-
The seam stops at the intersection point between the second last relation and the last relation.
A relation can be to the plate contour, or another seam, hole, line, point or arc on the same plate. Also grid values with offsets can be used.
Note: If the seam needs to start or stop at an arc in the contour of a plate in plan view, select Complete relation as the type of the relation to the plate. This is because the default relation type 1 vector does not support arcs, and using this relation type would result in the seam not connecting to the arc.
Another seam as a relation
The seam can be related to other seams on the same plate. The other seams must be on the same plate as the new seam.
The new seam can start or stop at another seam.
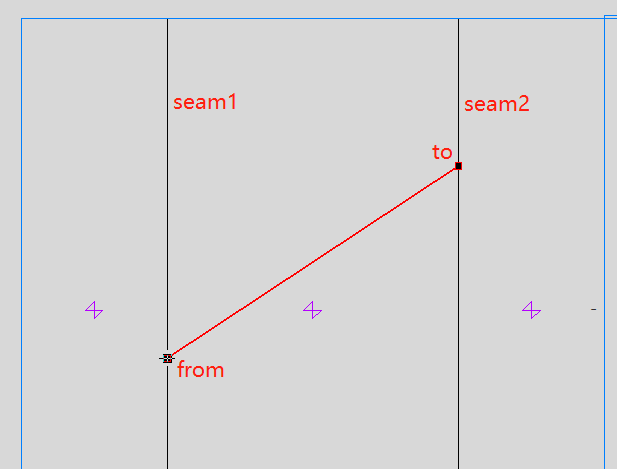
In this top view example:
-
The starting relation is seam1.
-
The second relation is at a breadth and has the Crossover property (point relation).
-
The third relation is at a breadth.
-
The fourth relation is seam2.
Inserting arbitrary seams
Do the following:
-
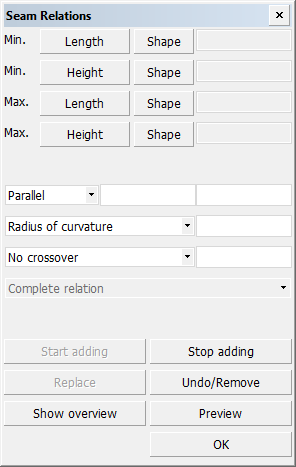
Select Construction > Items > Welds > Insert > Arbitrary Seam. The Seam Relations dialog opens.
-
Define the relations counterclockwise. You can indicate the relations in the graphical window (construction or grid values) and by entering grid values with possible offsets in the Min. and Max. input boxes.
You can click Preview to show the new seam's contour in the graphical window.
-
Click OK.
The relations of arbitrary seams can later be modified with the Change Seam Relations function. See Relations.
Copying, moving and removing topological seams
Topological seams can be copied, moved and removed like construction items with the Copy 3D-items, Move 3D-items, and Remove 3D-items functions, respectively. The item type of the topological seam in the item type drop-down menu in the copy, move and remove dialogs is Welded seam.