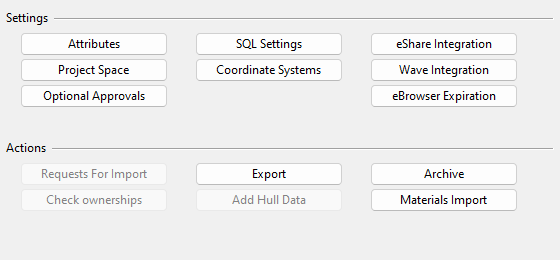
Settings and Actions
On the Manage Project dialog's Settings And Actions tab, you can use the following tools.
Attributes
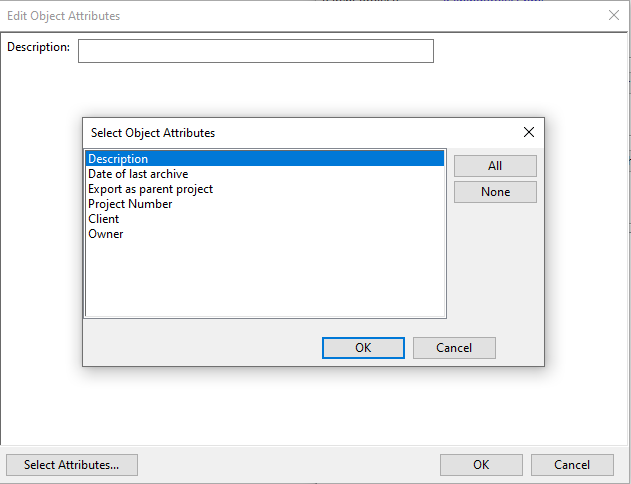
In the Manage Project dialog, select Settings And Actions tab > Attributes to open the Edit Object Attributes dialog for adding or removing project attributes. By default, only the Description attribute is included in new projects.
Project Space
In the Manage Project dialog, select Settings And Actions tab > Project Space to open the Set Project Space dialog for defining the 3D box that includes all design areas and model objects in the project.
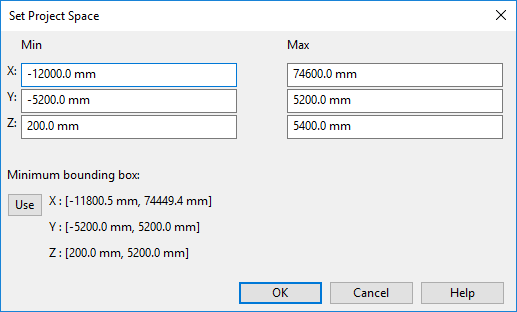
You can manually define the min–max limits, or click Use to define the project space as the minimum bounding box around the objects currently in the project.
Within the project space, each designer can define the min–max limits of their own working area as described in Set limits and save.
SQL Settings for P&ID
CADMATIC P&ID uses Microsoft SQL Server® for storing diagram data. Therefore, before opening P&ID, SQL Server must be installed as described in Install Microsoft SQL Server and the SQL settings described below must be correctly set.
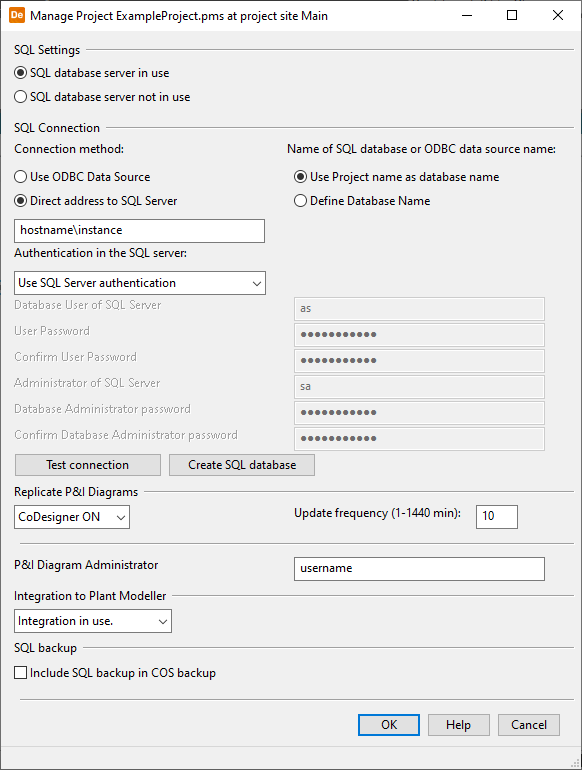
In the Manage Project dialog, select Settings And Actions tab > SQL Settings for P&ID to open a dialog for defining how to connect to the SQL Server and creating the SQL database.
SQL Settings for P&ID Database
Select whether the project can connect to the SQL Server.
-
SQL database server in use – When selected, the project can connect to the specified SQL Server.
-
SQL database server not in use – When selected, the project cannot connect to the SQL Server. All other options in the dialog except Integration to Plant Modeller are disabled.
Important: Selecting this option, when SQL Server is in use, disconnects from the server and clears all connection settings.
SQL Settings for P&ID Connection
Connection method:
Select how the project connects to the SQL Server.
-
Use ODBC Data Source – Project connects to the SQL Server using an ODBC Data Source. Select this option to use a more secure connection, for example if the database needs to be accessed from outside the company network.
-
Direct address to SQL Server – Project connects to the SQL Server using a direct address to the database and the Microsoft ODBC Driver for SQL Server. Enter the address in the format <HostComputer>\<DatabaseInstance>.
Note: In a default installation, the database instance is named 'Cadmatic'.
-
Encrypted connection – Select this option if the SQL server has a valid trusted certificate for establishing secure and encrypted communication between the SQL client and server.
Name of SQL database or ODBC data source name:
Specify the name of the P&ID database in the SQL Server.
-
Use Project name as database name – The name of the project is used as the name of the database.
-
Define Database Name – If selected, enter the name of the P&ID database in the SQL Server or the name of the ODBC Data Source, depending on which is used.
Important: Database name must not contain special characters.
Authentication in the SQL server:
Select how the SQL Server authenticates users that connect to the P&ID database.
-
Use Windows authentication – SQL Server authenticates the users of the P&ID database using Windows user accounts.
-
Use SQL Server authentication – SQL Server authenticates the users of the P&ID database using SQL Server user accounts.
-
Use SQL Server authentication (edit values) – When using SQL Server authentication, select this option to enter the username and the password of the normal user and the administrative user who are allowed to access the P&ID database in the SQL Server.
-
Database User of SQL Server – Enter the username to use for normal database operations (for reading and writing diagram data). Then enter the user password (twice).
Note: In a default installation, the name of the database user is 'as'.
-
Administrator of SQL Server – Enter the username to use for administrative database actions. Then enter the administrator password (twice).
Note: If the specified administrator account is permitted to see the open connections of the SQL database (for example, the 'sa' account is such), opening the Manage Database Tables tool shows a message if users are connected to the database. See Manage Database Tables.
-
Test connection – Click to test that the connection to the SQL Server works.
Create SQL database – If the project is new or P&ID has not been used yet in the project, select this to create the SQL database for the project in the SQL Server.
Note: Another way to create the P&ID database is to select Object > Manage Diagram Database from the CADMATIC desktop.
Replicate P&I Diagrams
Select whether the SQL database of P&ID should be included in COS replication.
-
CoDesigner ON – Replication of diagram data is enabled. When selected, also define the update frequency.
Update frequency (1-1440 min) – Opening the CADMATIC P&ID application automatically replicates the local SQL database if it has not been replicated within the time defined by update frequency.
Note: The previous replication might have been triggered by a Plant Modeller Service Instance that has been configured to replicate SQL data according to a schedule (see Diagram tab) or by the user opening the application—whichever occurred last.
-
CoDesigner OFF – Replication of diagram data is disabled.
For more details on replication, see Diagram replication.
Integration to Plant Modeller
Select whether the P&ID database should be integrated with Plant Modeller.
For more details on integration, see Administrating P&ID – Plant Modeller integration.
SQL backup
Include SQL backup in COS backup – If selected, performing a COS backup will automatically include the SQL database (.bak) in the .bup file.
For more details on the backup functionality, see Backup.
Tip: You can manually back up the current SQL database and restore a backup from a file as described in Managing the P&ID database.
Coordinate Systems
In the Manage Project dialog, select Settings And Actions tab > Coordinate Systems to open the Coordinate Systems object browser for managing coordinate systems.
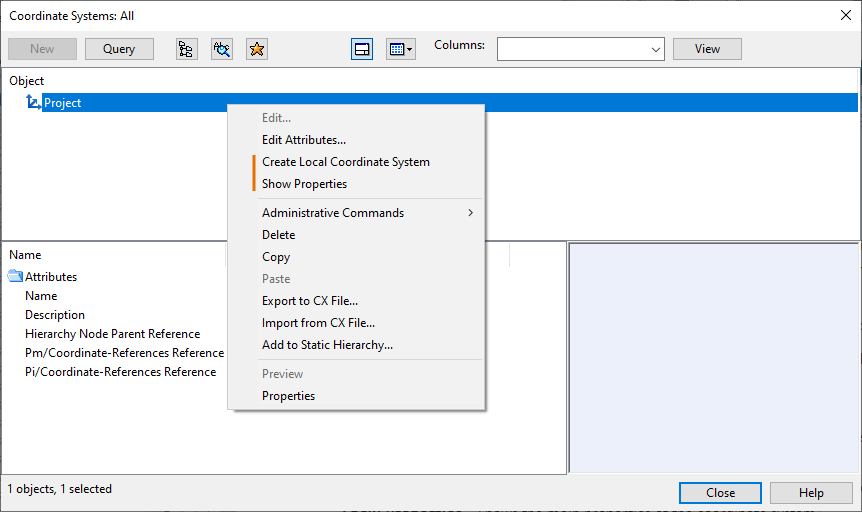
Initially, there is a single coordinate system, Project, which has no rotation or translation applied. You cannot edit it, but you can create additional local coordinate systems that are relative to it. Right-clicking the Project coordinate system opens a context menu that includes commands for managing coordinate systems.
-
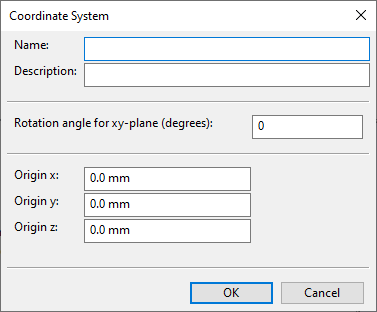
Create Local Coordinate System – Opens a dialog where you define the properties of a new coordinate system COS object to be created.
-
Name – The name of the coordinate system. For example, if the coordinate system is intended to be used for modeling a building, the name can be the name of that building.
-
Description – The description of the coordinate system.
-
Rotation angle for xy-plane (degrees) – The new coordinate system’s rotation around the z-axis in degrees. A positive value indicates counter-clockwise rotation of the coordinate system.
-
Origin x, y, z – The new coordinate system's origin, relative to its parent coordinate system.
-
-
Show Properties – Shows the main properties of the coordinate system.

When there are local coordinate systems defined in the project, creating a new Plant Modeller area, Service Instance, or Agent prompts the user to select the coordinate system to use and define the limits of the area.
Tip: In Plant Modeller, designers can assign model objects from the current coordinate system to another, as described in Local coordinates.
Optional Approvals
In the Manage Project dialog, select Settings And Actions tab > Optional Approvals and then the appropriate menu item to select which component categories require library objects to be approved before designers can use them in the project's 3D model.
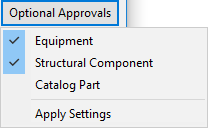
Select Apply Settings to store the settings in the project. The same settings will be used in all project sites. However, the settings are not enforced when the specification editor or a custom script uses the object selection tool.
Note: Removing the approval requirement does not remove approval lists for previously approved objects. If you later re-enable the requirement, objects that were previously approved remain approved.
eShare
In the Manage Project dialog, select Settings And Actions tab > eShare to open the eShare Integration Settings dialog for managing integration to CADMATIC eShare.
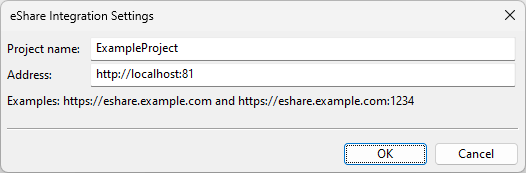
-
Project name – The name of the project in eShare.
-
Address – The protocol (HTTP or HTTPS), the name (or IP address), and the port of the eShare server.
-
Publish Main document & Spools as Multi-page – Select this option to publish a single multi-page spool document, rather than publishing the main document and spool drawings for pipe or duct spools separately.
Note: It is recommended to set this option at the beginning of the project and avoid changing it later. Otherwise, both multi-page and single-page documents will appear in eShare.
When you accept these settings, the program connects to the eShare server and creates a new eShare project with the specified name. You are prompted if a project by that name already exists in eShare.
When integration is enabled:
-
The 3D model and design documents can be sent to eShare. This can also be automated, as described in Plant Modeller service instance settings.
-
Plant Modeller and P&ID can get data from eShare.
-
Designers can adjust integration settings in the Markups section of Plant Modeller user settings.
eBrowser Expiration
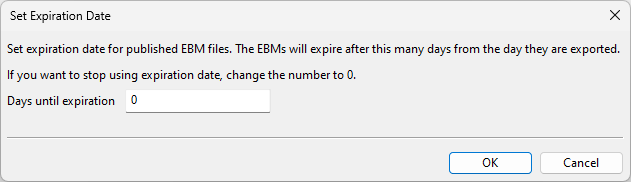
In the Manage Project dialog, select Settings And Actions tab > eBrowser Expiration to open the Set Expiration Date dialog for defining whether CADMATIC eBrowser models published by Plant Modeller will expire after a specified number of days. If a model has an expiration period that has elapsed, no viewer can open the model.
-
In the Days until expiration field, set the expiration period.
-
Value 0 means that models never expire (default). Non-expiring models can also be opened by eShare, limited (unlicensed) eBrowser versions, and older eBrowser versions that do not include this feature.
-
Any other value enables the expiration feature, and only licensed viewer versions that support this feature will be able to open the models before they expire.
Note: When publishing an expiring model as described in eBrowser model, User permissions allow shortening (but not removing) the expiration period, and Administrator permissions also allow extending it.
-
Wave
In the Manage Project dialog, select Settings And Actions tab > Wave to open the Wave Integration Settings dialog for managing integration to CADMATIC Wave.
-
Enable Wave integration – Select this option to add the Document requests function to the Documents tab of Plant Modeller and linking/unlinking commands to the Document browser context menu.
Materials import
You can import data from CADMATIC Materials.
Prerequisites
-
A folder containing the 'cata' and 'spec' XML files.
Do the following:
-
In the Manage Project dialog, select Settings And Actions tab > Materials import.
-
Select the 'cata' XML file, and click Open.
-
In the Select the template source Database dialog, click the database name.
-
The data is imported. If there were problems, a report dialog opens listing the issues. Click Close.
Requests For Import
N/A
Check ownerships
On a replica server, you can check whether the local server and the master server agree on who owns each object in a database. This can be performed in the situation where the replica thinks that ownership is at the master, and the master thinks that ownership is at the replica, which can occur, for example, when a database is restored from backup.
Do the following:
-
In the Manage Project dialog, select Settings And Actions tab > Check ownerships.
-
Select the database to be checked and click OK.
-
If there are problems, a dialog opens showing the number of objects with object ownership problems. Click Yes to show those objects.
-
In the object browser, select the Model Object category.
-
In the object tree, select the listed objects, right-click the selection, and select Request Ownership from the context menu to get the ownership of the objects to the local server.
-
If the master server should get the ownership, select the objects again, right-click the selection, and select Relinquish Ownership from the context menu.
-
Click Close to close the object browser.
-
Repeat steps 1–2 to verify that the ownership problems are gone.
Export
In the Manage Project dialog, select Settings And Actions tab > Export to open the Export Objects dialog for exporting project data into a .cx file.
For more details on the export function, see Exporting project data to CX.
Add Hull Data
In the Manage Project dialog, the Settings And Actions tab displays the Add Hull Data button if the COS server has HCA support enabled, the project includes a Hull product, and Hull data has not been added for the project yet. After adding data, the button is renamed as Hull Data Added and no longer available.
Important: Before adding Hull data, make sure no users are active in the seed project.
Select Add Hull Data to add data for CADMATIC Hull to the project. The Choose COS user dialog opens for selecting the COS user for this.
Hull data can also be added on satellite sites, when HCA support has been added for the satellite site COS server.
For more details on adding HCA support to COS servers, see Adding HCA support to existing COS servers.
Archive
In the Manage Project dialog, select Settings And Actions tab > Archive to open the Export Objects dialog for archiving a completed design project.
For more details on the archive function, see Archiving.