Work Breakdown Structure
Note: Paragraphs marked with an asterisk (*) only apply to Hull Viewer in combination with CADMATIC Hull. These functions are not available in the standalone version which is also referred to as Work Preparation Manager (WPM).
To open the Work Breakdown Structure dialog, select File > Work Breakdown Structure, click  on the toolbar, or use the keyboard shortcut Ctrl+L.
A tree view is shown according to the work breakdown structure defined in the project settings. The work breakdown structure is defined in System Management > Production > Work Breakdown Structure. The structure can have a depth of up to 16 levels.
The system allows multiple branches with the same name. There can be a subsequent branch of the lowest branch with the same name, so that they are shown as separate branches.
For information on the hierarchies drop-down menu above the tree structure, see the setting Extra > Hull Viewer > Hierarchies.
Note: Models loaded as loose .mod files or .3dd files are not shown in the Work Breakdown Structure.
Filtering the tree view
You can select which blocks are shown from the drop-down menu below the tree view. Select Active block to show only parts belonging to the active block. Select Displayed blocks to show all the blocks whose parts are displayed in Hull Viewer. Select All blocks to show all the blocks in the project. In addition, you can select to show blocks in any of the project's block group.
When you activate the dialog, only the active block branch is completely filled in. This is for efficiency. The other blocks only have the block number filled in. The work breakdown structures of other blocks are filled in only when needed, and there may be a delay expanding the branches. The block also may not contain any construction at all, such as 2D blocks. In this case the icon ![]() is displayed. If an error occurs when determining a block's work breakdown structure, its icon changes to
is displayed. If an error occurs when determining a block's work breakdown structure, its icon changes to  .
.
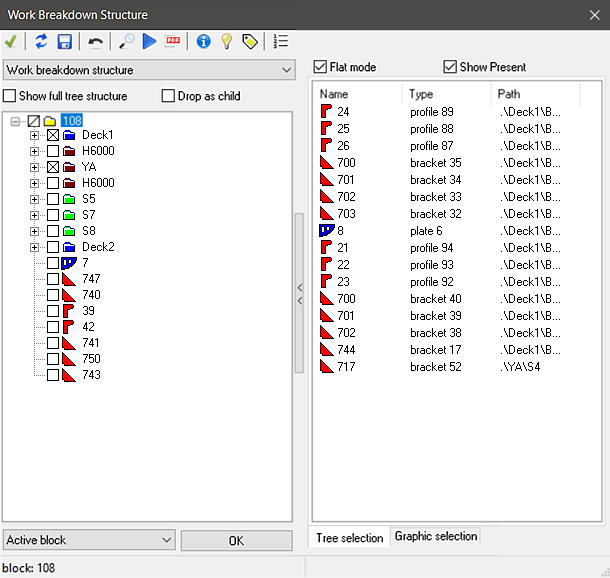
The above breakdown structure has five levels of items, each marked with its own color: Block, Unit, Panel, Sub-panel, and Part. Blocks are marked with  , and they contain units. Units
  contain panels. Panels
  contain sub-panels
  . There are six different parts, each marked with their own icon:
Plate: 
Face: 
Profile: 
Webframe: 
Lug: 
Bracket: 
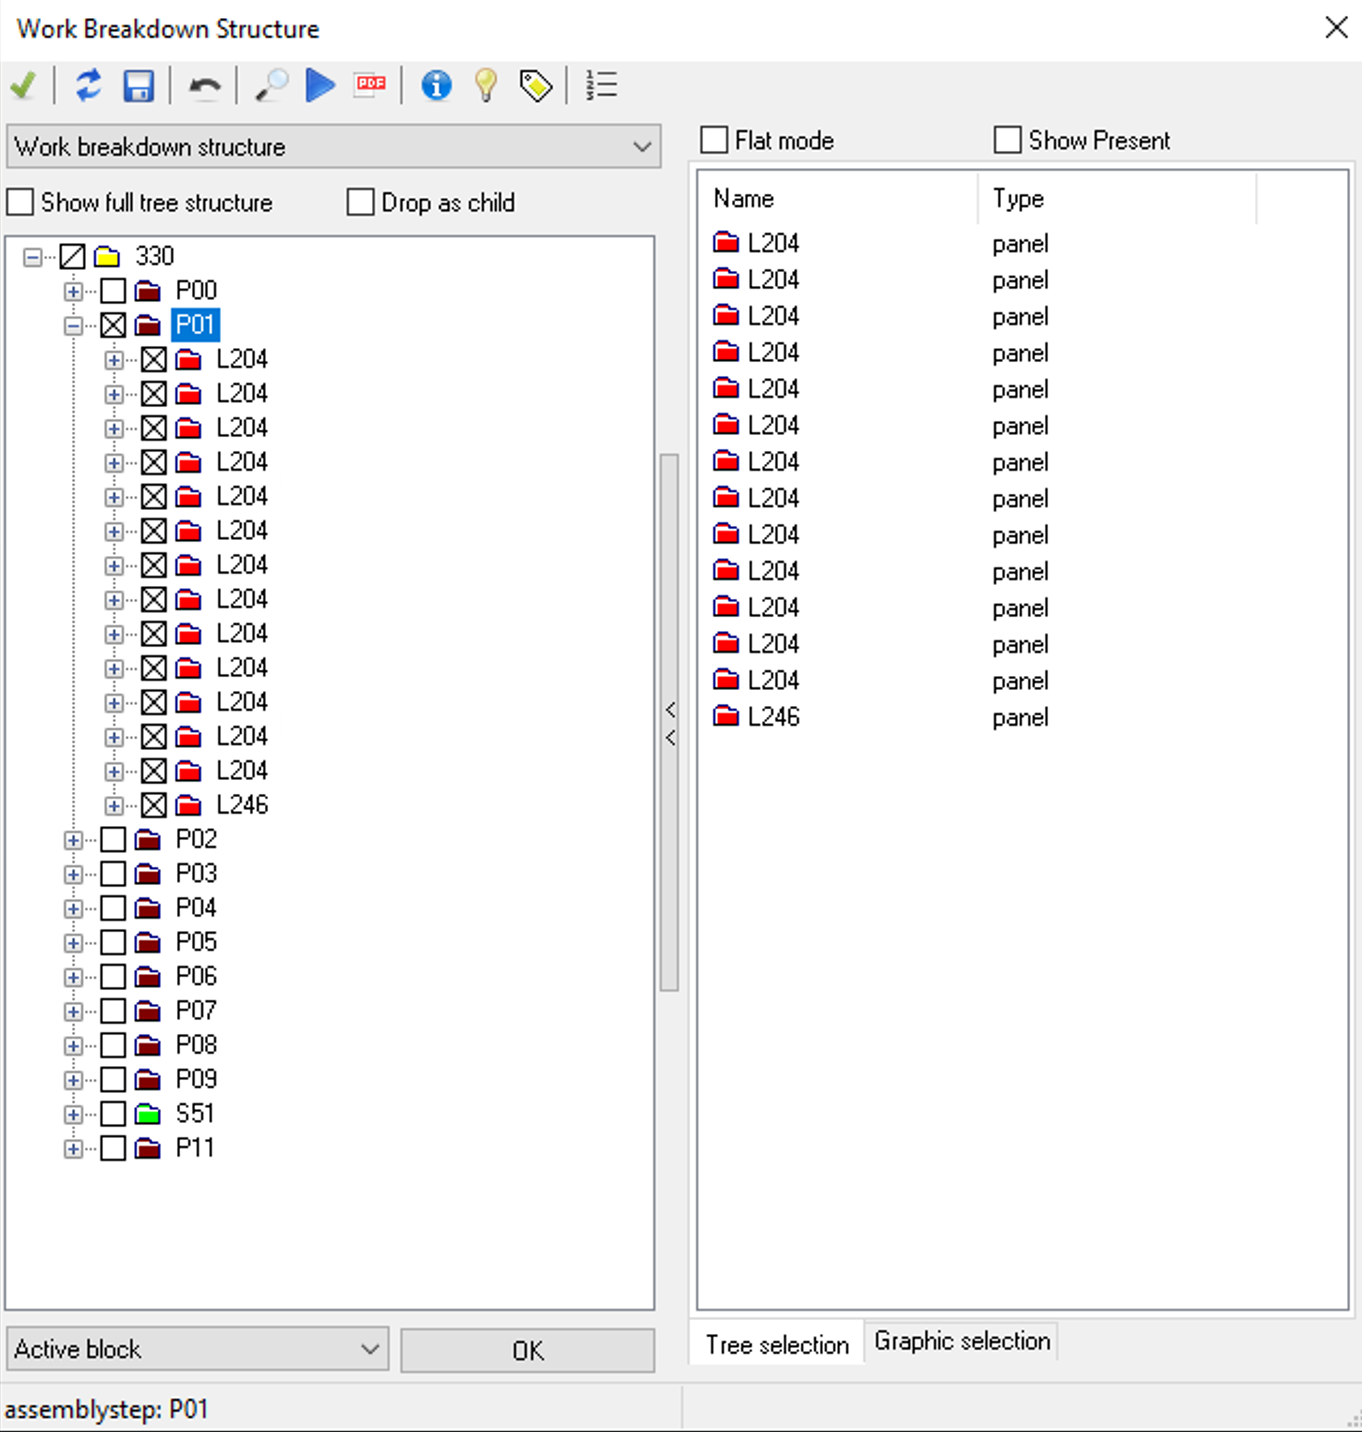
In this example, block 108 is selected. The items in the lowest level of the tree hierarchy (parts in this case) are called children. The expanding level items higher in the tree hierarchy are called branches. The status bar displays information about the selected item.
If you do not select Show full tree structure, the branches having the same value as Level name are skipped. To show the full tree structure, select this option. By default, the Level name is 000. To change the level name, use the System Management application function Production > Work Breakdown Structure. For information on the Drop as child check box, see Editing parts.
Expanding branches and selecting parts
Click  or
or  to expand and collapse the branches. In the tree view, there is a check mark shown for the parts displayed in Hull Viewer. By using the check boxes of the branches you can check
  or uncheck
  all the children of a branch in one go. If a branch contains both checked and unchecked children, the branch appears as partially checked
  .
.

You can load parts and display them in Hull Viewer by checking the parts in the tree view and selecting Apply  or OK.
* If the required 3D models are missing or outdated, they are re-created. See also Creating models.
Functions in the toolbar
|
|
Apply changes when selecting items and clearing selections. |
|
|
Refresh the tree view. If you have made any changes you are prompted to save them. |
|
|
Save changes to the CADMATIC Hull database. Do this if you have renamed or moved items by dragging them to another place in the tree. If you are working on a .3hm file, the changes are saved to the memory. For more information, see Editing parts. |
|
|
Undo the last renaming or moving/dragging action. |
|
|
Search for parts by logistical information. For more information, see Searching parts. |
|
|
Animate the assembly of the parts. For more information, see Animation. |
|
|
Create PDF report documents. For more information, see Document items. |
|
|
Opens the Item information window. This window shows detailed information on the selected part(s) in the tree or list. For more information, see Item information. |
|
|
Highlight the selected parts in Hull Viewer. You must check the parts to be able to highlight them. |
|
|
Show or hide sequence numbers of the selected items. Sequence numbers are labels that are shown in Hull Viewer. They consist of the assembly order number followed by the part number. |
|
|
Reset assembly order. Resets the assembly order. |


Context menu
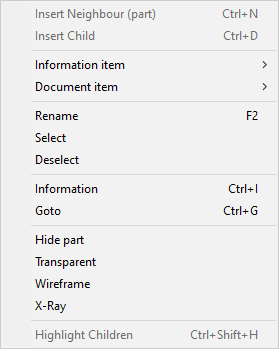
Right-click on an item in the tree view to show a menu of actions available for that item. You can change the display state of a part, for example.
For more information on the options, see the following:
List view
The list view opens to the right of the tree view. Show and hide the list view by using the  and
and  buttons.
The list view displays the contents in the branch that is currently selected in the tree view. Select Tree selection tab at the bottom to show all items in the branch. Select Graphical selection tab to only show items that you manually select in the branch.
The list can be sorted in descending or ascending order by Name, Type or Path. The Path column is only visible if Flat mode is checked. The Path column shows the relative path to item from the branch selected in the tree view.
When Show Present is selected, only the items checked in the tree view are shown.
Right-click on an item in the list view to show a context menu:
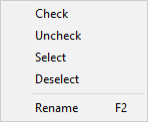
You can check and uncheck (clear) items that are selected in the tree view. Items that are selected, but unchecked in the tree, are indicated by white icons. For example, ![]() indicates a bracket that is unchecked in the tree view. You can also select and unselect items here.
indicates a bracket that is unchecked in the tree view. You can also select and unselect items here.